Ernie McFarland University of Guelph
elm@physics.uoguelph.ca
This article first appeared in the OAPT Newsletter in 1987. It is being repeated here for three reasons: the demonstration is a classic, 1987 was a long time ago, and now this demo (and others) can be seen online (use the link at the end of the article).
One category of good physics demonstrations involves the “disorientation” or “disequilibrium” of students. The demonstrations in this category cannot be explained by most students, and thus serve to disorient the students into a state of disequilibrium from which they wish desperately to escape.

Such demonstrations pique the students’ curiosity and gain their attention. Some students have been known to throw up their hands and say that such a demonstration can be explained only by magic. At this point, the students are like putty in the teacher’s hands, and they are eager to learn the real explanation.
The belt-hanger described here is a nice disorientation demonstration, and it is cheap to make and easy to use.
Figure 1 shows a belt-hanger in (full-size) cross-section, and can be used as a pattern from which to make your own belt-hanger. It can be made from a variety of materials: wood, metal, thick cardboard, etc. The ideal thickness is about 1 cm (the aluminum one I have is 9 mm thick).
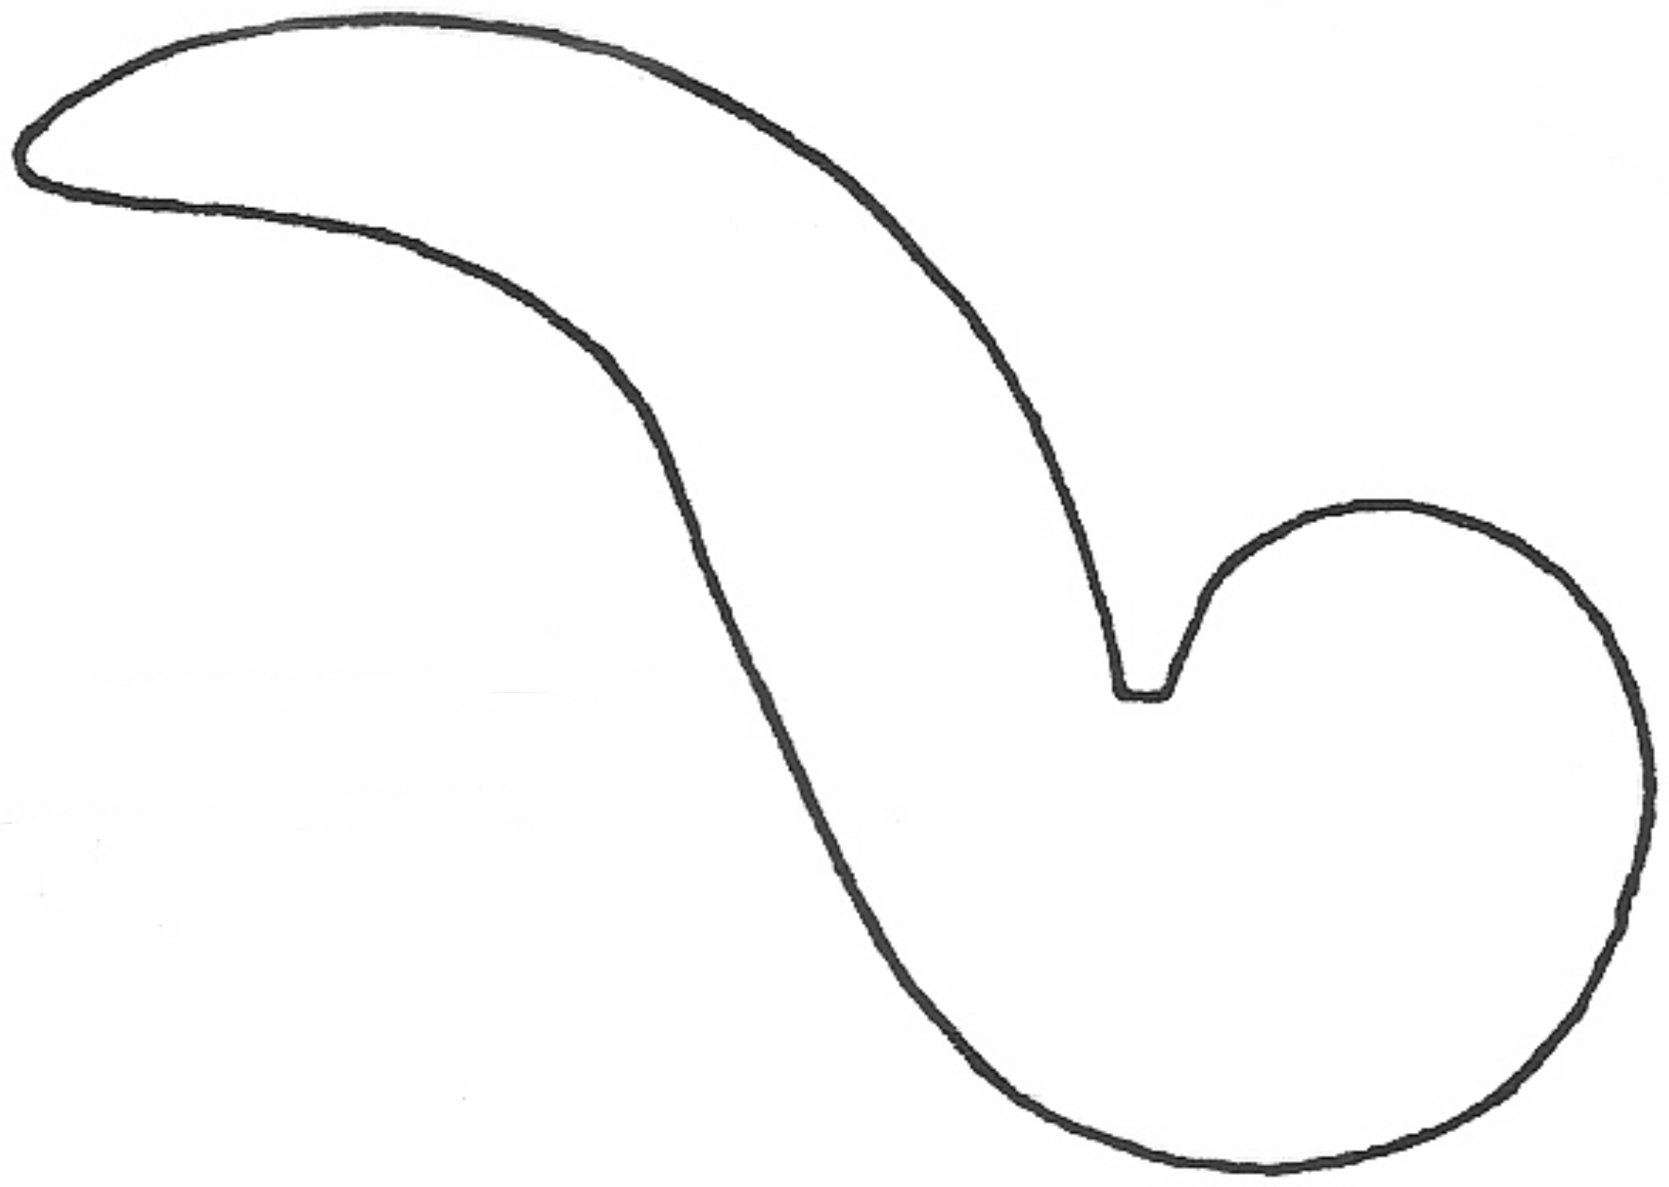 Figure 1
Once the belt-hanger has been made, position it on the end of a fingertip as shown in Fig. 2. It is unstable in this position and falls to the floor.
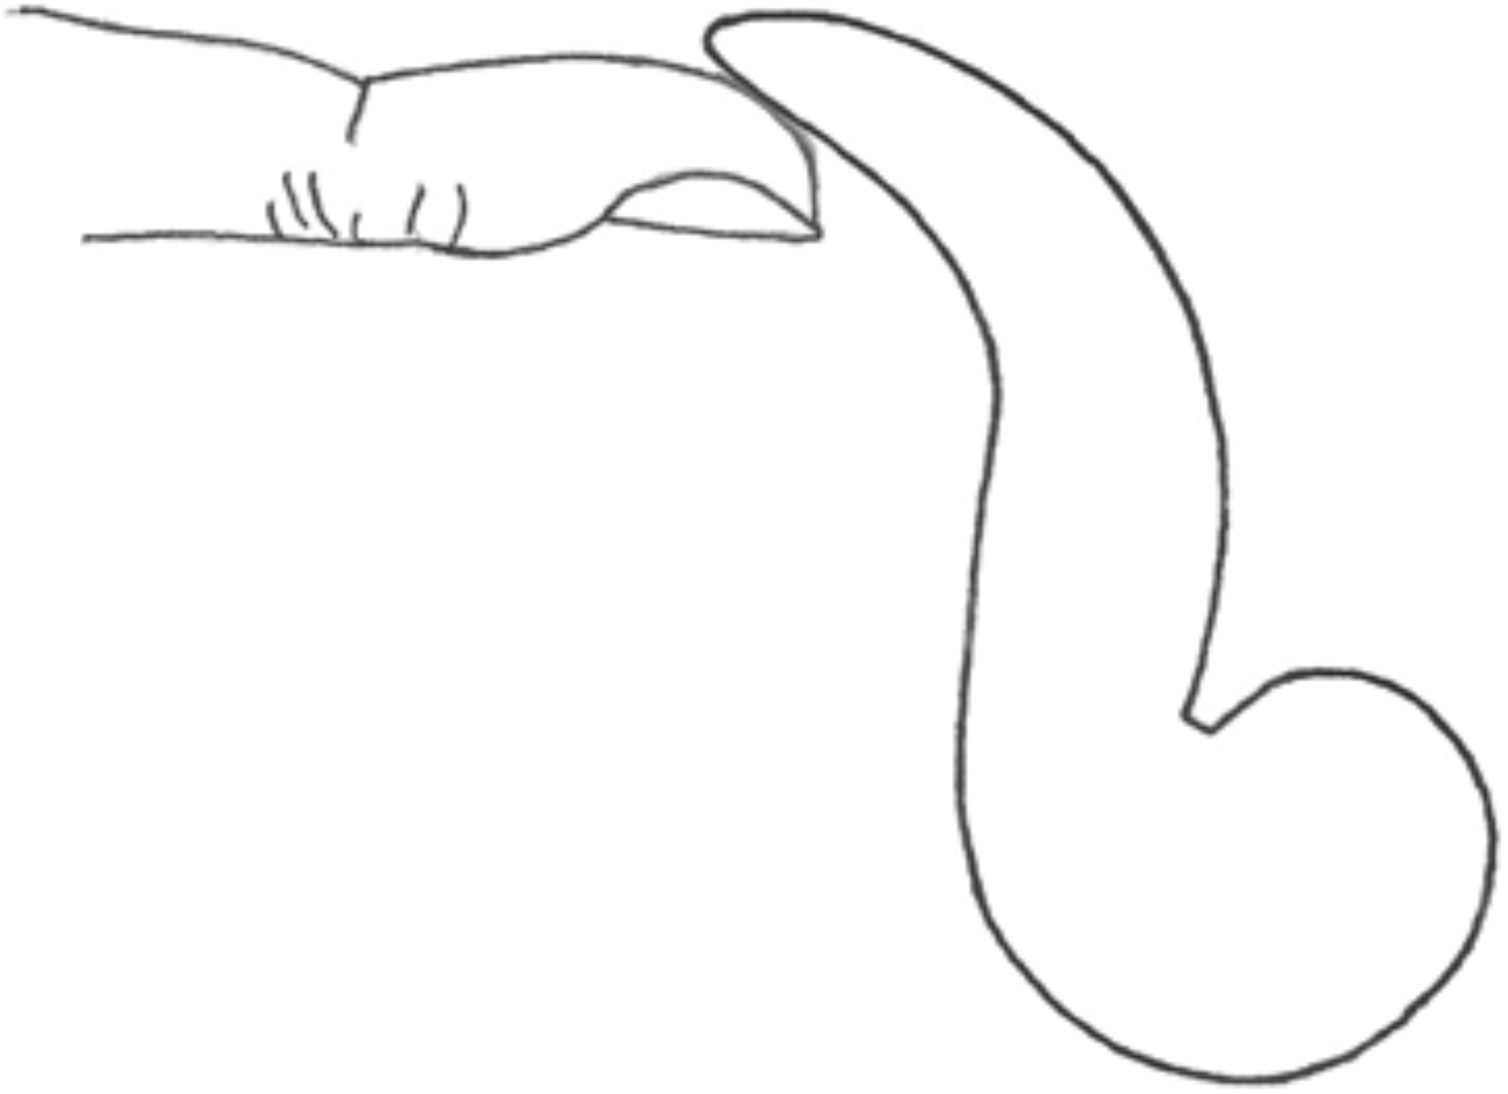 Figure 2
Now take a belt (preferably a firm leather one with a reasonably large buckle), and fasten the buckle so that the belt forms a closed loop. Place the belt on the hanger (on your fingertip) as shown in Fig. 3, with the buckle at the bottom of the belt.
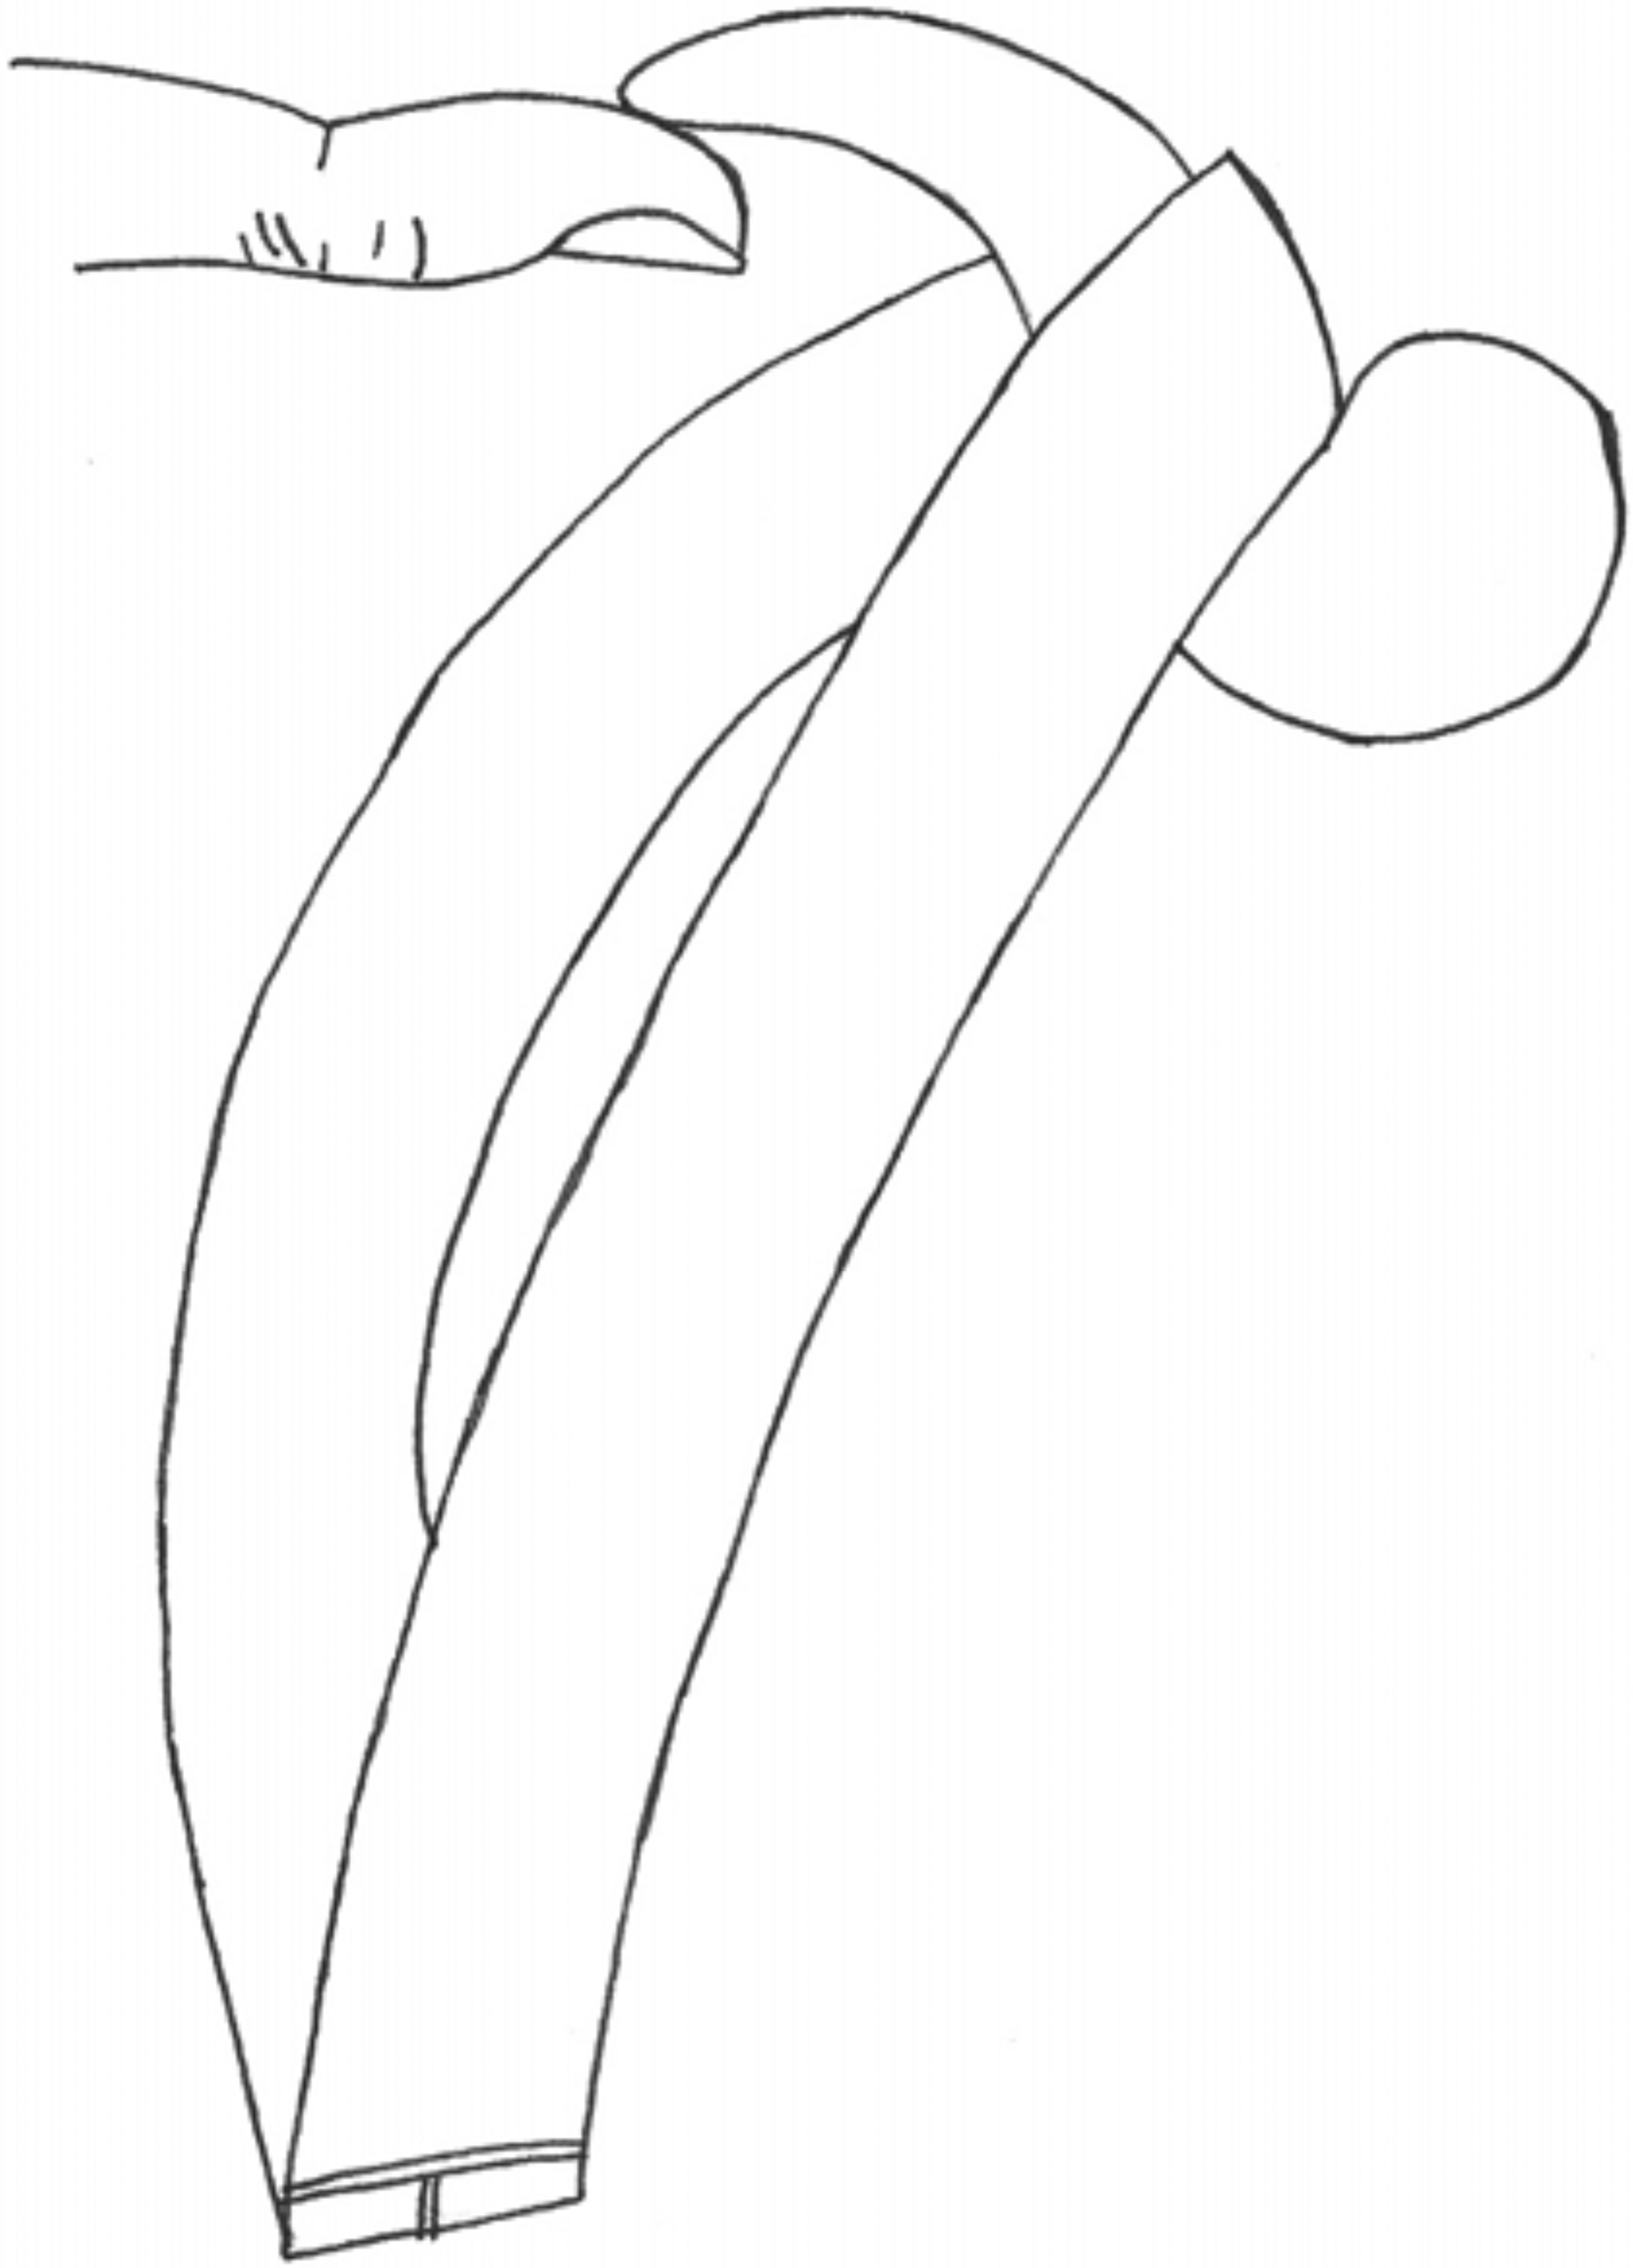 Figure 3

Instead of the hanger and belt falling to the floor, the entire system is quite stable! For added effect you can swing the hanger and belt gently from side to side, or place it on the edge of a table or the top of a door frame.
Students are very surprised that the hanger is unstable by itself, but stable when the belt is hung on it.
HOW IT WORKS — If an object (which is free to rotate) is to be in stable equilibrium, the centre of mass (CM) must be below the pivot point.
When the hanger alone is placed on a fingertip, it is impossible for the CM to be position below the pivot point without the hanger sliding from the finger and falling. (The pivot point is just the contact point between the hanger and the finger.)
When the belt is on the hanger, the CM of the system (hanger + belt) is now positioned somewhere in the middle of the loop formed by the belt, and it is “easy” for the CM to be under the pivot point, with stable equilibrium being the result.
WHY DO IT? — First, it engages the students’ minds in attempting to explain a physical phenomenon. Second, although centre of mass is not a topic which is usually not taught in any depth at the high-school level, it is useful to point out to students that the acceleration a in Newton’s Second Law (Σ
F =
ma) is the acceleration of the CM of the object, and it is then nice to have at least one demo related to CM.
At the university level, the topics of CM, torque, stable and unstable equilibrium are considered in detail, and CM demonstrations related to equilibrium are very useful.
WEBLINK — To see this demonstration performed, go to
https://www.physics.uoguelph.ca/outreach/physics-demonstration-videos and click on “Balancing act.” To see another CM demo, click on “Centre of Mass.”
Column Editor: Ernie McFarland, Physics Department, University of Guelph, Guelph, Ontario, N1G 2W1 Tags: Forces
