How to Make a Lighted Throwing Stick to Show that the Centre of Mass is a “Special Place”
February 01, 2010 Filed in:
Demo CornerForest Fyfe, Department of Physics and Atmospheric Physics Dalhousie University
This article is reprinted from Physics in Canada, Volume 65, No. 3, pg.141 (2009), with permission of the Canadian Association of Physicists (CAP).

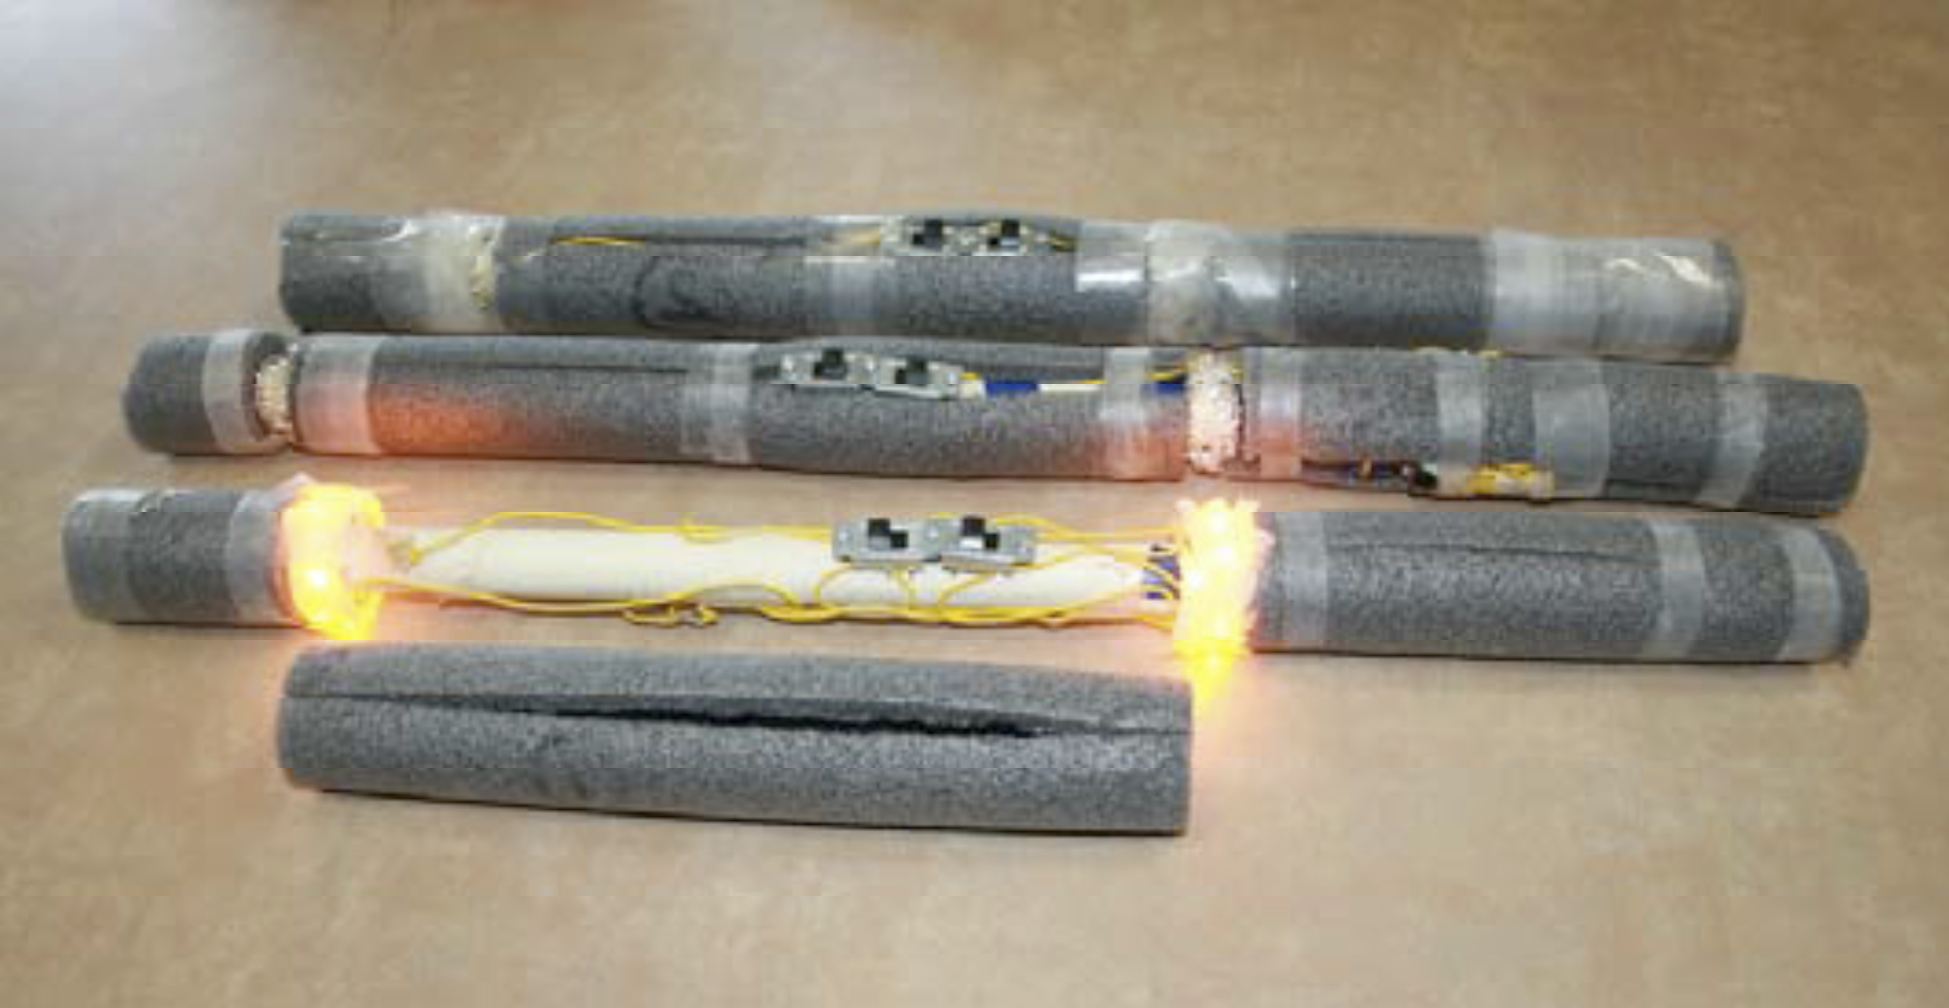
Illustrating the concepts of centre of mass and centre-of-mass motion to an introductory physics class can be a challenge to a physics instructor. The topic can be very mathematically complex and is not necessarily intuitively obvious. A device that demonstrates how the centre of mass of an object moves as compared to the motion of a point on the object away from the centre of mass would provide an excellent qualitative illustration of this. At Dalhousie University we have constructed just such a device, our lighted throwing sticks (Fig.1).
 Figure 1: Three throwing sticks at various stages of assembly.
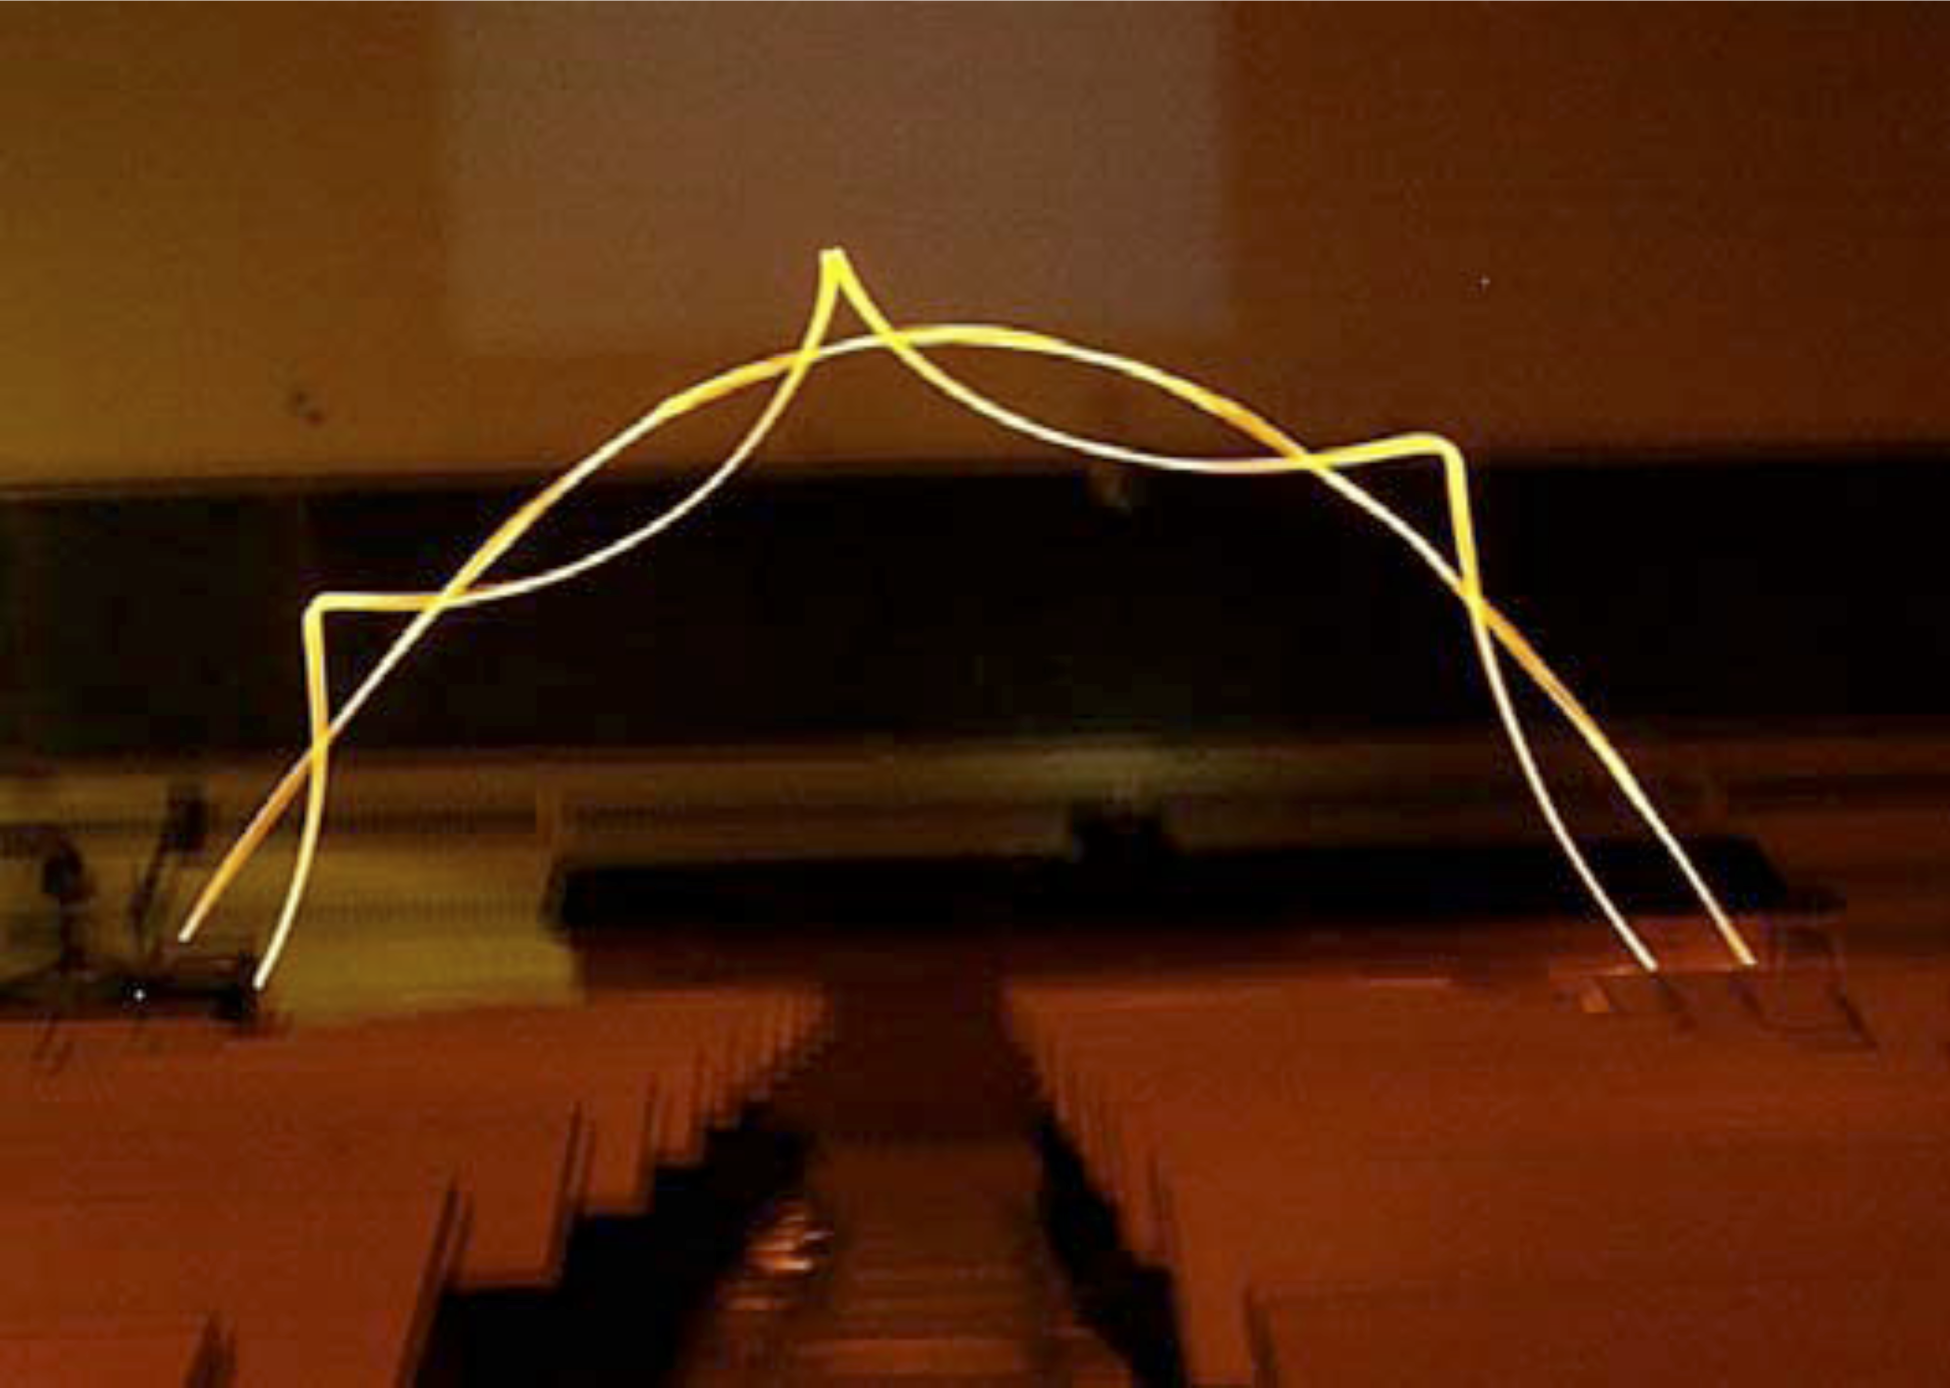
These throwing sticks are long rods with lighted bands located at one end and at the centre of mass of the rods. By throwing such a rod with the centre of mass lights on, the students see a smooth trajectory of the centre of mass motion, while the end lights demonstrate the complicated motion of points away from the centre of mass (Fig. 2). Jeff Dahn demonstrated our lighted throwing sticks at the 2009 CAP Congress in Moncton, NB.
 Figure 2: Stick thrown with both lights on.
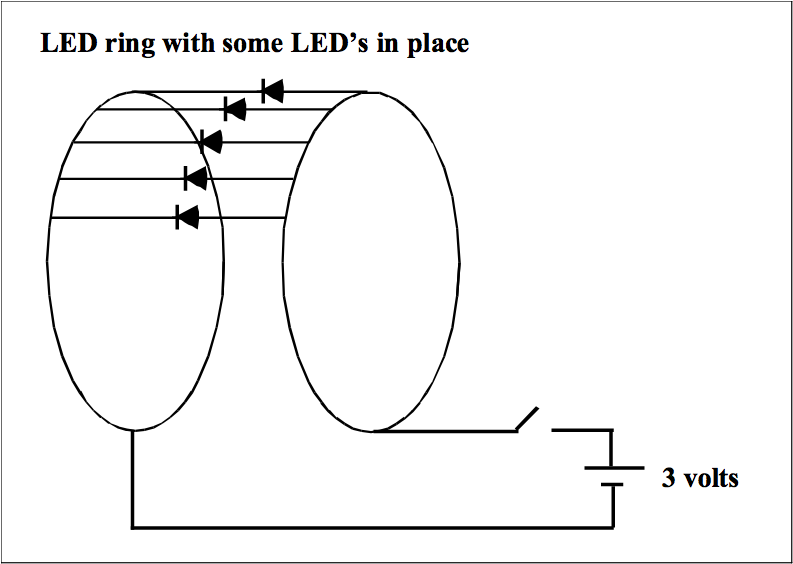
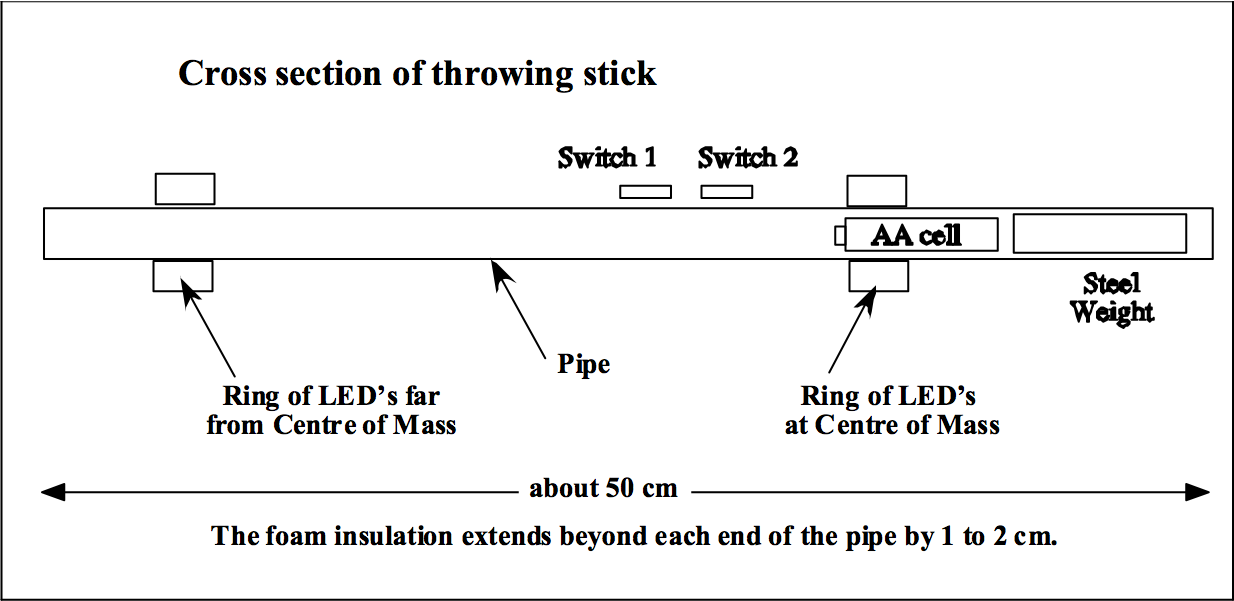
At Dalhousie we made throwing sticks from white water pipe (3/4" outside diameter). The lights are made from about 10 to 30 LEDs, soldered around the circumference of two rings as in Fig. 3. The pipe is padded with 3/4" id foam pipe insulation. The LEDs are protected by potting them in clear caulking. A steel mass near one end ensures that the centre of mass is not at the centre of the pipe. One light is at the centre of mass; the other is far from the centre of mass. Each light has an on/off switch. Figure 4 shows the layout of the stick.
 Figure 3: LED details.
 Figure 4: Details of throwing stick.

Landings are very harmful to the throwing stick. We felt we were doing well if a stick survived 10 throws without failing. We usually operate in lectures with two spares.
Things that helped sticks survive are:
- We used flexible, braided wire.
- We used AA cells with solder tabs.
- We twisted, soldered and taped all electrical joints.
- We wrapped the pipe insulation with transparent first aid tape.
- A rubber stopper in each end of the pipe helped but never stayed in place very long.
How to use:
- Throw the stick with only the off-centre light switched on and you see a complex tumbling path.
- Switch on only the light at the centre of gravity. Throw the stick with a tumbling motion and the light will follow a simple parabolic path, demonstrating that the centre of mass is a special place.
- Throw the stick with both lights on and you see both motions as shown in Figure 2.
Supplies: We bought LEDs (in packages of 100) and slide switches from Jameco Electronics, Belmont, California. Everything else came from local hardware stores or pharmacies.
Column Editor: Ernie McFarland, Physics Department, University of Guelph, Guelph, Ontario, N1G 2W1 Tags: Motion


