Overhead Projector Wave Simulator
March 01, 1989 Filed in:
Demo CornerBill Konrad, Kent County Board of Education
The demonstration described in this column is one I learned as a teacher in summer school at the beginning of my teaching career. It is one that I have found to be very useful in teaching a number of concepts related to waves.
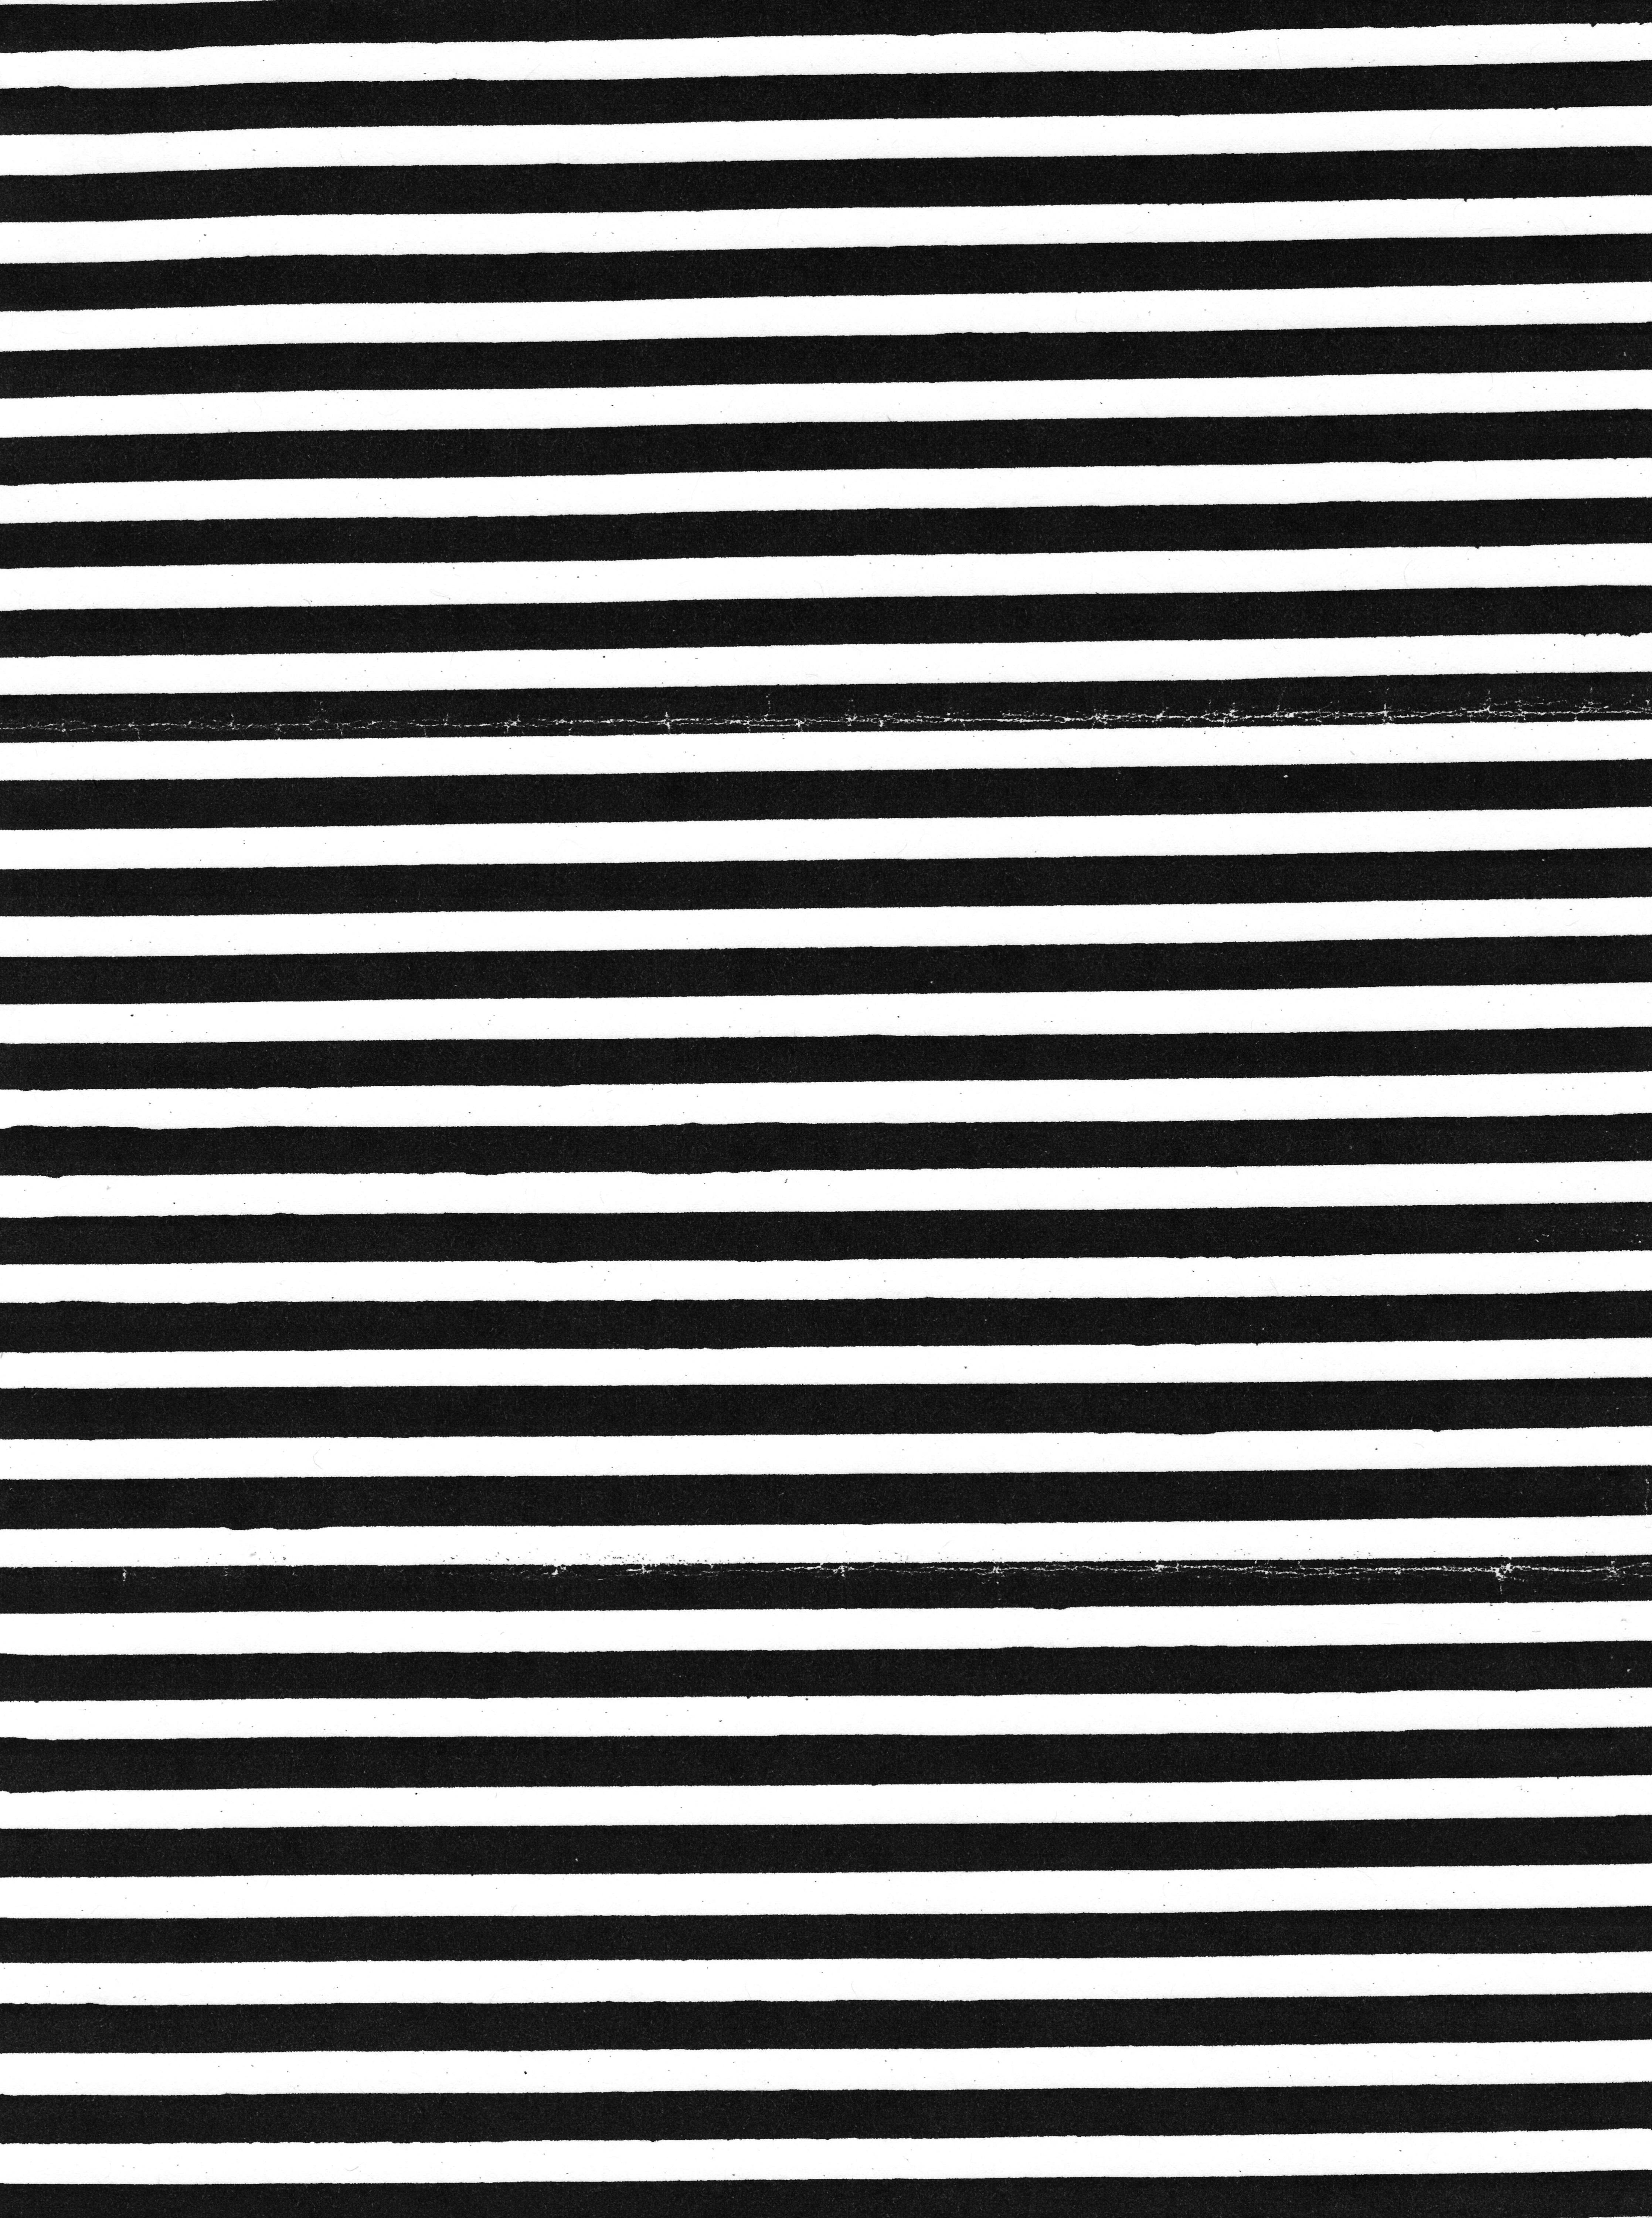
I would stress that it is important for students to see and experience a number of real waves such as those on slinkies, in water, or on a Bell Wave Demonstrator, and so this demonstration is not meant to replace any of these hands-on activities. However, the overhead projector model described below is very useful in teaching concepts such as vibrating in phase, direction of particle motion versus direction of wave motion, and the universal wave equation. To make your own overhead projector wave demonstrator, first make a transparency of the sheet of parallel black lines found on the sheet attached to this newsletter. Next you will need to draw a sine wave on a sheet of Bristol board that is about 80 cm by 20 cm. Use a wavelength of 10.2 cm (4 inches). After drawing the wave on the Bristol board, cut it out so that a gap is left on the sheet. Now use acetate transparencies (a portion of a roll from an overhead is best) to cover the gap. If you have access to a laminating machine, it is even better to laminate the sheet that has the sine wave cut out of it.
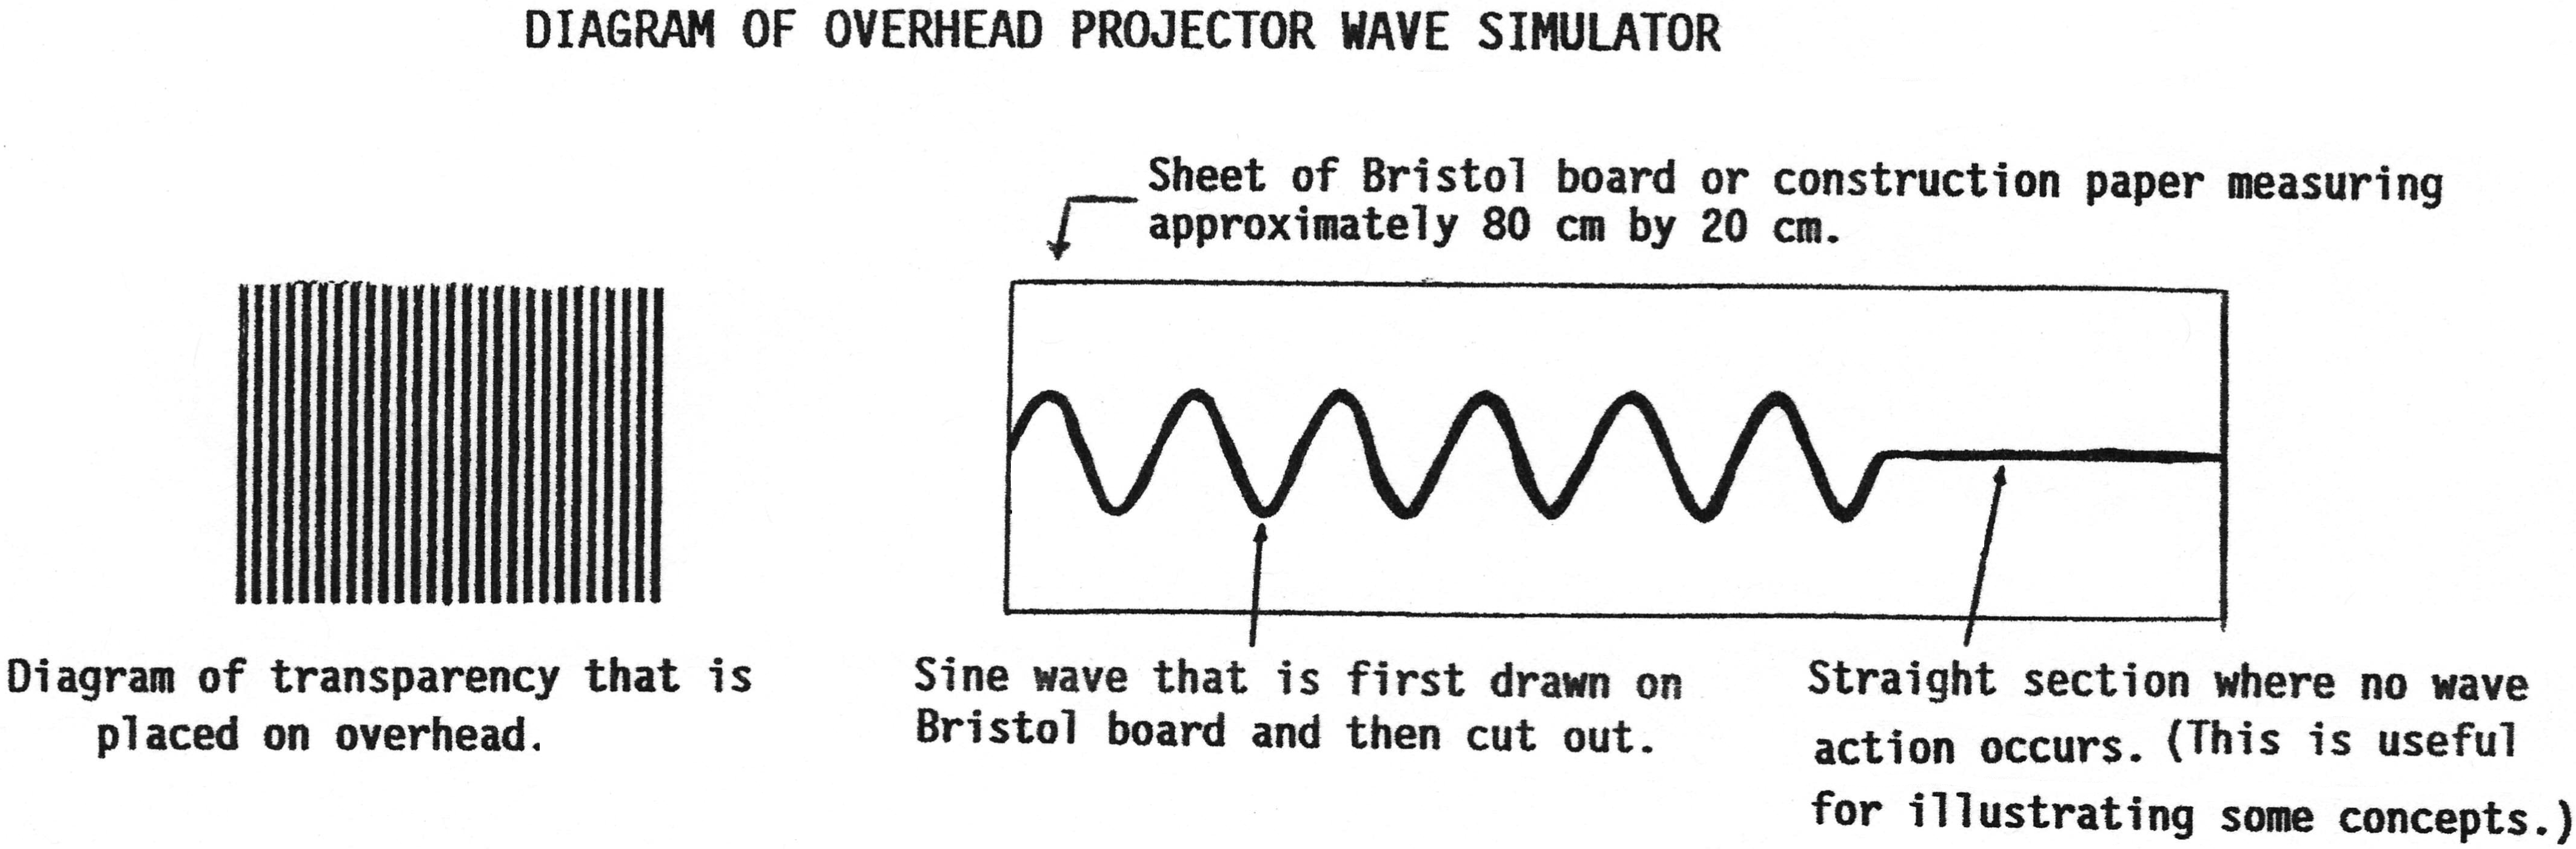
Tape the transparency consisting of alternate black lines to the top surface of the overhead. When the opaque Bristol board (with the sine wave cut out of it) is moved across the transparency, a moving transverse wave will be seen on the screen.
Some suggestions for using the wave simulator are as follows:
Colour two blank spaces on the transparency that are one wavelength apart with an overhead projector pen. Colour another space that is a distance other than one wavelength from the two previously coloured spaces. (Use a different colour for each of the spaces.) Now when the wave motion is simulated, the terms “vibrating in phase” and “not vibrating in phase” can easily be illustrated.
To emphasize the difference between particle motion and wave motion, ask one student to follow the motion of a specific coloured particle with the end of a metre stick. (One of the particles created by the coloured spaces mentioned in step 1 can be used.) Another student could be asked to follow the motion of the crest of a wave. The difference between particle motion and wave motion is clearly illustrated.
To teach the universal wave equation, proceed as follows. Ask a student to say “STOP” after a particle on the wave has gone through exactly one complete vibration. Repeat this a few times and ask students to note how far the wave itself moves as the particle goes through one vibration. Students should see that this distance is one wavelength. It becomes clear then that, if a specific particle goes through f vibrations, then the wave will move f wavelengths. If f represents the frequency or the number of vibrations per unit time, then the distance travelled in that unit time is the speed of the wave.
Column Editor: Ernie McFarland, Physics Department, University of Guelph, Guelph, Ontario, N1G 2W1 Tags: Waves and Sound
