Vjera Miović
Have you ever wondered about life on other worlds? How about what planets outside our Solar System might look like? Do they have an atmosphere? Are they in the habitable zone for their star? Your students most certainly have — especially if they watched any space movies, comics or video games. In that case, leave the motions of our Sun, Moon and Earth behind and let your students go deeper and farther into space in search for exoplanets!
All you need for each station is a light bulb, a box and some play dough balls. Don’t let the cheap materials fool you – there are deep inquiry-based learning opportunities in this activity to satisfy the most curious of minds. Let’s begin.
What are exoplanets?
Exoplanets, or extrasolar planets, are planets orbiting stars other than our Sun. They could be rocky, like our Earth, but also much bigger than any rocky planets in our solar system. They could be gaseous and large, like Jupiter, but orbiting surprisingly close to their parent star. A lot of the planetary systems we discovered are quite unlike our solar system. This has lead to large changes in our understanding of planetary formation. Thanks to improvements in technology and different methods of detection, there are now over 3500 known exoplanets (source:
https://exoplanets.nasa.gov/). The new Transiting Exoplanet Survey Satellite, TESS, launched in the spring of 2018, is set to discover many more.
How are exoplanets detected?
Planets orbiting other stars can be detected by direct observation with a telescope in only a few rare circumstances. Most exoplanets are detected using indirect methods, by observing changes in the light coming from the star. The two main methods are the radial velocity method and the transit method.
Prior to 2009, the most effective way for detecting exoplanets was the radial velocity method. It detects the Doppler shift in the star’s spectrum due to its back and forth motion or ‘wobble’, while both the star and the planet orbit around a common centre of mass. The drawback of the radial velocity method is that it cannot accurately determine the mass of the planet, nor its orbital inclination.
The transit method of planet detection is similar to the way we observe the transits of Venus and Mercury in front of the Sun. We can’t directly see an exoplanet transit because the star itself only covers a few pixels in the detector. However, when an exoplanet passes in front of its parent star, the light from the star will appear to be slightly dimmer. The transit method looks for this dimming in the star’s “light curve”, a graph of brightness vs. time. This light curve can provide lots of information about the planet: its orbital period, distance to the parent star, and even the mass of the exoplanet.
Here's an animation video showing a light curve during a planet transit:
(Credit: NASA Kepler Mission/Dana Berry)
Most astronomy data is publicly available, and students may be interested in exploring websites which store exoplanet data. As an example, here’s a tutorial on how to download data from Kepler missions:
https://www.cfa.harvard.edu/~avanderb/tutorial/tutorial3.html.
The graph below is an example of a light curve that I made using the data and software.

Note that the total dip in brightness during transit is only a fraction of a percent smaller than the brightness coming from the star itself!
Exoplanet detecting missions
Since the development of more sensitive detector technology and the launch of space telescopes that are beyond the blurring effect of the Earth’s atmosphere, the number of known exoplanets has grown dramatically. After the first confirmation of exoplanet 51 Pegasi b in 1995, about a hundred more were confirmed in the following decade, and about 3000 more in the decade since 2009 (source:
https://exoplanets.nasa.gov). Some of the space missions in search for exoplanets include the European satellite COROT and NASA’s Kepler, K2 and TESS missions. Canada has been involved in this search since 2003 with the MOST (Microvariability and Oscillation of Stars) space telescope. This was the first Canadian space telescope to be completed, designed and constructed in Canada.
Exoplanet detecting activity for the classroom
In this activity, we explore detecting exoplanets using the transit method. There are different variations of the activity based on the two workshops that ran in the summer of 2018: the OAPT–OTF Summer Institute workshop, and the astronomy workshop for teachers at York University. The latter was organised by several astronomy professors, post-doctoral fellows and graduate students, and funded by NSERC and York University.
The key difference in this activity from others available to Ontario teachers is that we spend some time talking about the instrumentation and the practical side of transit detection in addition to the physical characteristics of the extrasolar planets and their orbits. We model the detection process the way it is done by real telescopes, to provide students with the realistic understanding of the challenges of this technique. We also provide the opportunity for students to investigate some key questions regarding the transit method.
Key Questions
The key questions students will investigate in this activity are:
- Did Kepler find all the planets in the planetary systems it searched?
- What can we say about the properties of planets found by the transit method?
- Which planets are the easiest to detect using the transit method?
- What are the limitations of the transit method of exoplanet detection?
Each group needs a light source (representing the parent star), some spherical objects of various sizes (representing the planets), and a box (acting as a detecting telescope). The roles in the group are: the
planet mover (the person moving the planet around the light source at various angles and distances), the
observer (the person operating the telescope and detecting the planets), and the
recorder (the person writing down what the observer tells them they see). The roles should be switched throughout the activity so that everyone in the group gets a chance to try each role. The students are instructed to observe the brightness detected through the box over time as the planet is moved around the star. They should notice a difference in the light dimming depending on the distance of the planet to its parent star, as well as depending on the angle of the planetary orbit. This can be done qualitatively, with the students recording the dimming of light on some arbitrary scale, and roughly sketching a light curve. A teacher can also decide on a more quantitative approach, having students plot a light curve using smartphone apps such as: Lux Meter, Light Meter in the Physics Toolbox Suite etc.
 Photo credit: Matt Russo
In the picture above, you can see the positions of the planet mover, bulb, observer and telescope.
The telescope can be modeled by a cardboard box, with a square opening in the box covered by a parchment paper acting as a single pixel of the detector. The idea behind using the parchment paper to cover the opening is that you will only see diffuse light coming through your pixel and not the shape of the planet or your light source as the planet passes in front of it. You can tell that some things are brighter than others when seen through a parchment paper, but you cannot directly observe their shape, distance etc. This gets students closer to the actual experience of planet detection, where a planet is not ‘seen’, but its characteristics are inferred from the information obtained in the light curve of one pixel.
Making the detector from a large cardboard box helps the students to concentrate on their star and not get distracted by the other lights in the room. However, they are bulky and troublesome to transport and store. Instead of a box you can use large cardboard sheets which stack nicely. Alternatively, you can use toilet paper rolls covered with parchment paper at one end which the students will use with one eye.
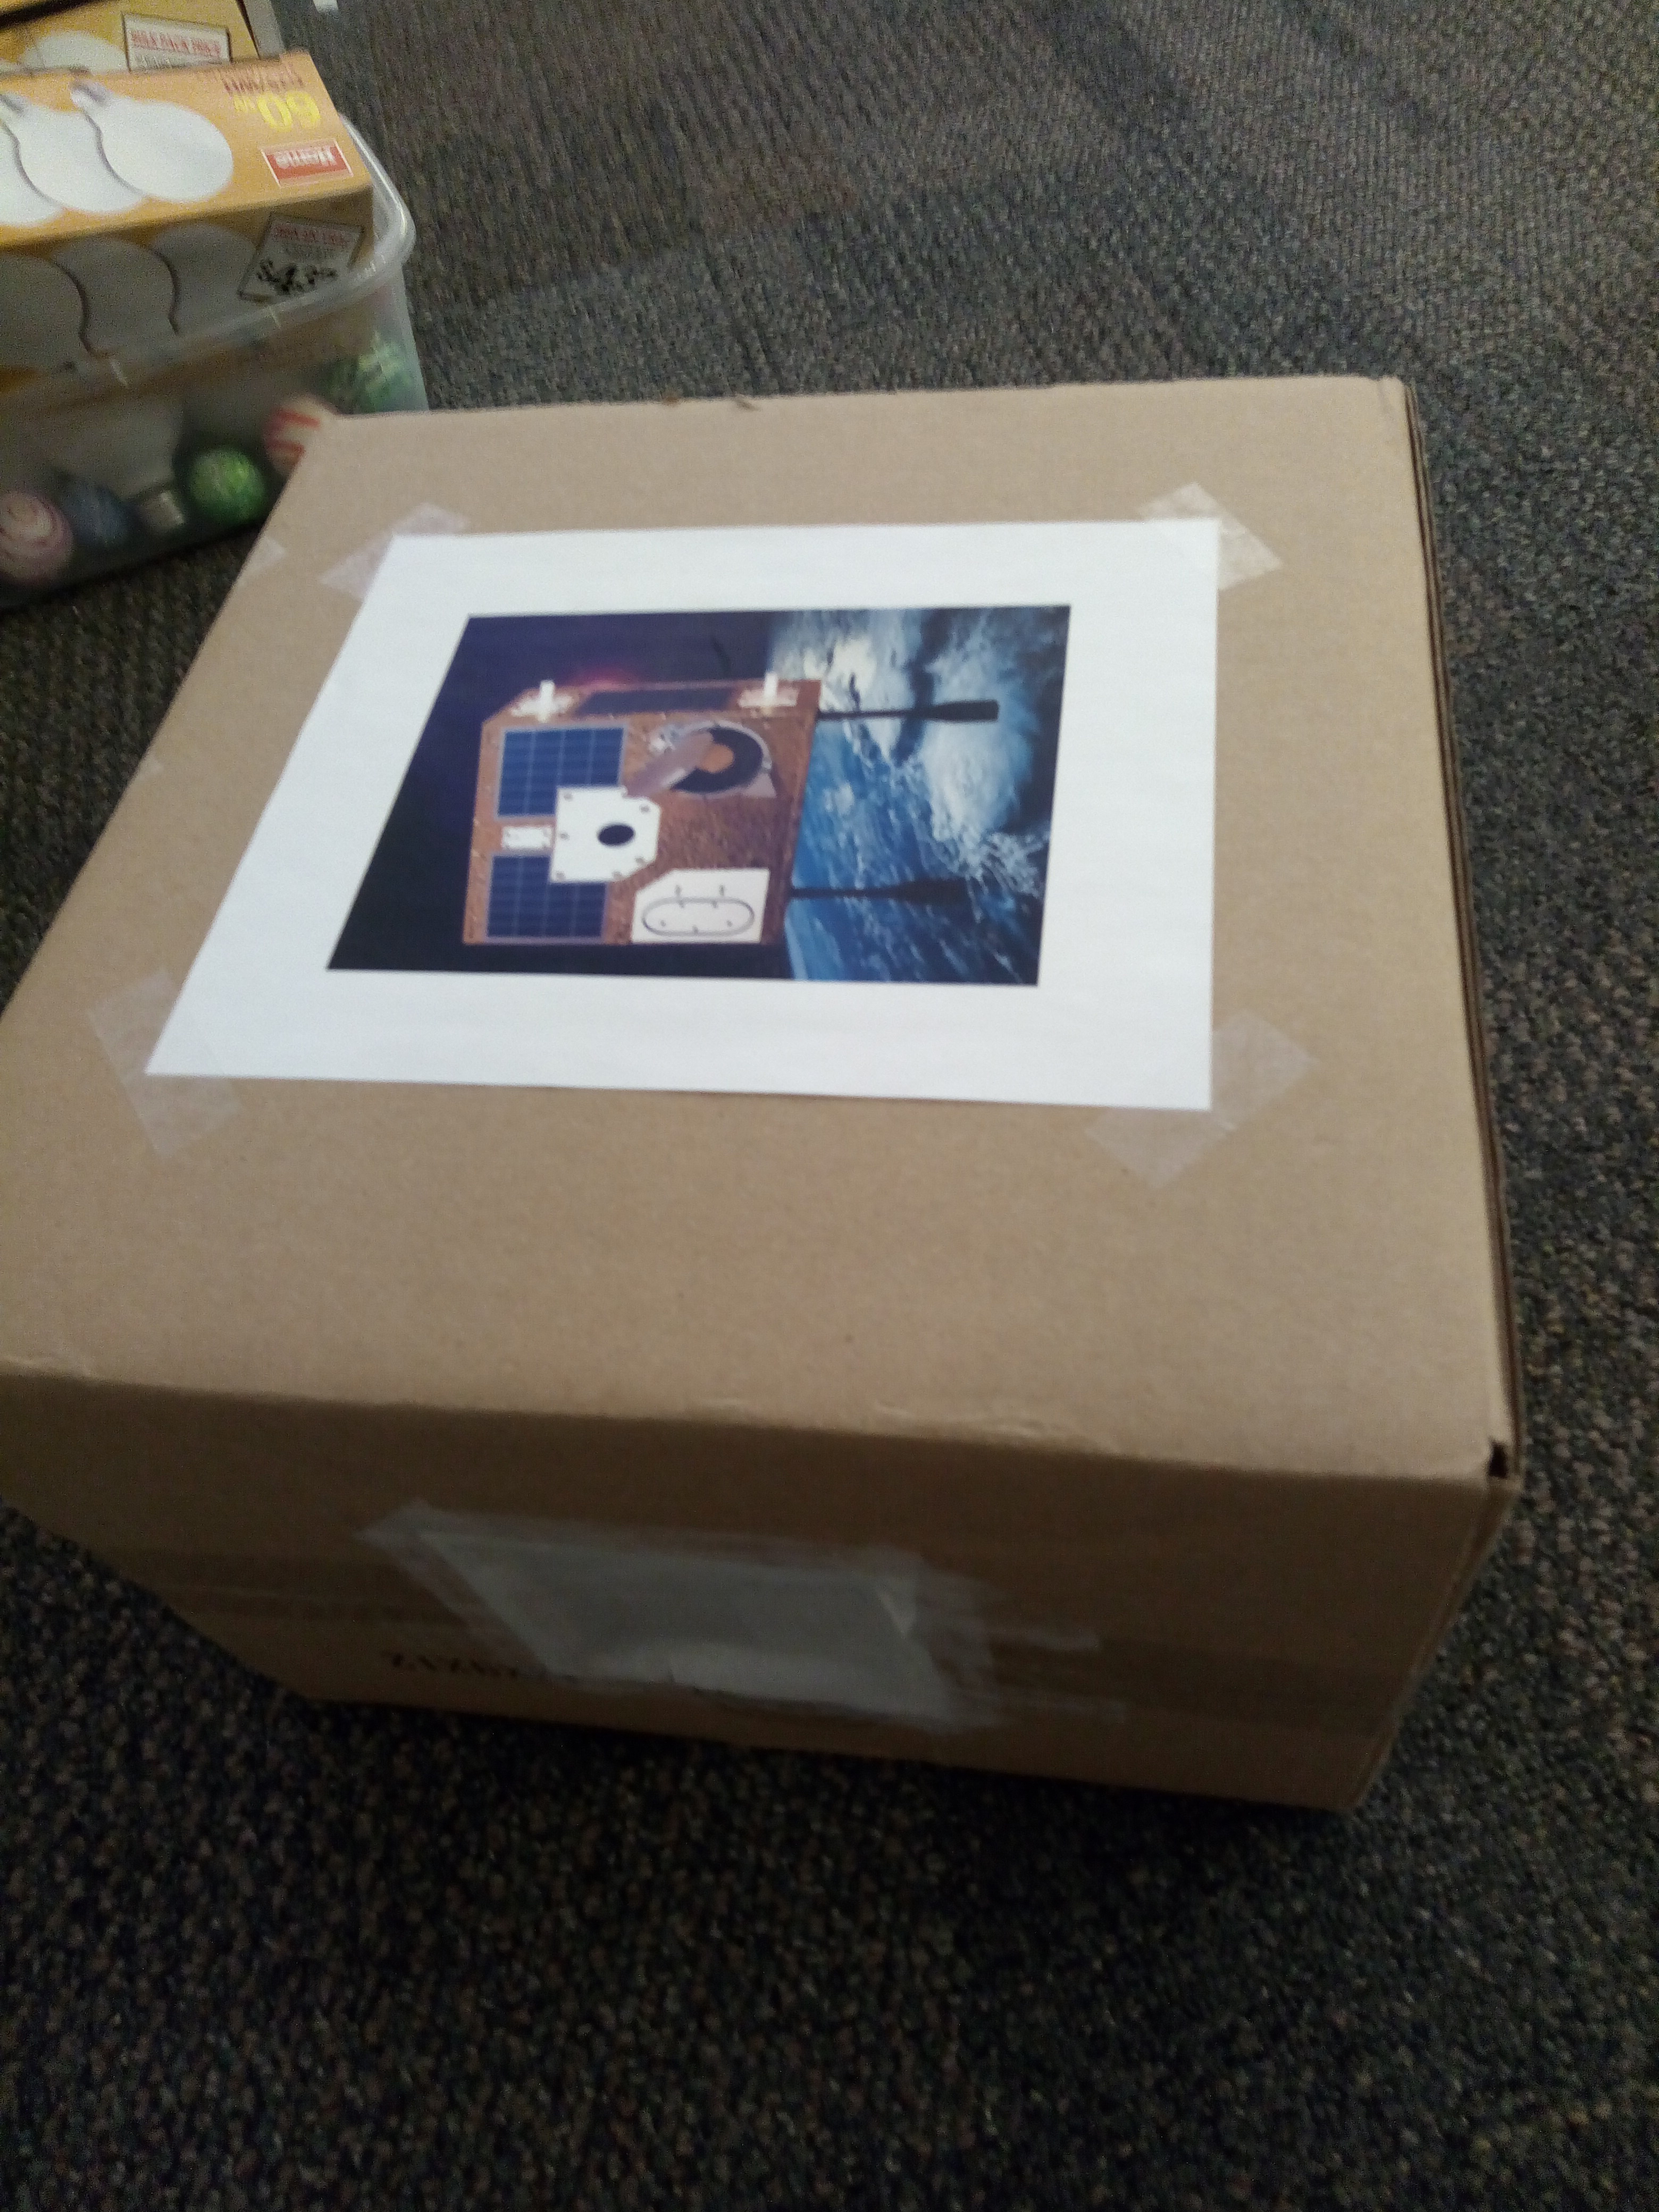
The image above shows a box with its parchment pixel on the side. An optional picture of the MOST space telescope has been placed on the top.
The planets can be made of Styrofoam balls but I prefer to have students make their own from play-dough. Students who like to fidget in class may appreciate the chance to make planets while you go over the presentation slides to introduce the topic. Instruct the students to make (or select) planets of varying sizes, about 3-5 cm in diameter, 3 per group. The balls are placed on BBQ skewers to make them easier to handle.
We explored different light sources in the two workshops over the summer. The best light source will light up the parchment pixel uniformly, because you can only get one value of brightness from one pixel. What worked best was a plain globe light bulb with a matte white finish, like those found on some bathroom vanity lights (hardware stores and Dollarama sell them). They can be attached to the end of a desk with a clamp.
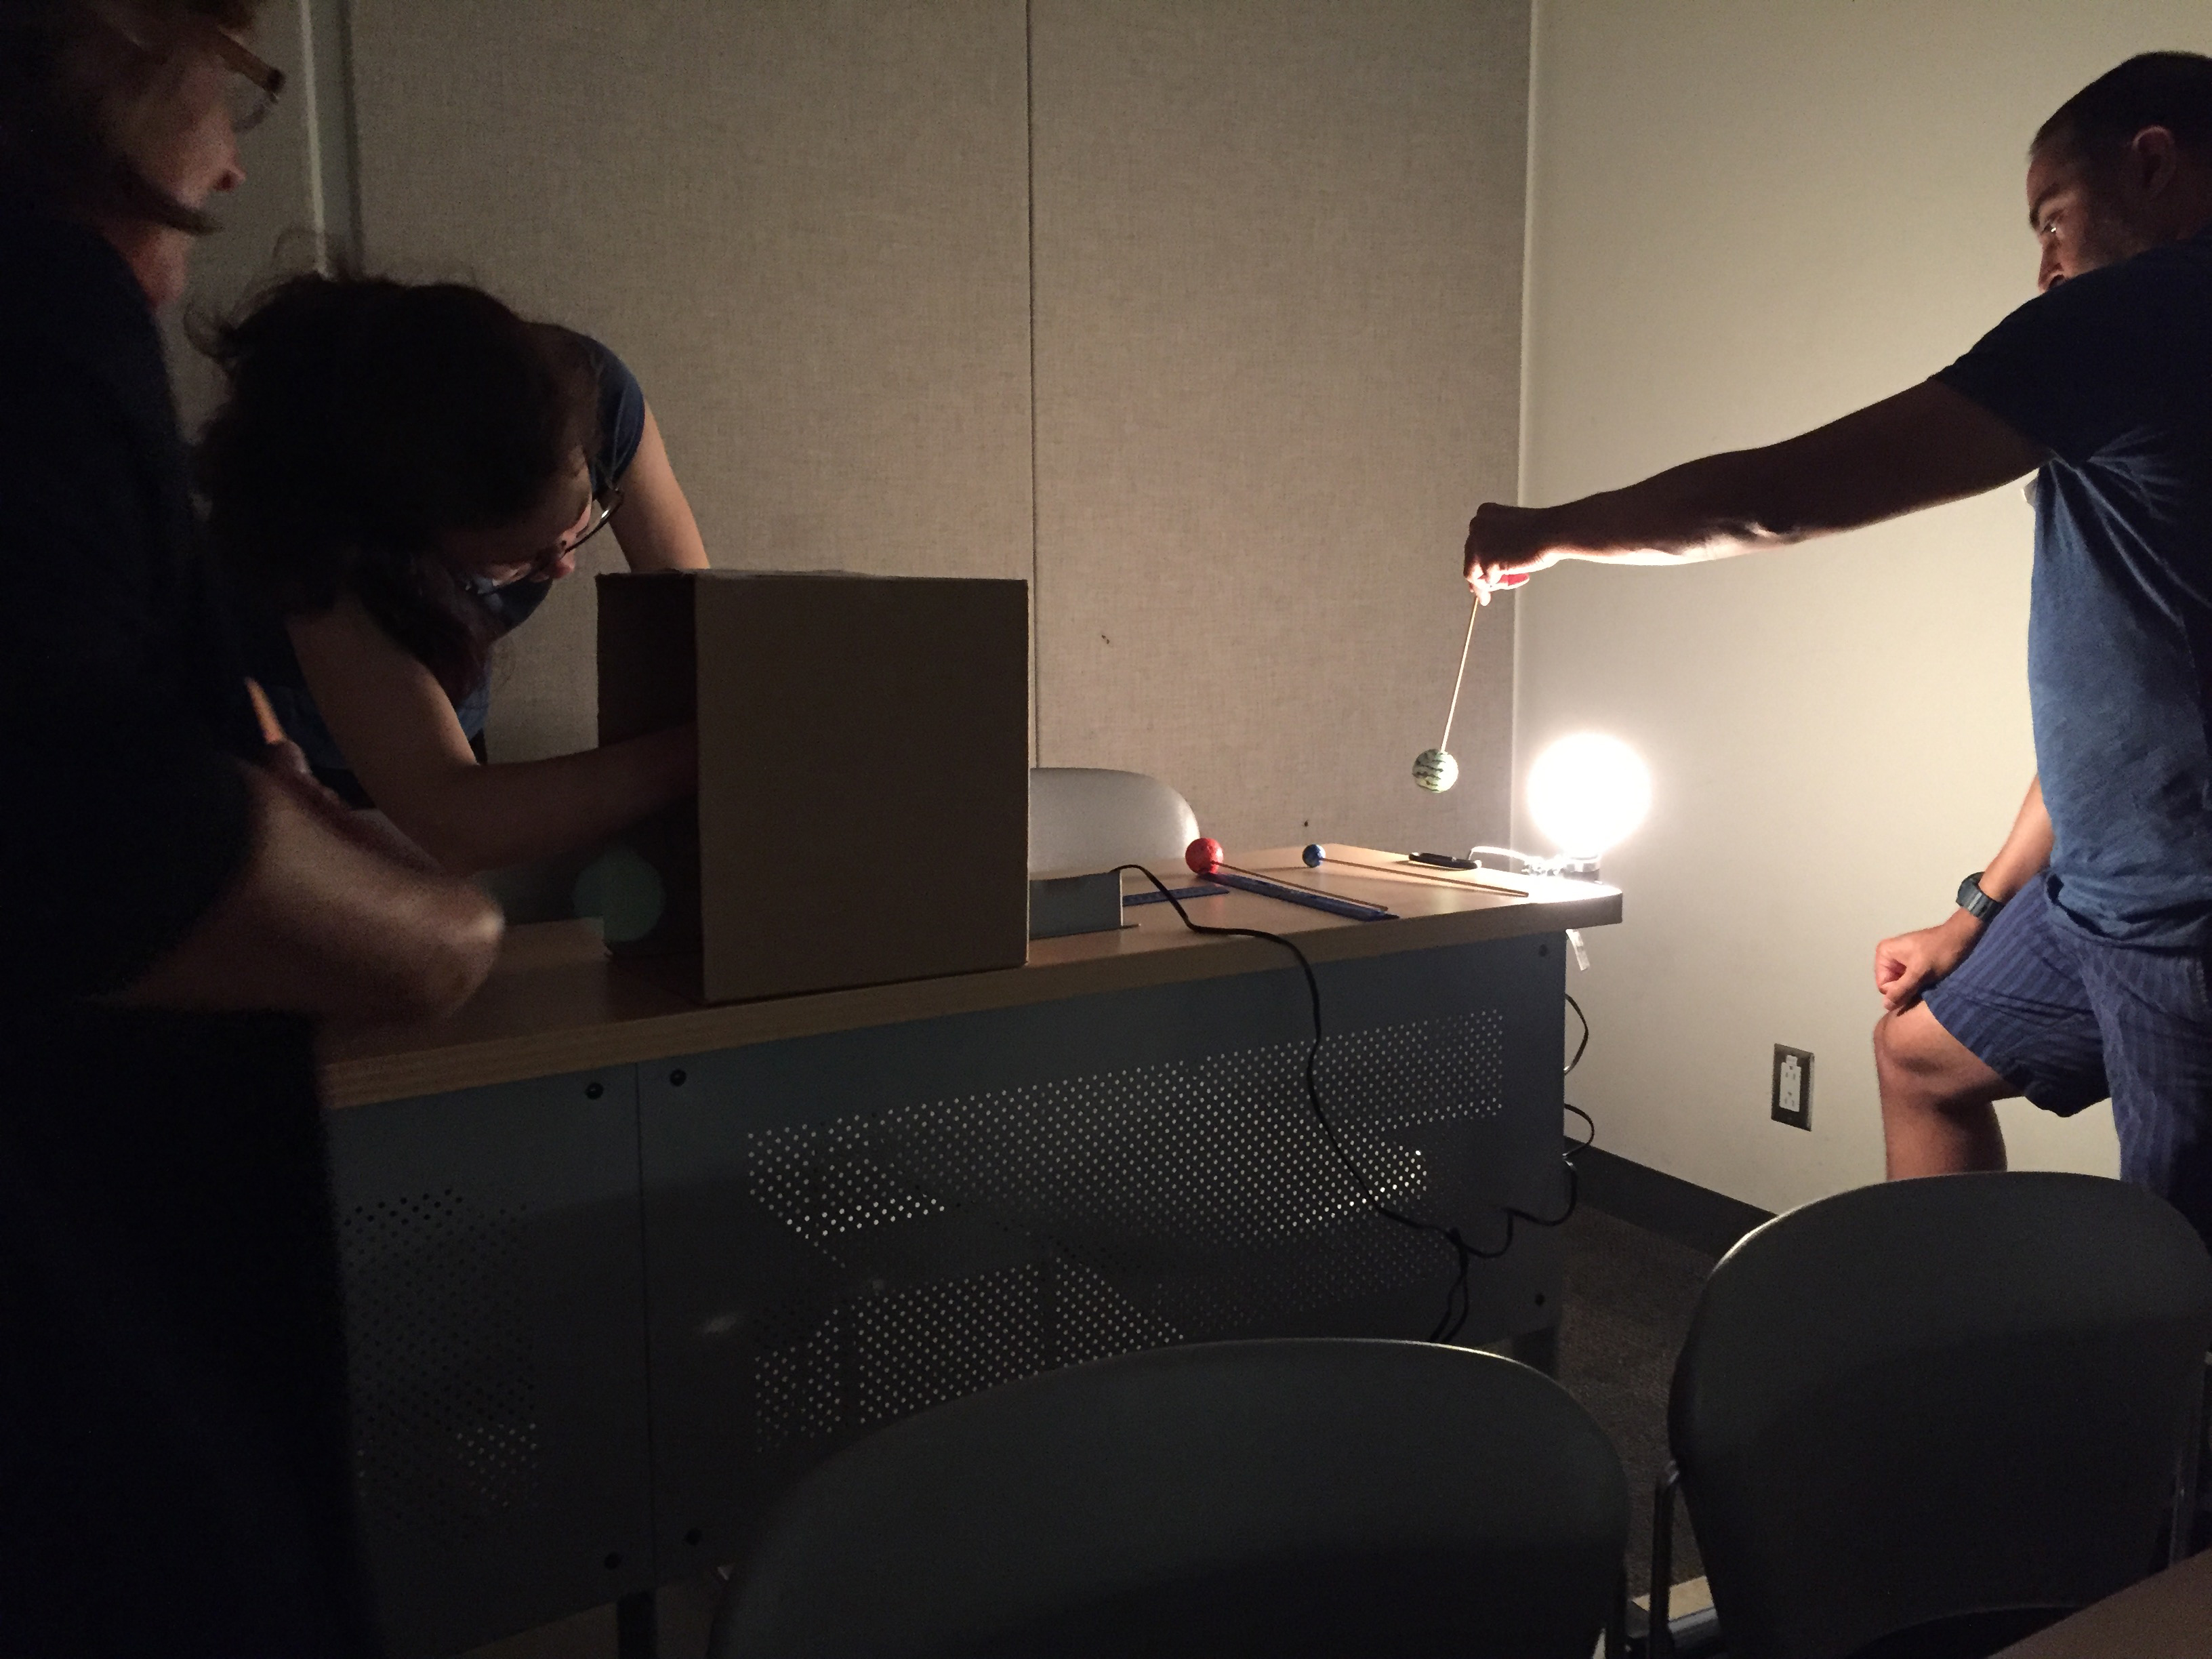 Photo credit: Matt Russo
This photo lets you see the clamp for the bulb and the planet more clearly. The observers are using a cellphone app to measure the brightness as the planet moves past the star.
What did we learn about exoplanets?
By the end of this activity, the students should have a solid understanding of how exoplanets are detected using the transit method. They should realise that it is easier to detect large planets and those orbiting closer to the parent star, because they block more of the star’s light. They should also realise that the angle of orbital inclination matters, since we would not be able to detect planets which orbit far above and below the direct “edge-on” orbit as viewed from the Earth. The students can be given a task to determine a planet’s orbital period, density and mass, given its light curve. This task can also be expanded to a discussion on what makes the habitable zone around a star for the potential of life on another planet and tied in to the unit on ecosystems.
For more resources, including the slides used in these two workshops, see:
https://drive.google.com/drive/folders/1ERbRnWAEWWlNEakB9BviBpSOsRJ269IY?usp=sharing Acknowledgement
My sincere gratitude goes out to all the participants of the 2018 summer OAPT camp and the York University workshop for teachers in astronomy. Without their valuable input and feedback, there would not be the many improvements and variations to the exoplanet activity that make it so rich and versatile. I am indebted to the organisers of these two workshops, most notably Roberta Tevlin, James Ball, Matt Russo and Paola Rodriguez Hidalgo.
Tags: Astronomy, Light
