December 12, 2015 Filed in:
ArticlesGavin Kanowitz, Teacher at AY Jackson SS
gavin.kanowitz@tdsb.on.ca
The ‘Demo’ is one of the most powerful tools that physics teachers have. It can hook the students’ interest right away. If you frame the demo with a pre and post dialogue, it can also ignite their learning.
There is no hard and fast rule as to when an educator should perform a demo. I prefer using them as an intro to the topic. Other teachers choose to defer to demos as a means of solidifying a key idea at a later stage of concept development. There is certainly no shortage of demos — a quick glance at the
OAPT website will alert you to that, but what is often missing in demo descriptions is the pedagogy that surrounds the show.
Four Steps in the Holistic Demo
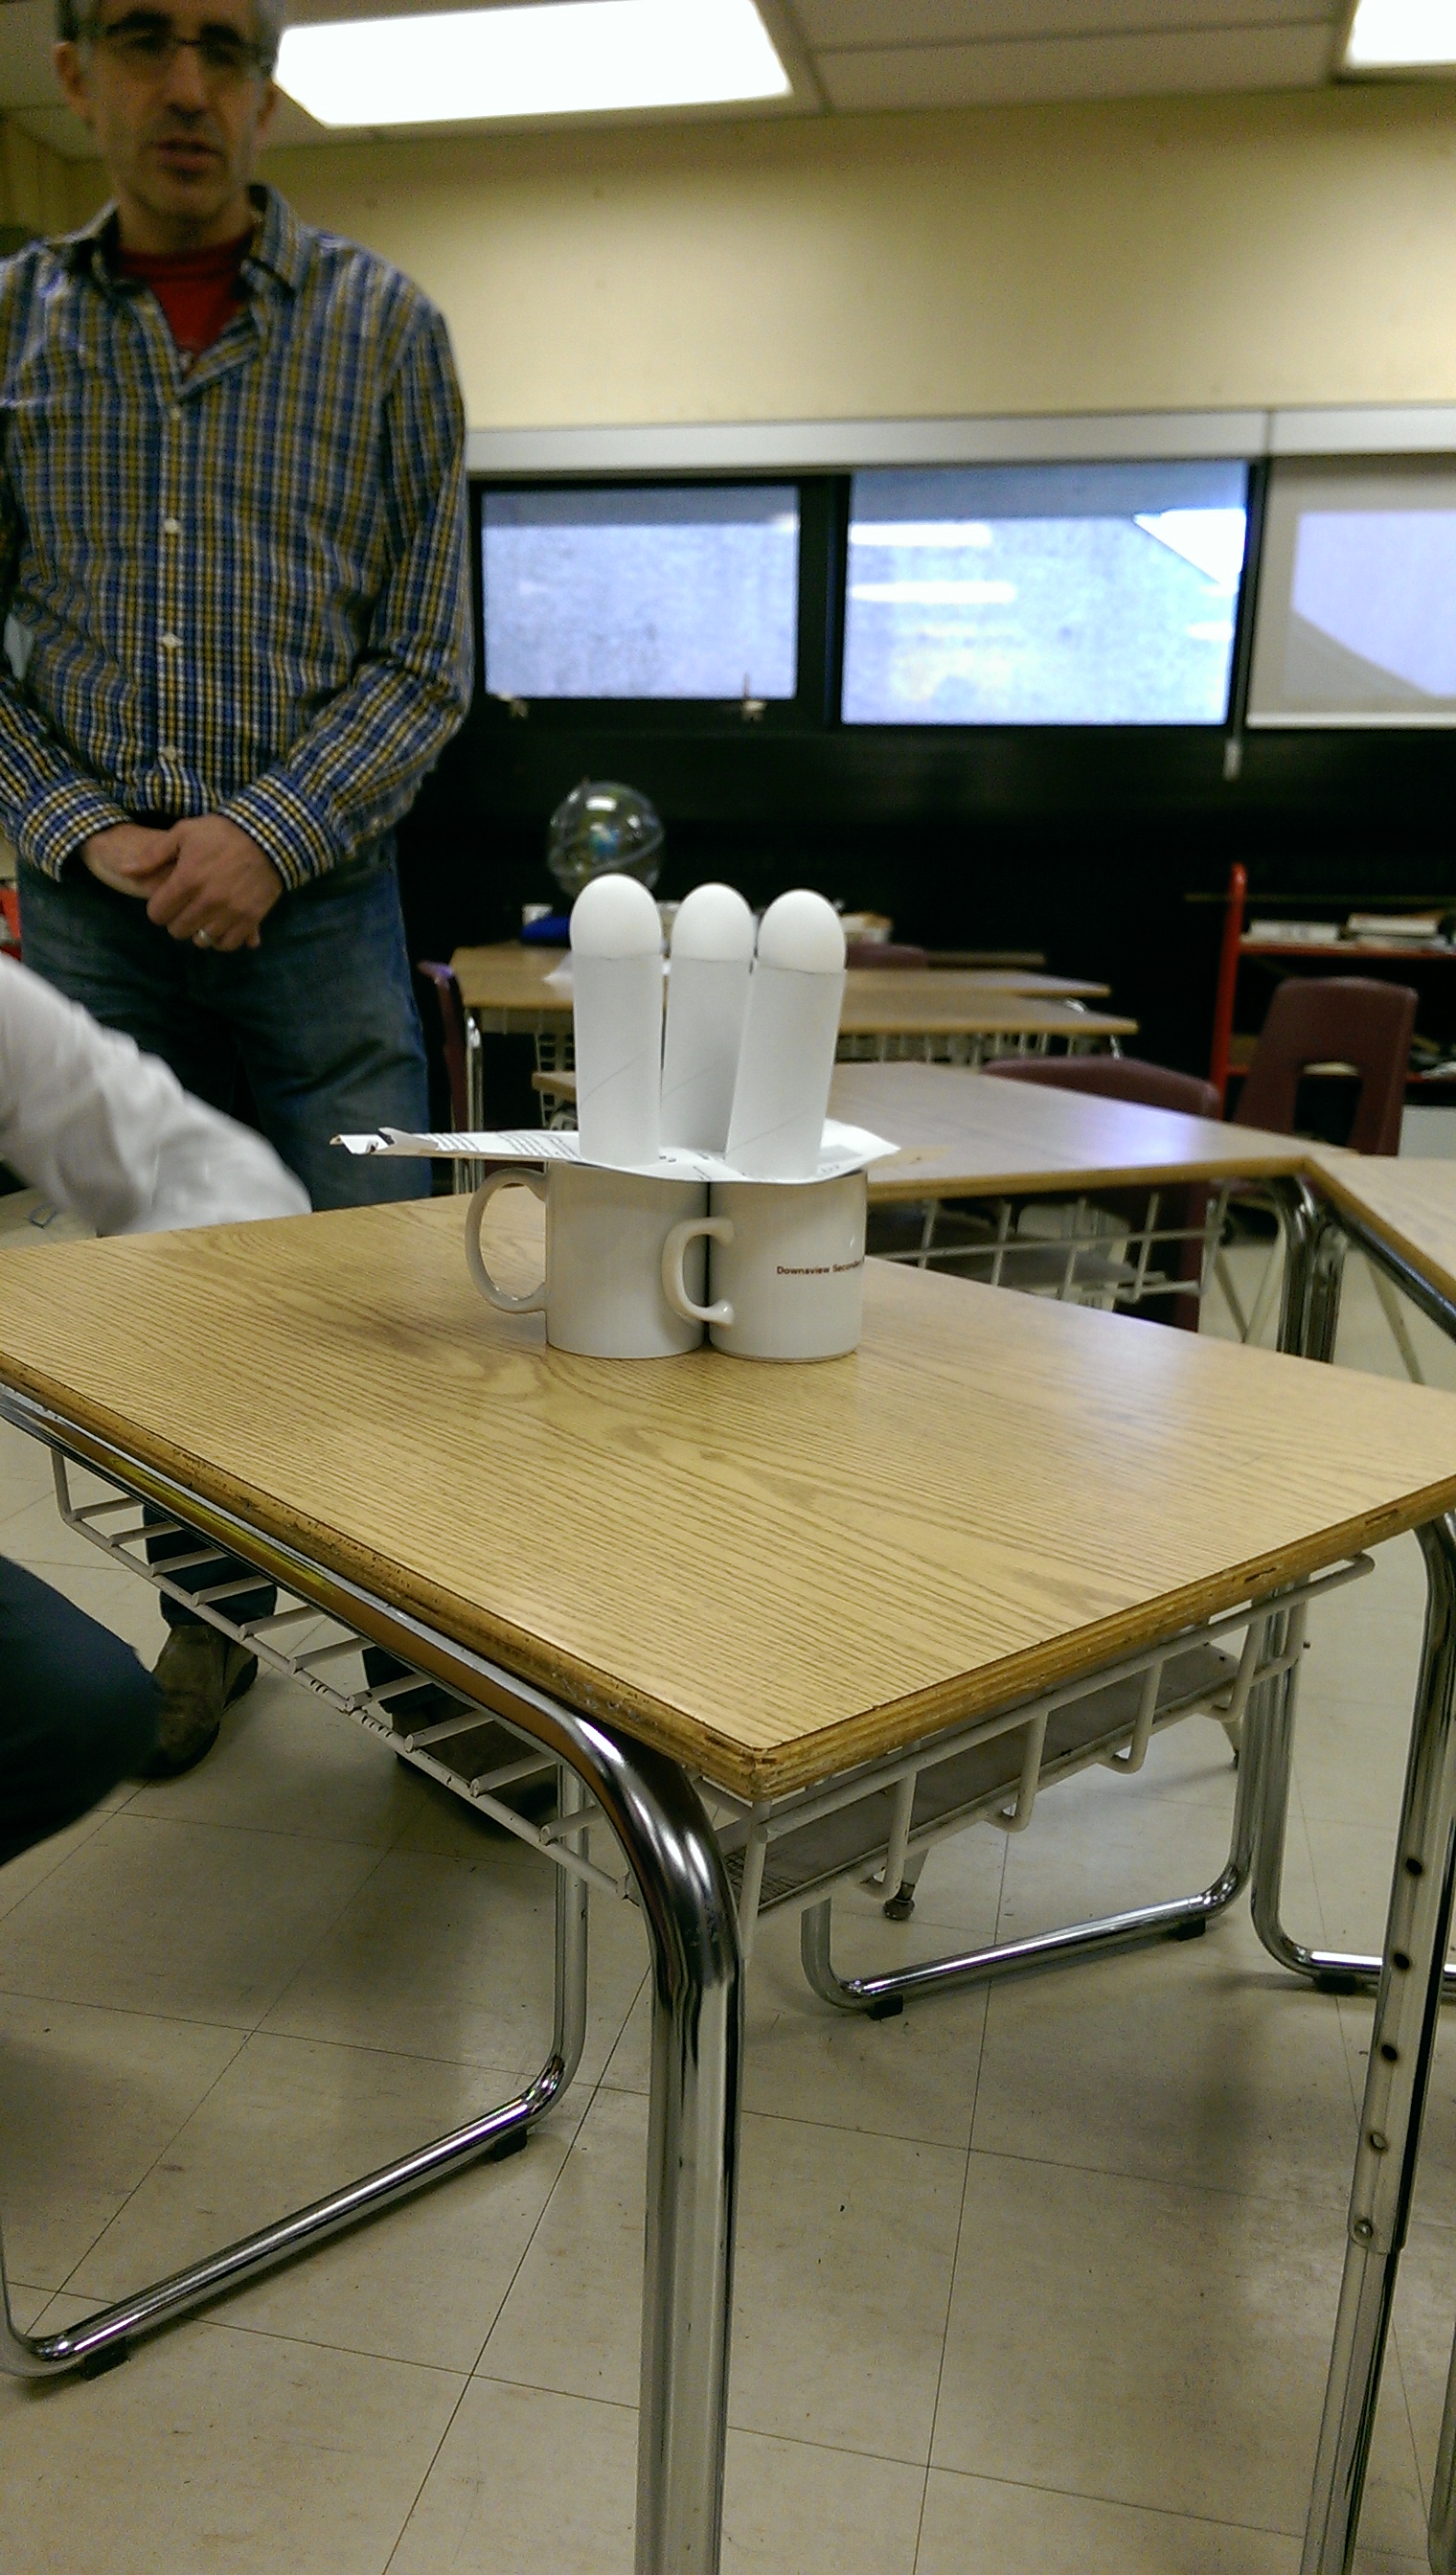
Consider a simple inertia demo involving three toy eggs, a piece of paper, three coffee mugs and three cardboard cylinders (taken from toilet paper rolls which are always good for a laugh as well). Having three of each seems to magnify the process, amplifying the ‘wow’ effect.
Step one of the demo is the buildup of anticipation as one sets up the apparatus as seen in the image below. Students need to see the set-up and know what will be done. In this case, the paper will be removed rapidly. What will happen?

Step two should not be rushed as students need to think deeply about the events that they expect to see unfold. Students make predictions which they either write down on a paper or on a white board. The predictions must be explained. Small group discussion works well here. Teachers must do their best to avoiding biasing any predictions and should try to refrain from any input at this stage of the process.
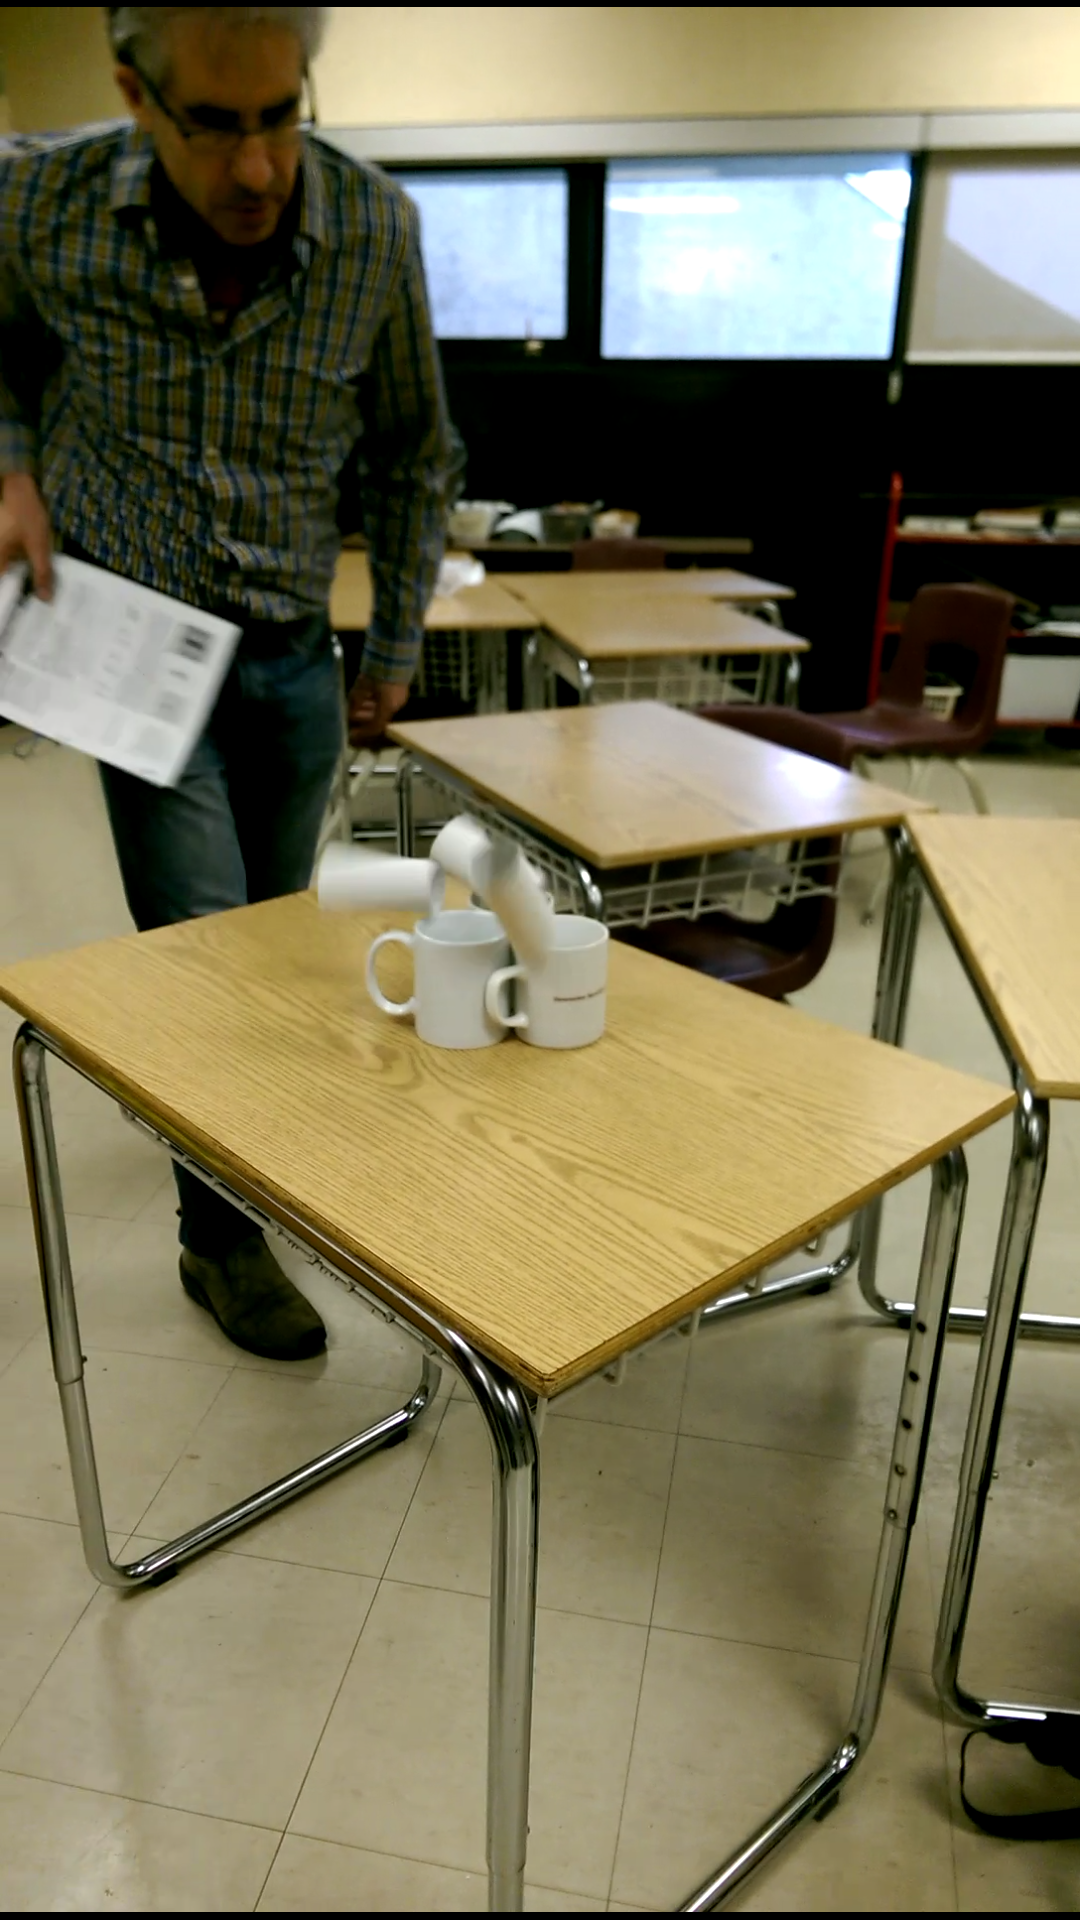
In step three the physical demo is carried out. Most students will gasp as all three eggs fall into their respective mugs which naturally beg for a repetition or two. The demo is then repeated and as an added bonus, students may be called up to carry out the task themselves. (Physics teachers don’t have magic powers.)

In step four the quest for the explanation of the observations begins. Have the students discuss with each other what they have seen and then articulate their explanations. Diagrams most certainly help as do the appropriate symbols that convey the language of physics. The explanation should be as clear as possible with a strict focus on the Big Idea behind the demo.
Repeat as Needed
One demonstration of a principle is usually nor enough. Other demos or videos that illustrate the same concept will deepen the learning. There are many other inertia demos. The video
“7 Inertia Demos” has seven. Examples of the principle in real life can also be used. The video
“Crash test with and without a safety belt” illustrates the inertia of objects in motion.
Framing a demo with a discussion before and after does not take anything away from the entertainment but it does add a lot to the educational result. It will take more time, but this is time well spent.
Editor’s Note:
For a couple of decades, Ernie McFarland was the editor of the Demonstration Corner, a regular column for the OAPT Newspaper. This has lapsed since Ernie retired. Would someone like to volunteer to continue it?
Rolly Meisel has collected all of these demonstrations into
one convenient location, sorted by unit. As the author has noted, most of these demonstrations do not include hints about how to frame a discussion before and after the demo to increase learning. You will usually have to add that yourself. However, Ernie McFarland’s demo article in 2010 “Buoyancy Newton’s 3rd Law” clearly shows how to use Peer Instruction with the demo.
Tags: Motion, Pedagogy
