Andrew Moffat, Teacher Bishop Strachan School
amoffat@bss.on.ca
Students often struggle with the “Physics” unit in grade 9 Science — electricity. This can lead to a negative association with Physics and fewer students taking grade 11 and 12 Physics. At our school we have tried to make the electricity unit (and specifically the idea of circuits) more fun and engaging by having students create an electric greeting card consisting of LEDs and a battery. This can be done for around $2 per student.
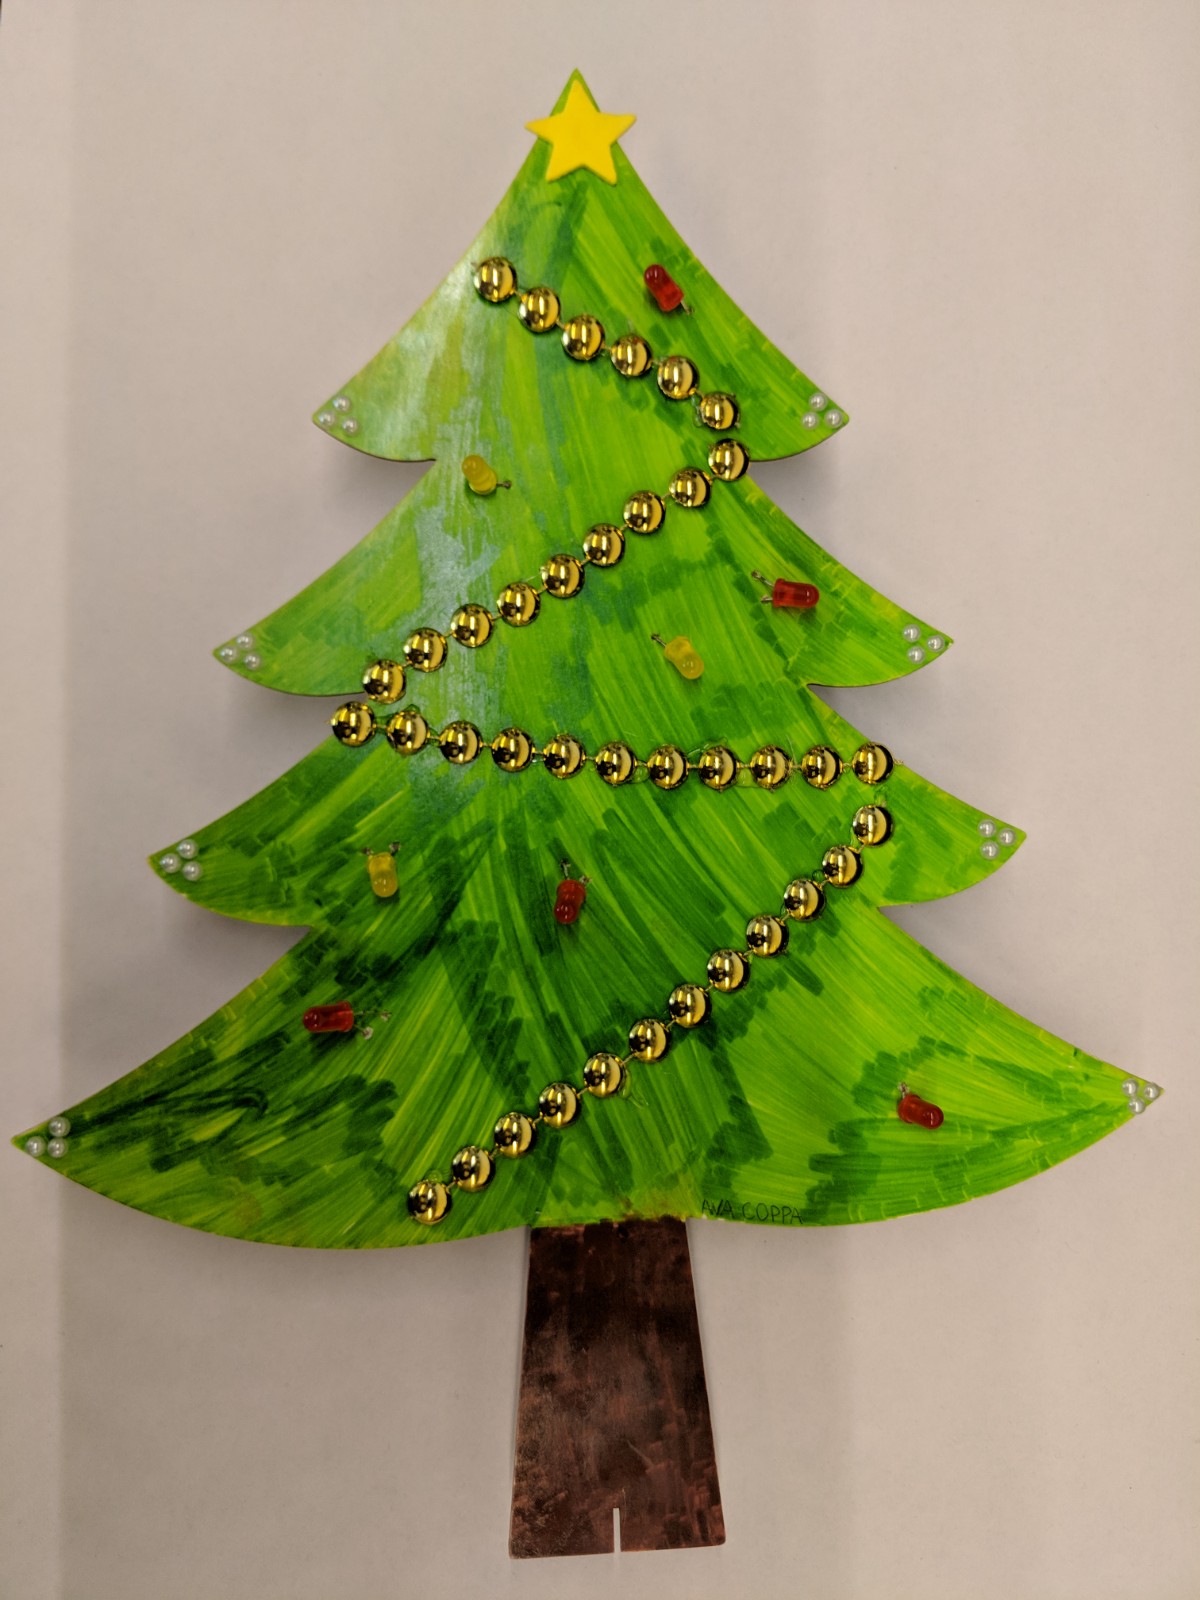
While the artistic aspect of the card is fun for the students, the learning goal of the card is to develop a student’s understanding of the concept of a circuit. The cards are great because the students are able to lay out their circuit in a visual manner on the hidden inside of the card while on the front they can produce a flashy design. There is also no reason that the cards must be cards. We had students this year also making snowflakes, Christmas trees and Menorahs. This one used the LEDs as lights for the Christmas tree.
The circuit is a simple parallel circuit consisting of only a 3V battery, a switch and LEDs. The circuit diagram is below:
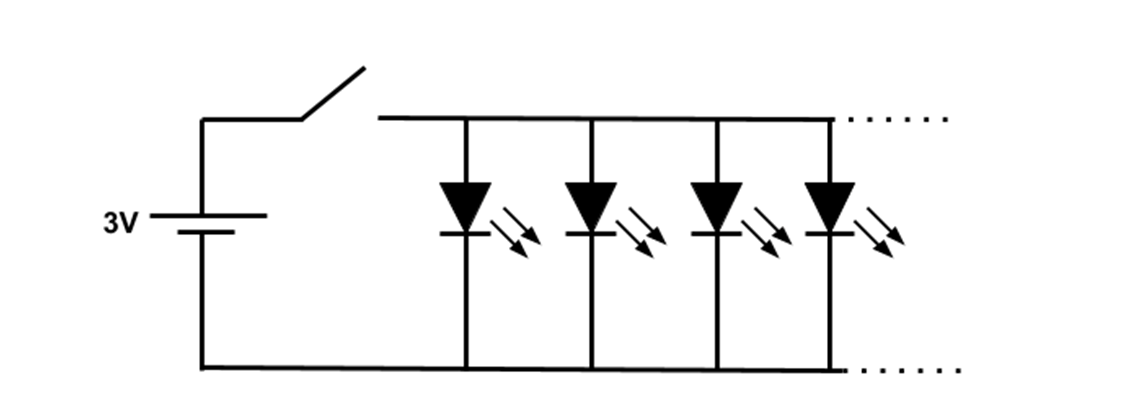
We have found that circuits of up to about 8 LEDs tend to work well. Beyond that the battery can have trouble sustaining the current required to light up all the LEDs at once. Note: LEDs are directional. The longer leg is positive (also, the flat edge of the LED case is negative).
This project has been going on at our school for 5 years and each year we have worked to make the project easier to complete and the cards more successful. Our first version of a card used copper tape for the circuit. While this looked great the students struggled to make connections using the tape due to the sticky adhesive that acted as an insulator. When hammered or pushed on hard with a tool such as a nail it usually worked well, but only for a short period of time. Solder works amazingly, but it does require more equipment, training and safety precautions. For the next year we used aluminum foil with clear tape overtop of it, instead of copper tape as it lacks the adhesive.
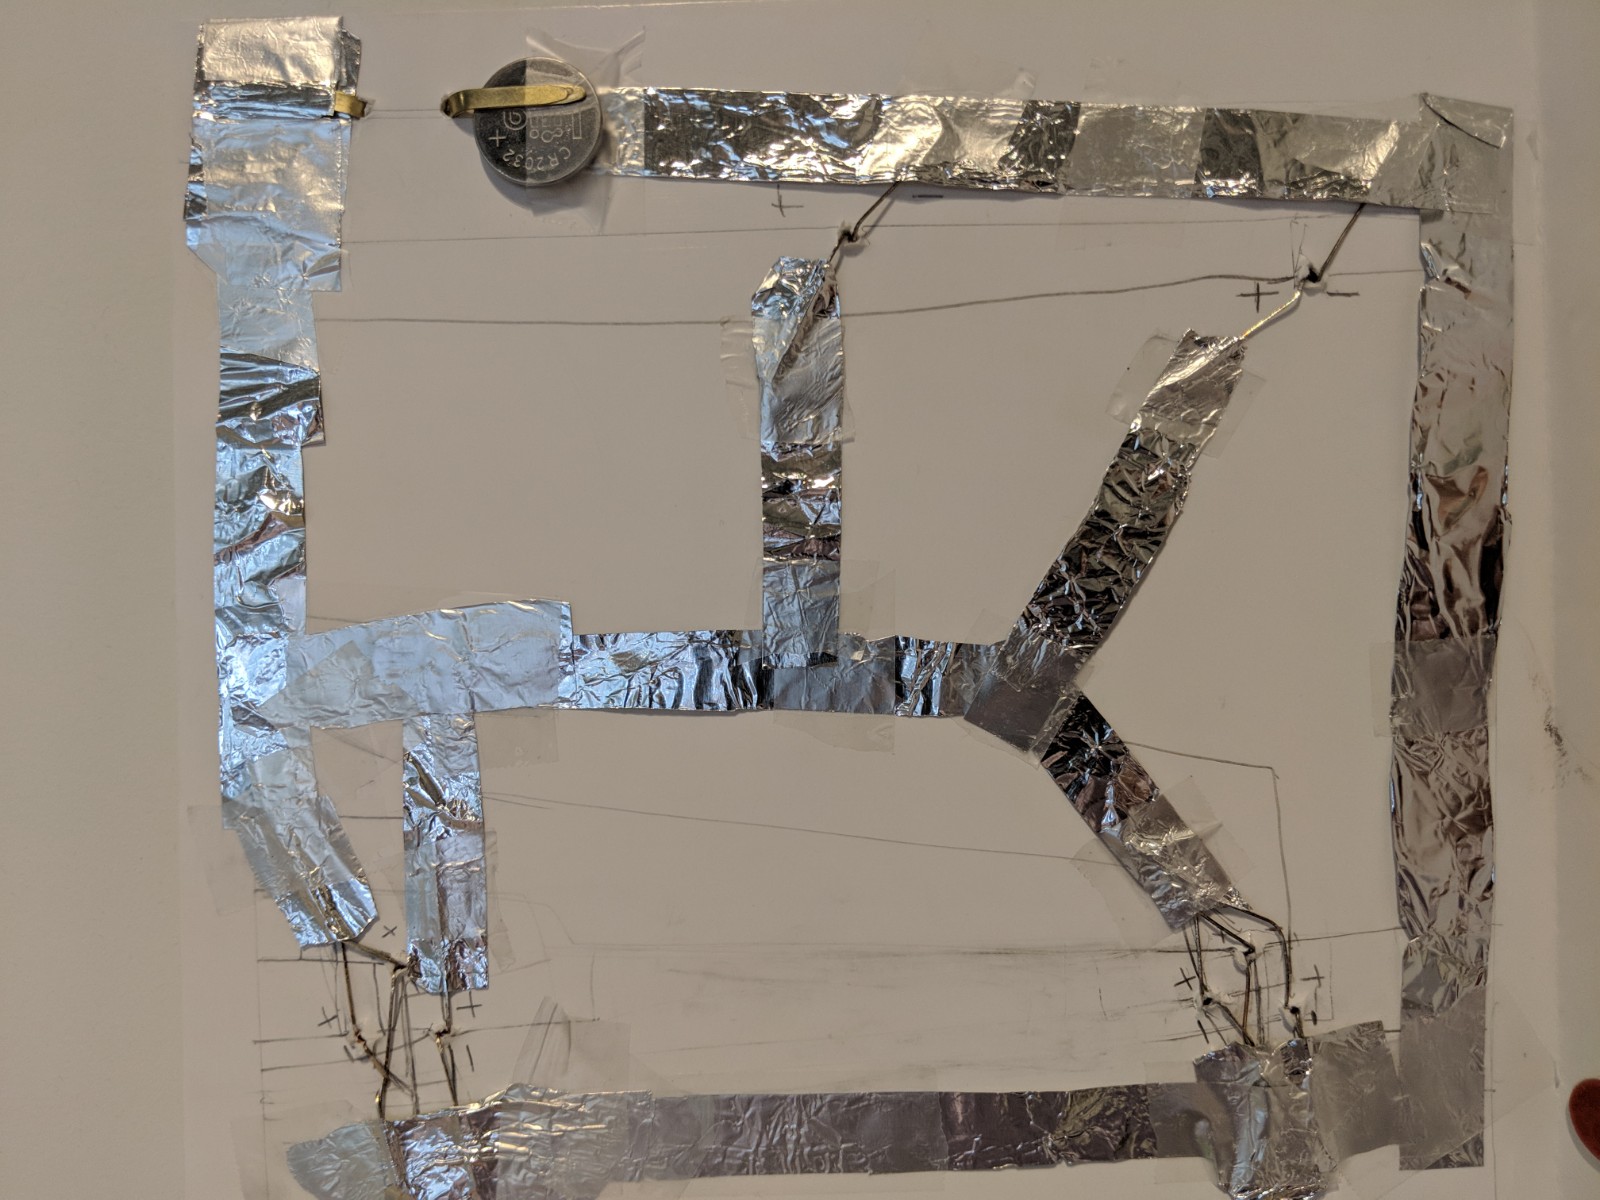
The students continued to have frustrating troubles with their connections. In our third year we switched to thin wire. While the result was that the circuit itself looked much messier, it worked much more consistently and ultimately it was the most successful year for the project.
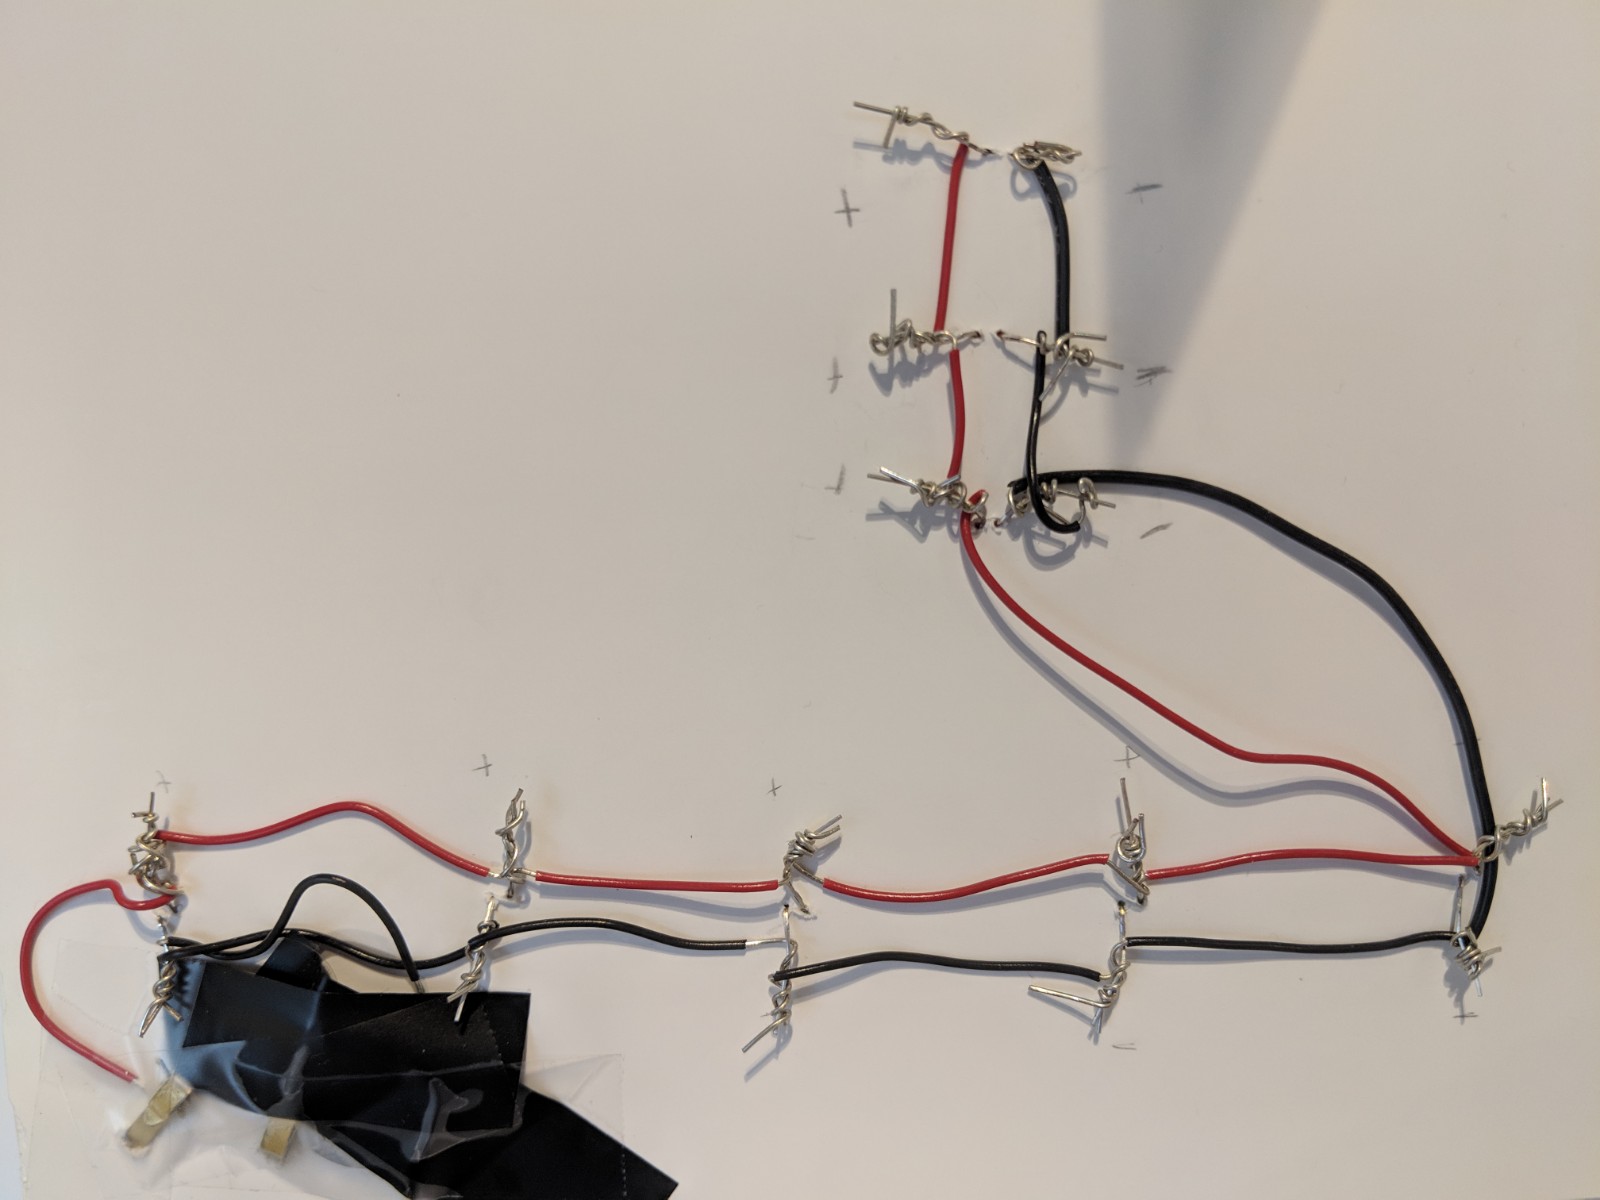
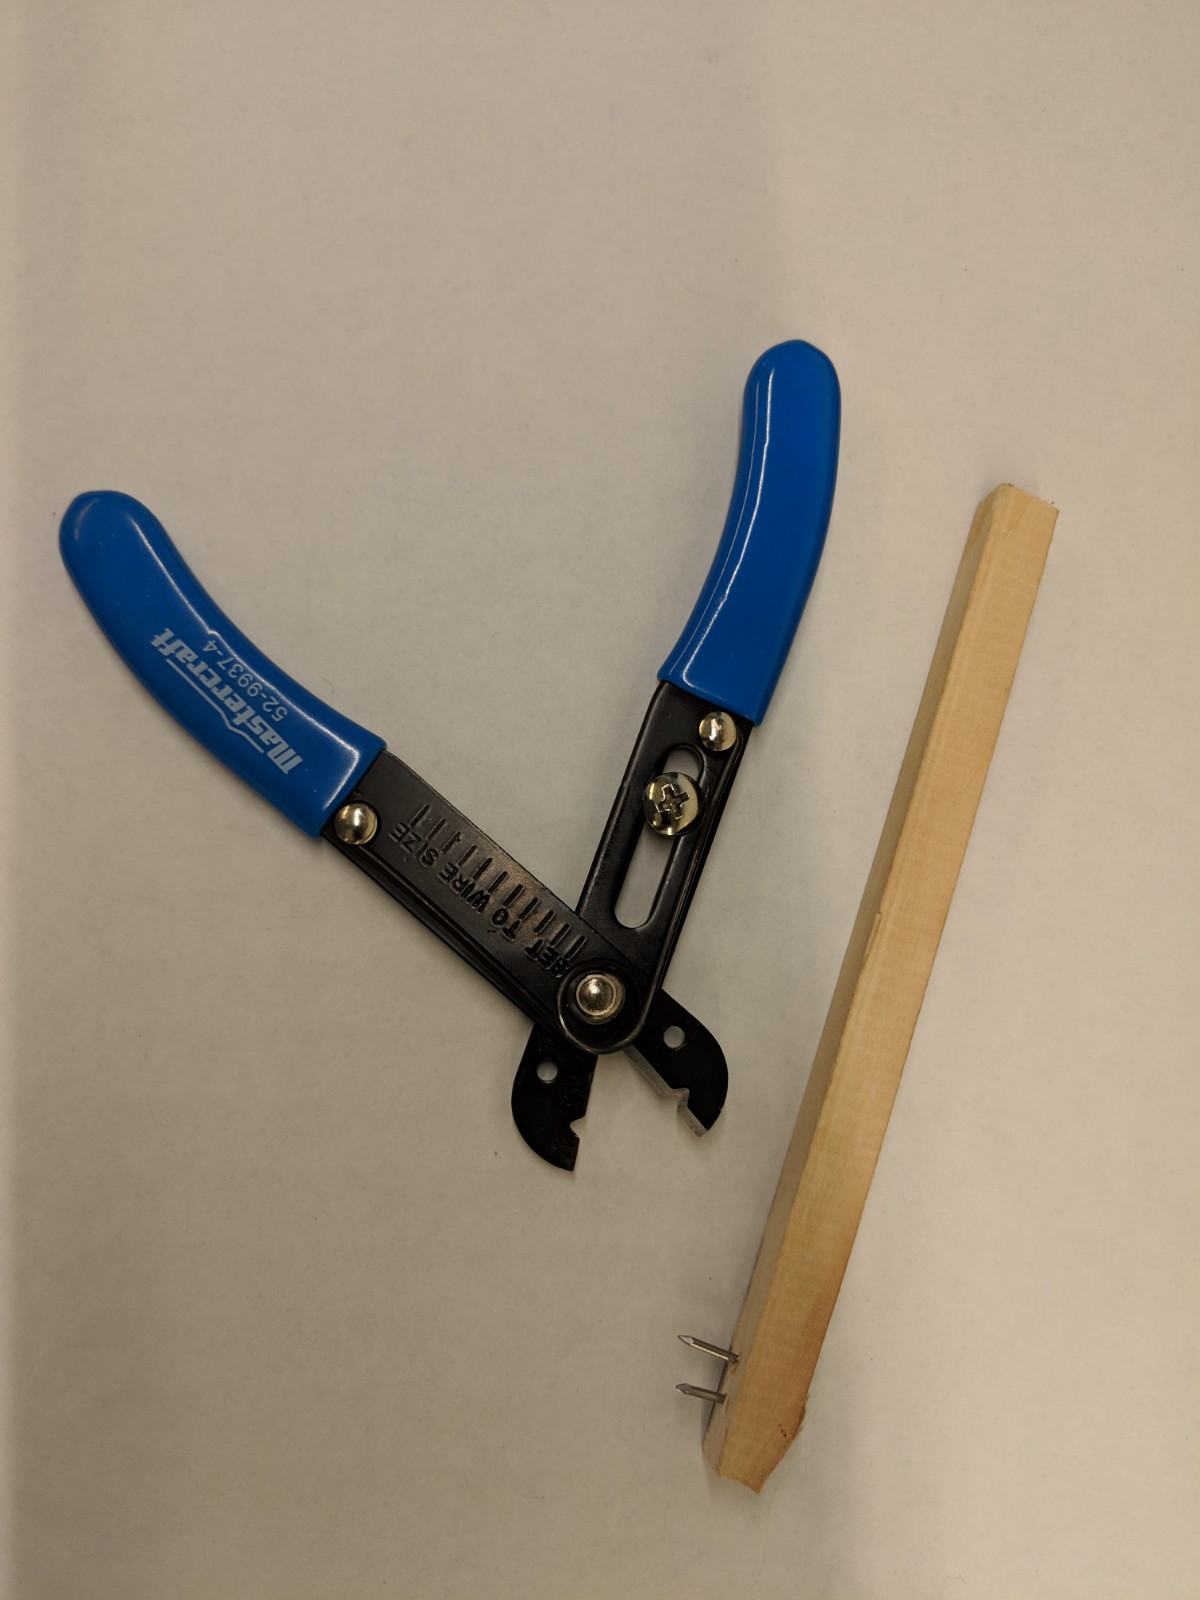
Another source of frustration over the years for both teachers and students has been the short circuiting of the LEDs. It is highly recommended that each leg of the LED go through its own hole in the card. We produced a very simple tool for this purpose (see picture) that consists of 2 small nails about 4 mm apart in a stick of wood. The small hammer can be used to punch two small holes at once.
For the card we bought the thickest card stock we could find. We sourced it from a sign supply store, but cardboard or foam core from a dollar store also works well. With thick sturdy card it is helpful to score the card so it folds nicely.
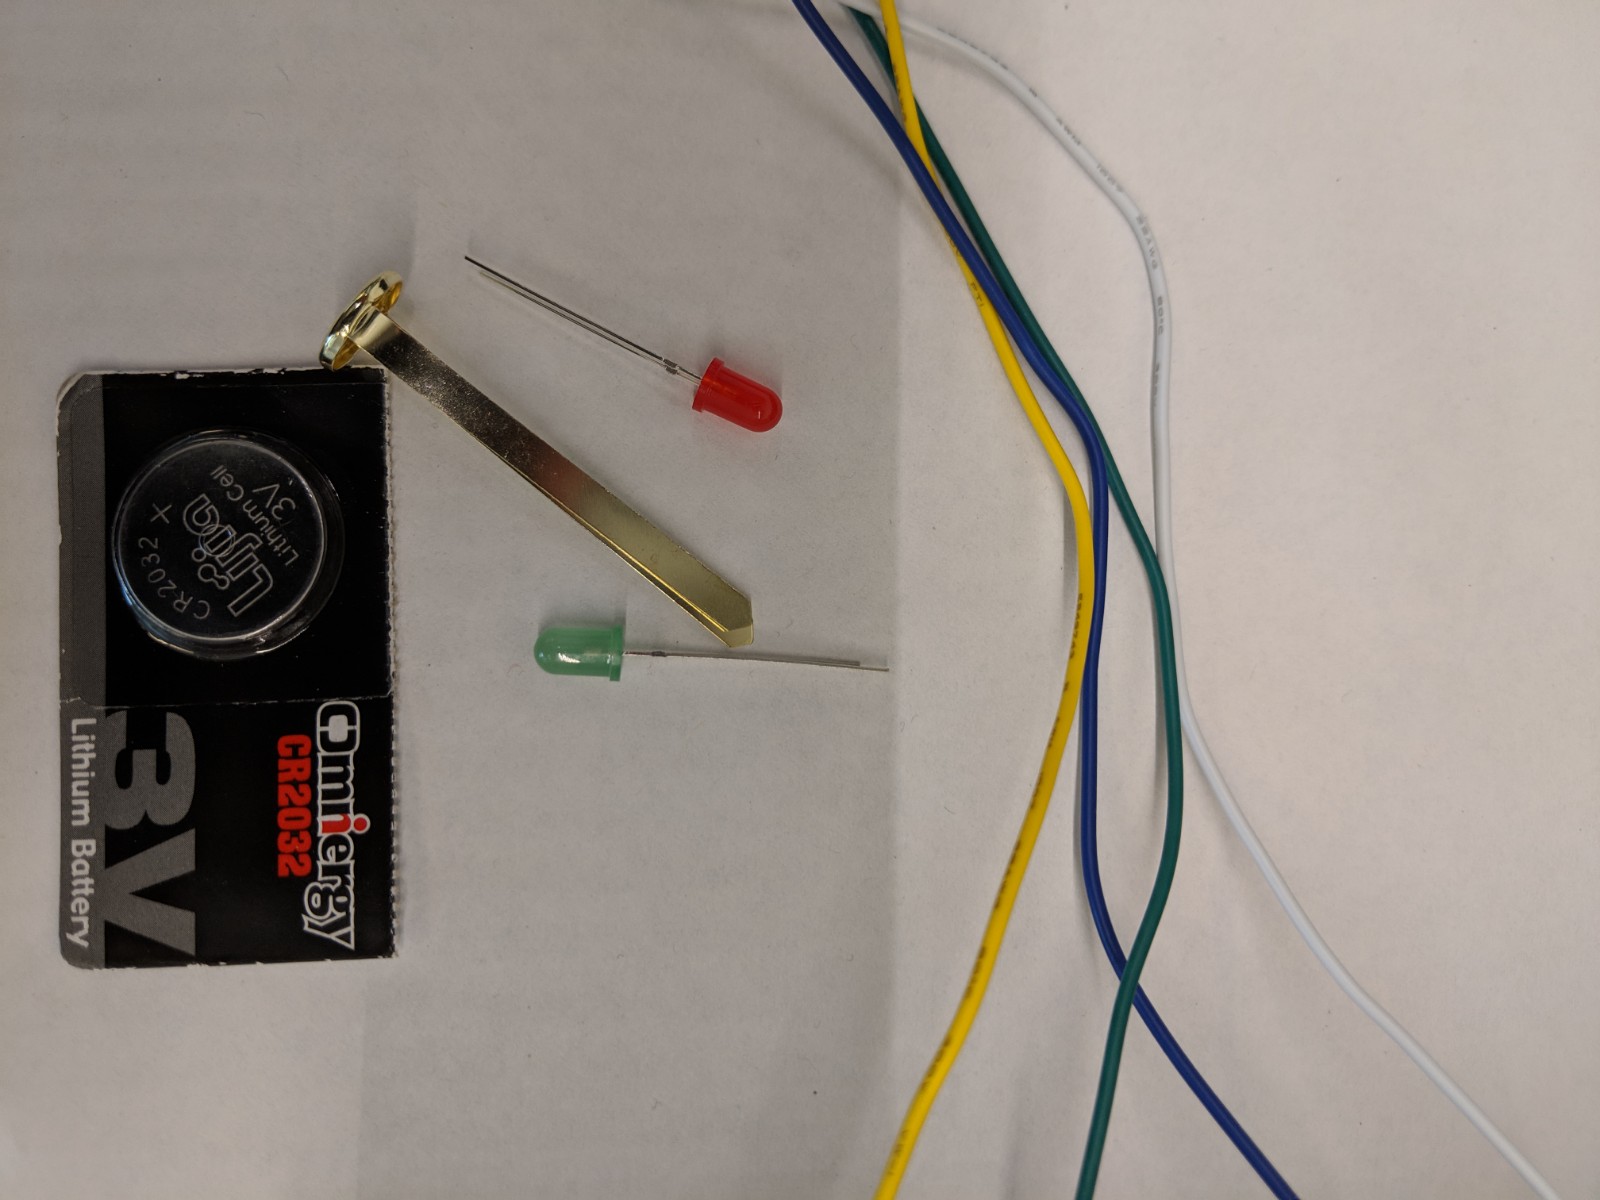
The basic materials are LEDs, batteries, wire and brass fasteners.
Source for materials:
- LEDs: Can be purchased in bulk from any electronic supply store such as Sayal Electronics (~$100/1000). They can also be sources through Amazon, but the quality of the ones we received online was inferior.
- Batteries: The 3V batteries (CR2032) are universally available, but the cheapest place we have found is MEC for $0.50 each. (Holders for these batteries are optional, but a nice addition making easy connections. They are available from Amazon)
- Wire: Thin gauge wire (~22-28 AWG) is universally available
- Switches: Brass fasteners available at any office supply store work well
Tips for success:
- Make sure all your connections are well made. This includes stripping about 4 cm of insulation off each wire so it can be tightly wrapped around each leg of the LED.
- Lay out the circuit cleanly so it can be easily followed and debugged
- Use up to about 8 LEDs
- Do not mix colours that are more than one away from each other in this list: Red – Orange – Yellow – Green – Blue. The differences in voltages cause problems, which can be solved by using resistors, but we chose to keep the circuit as simple as possible.
I will be presenting the activity at the OAPT conference May 3 at 11:15 so you can get a full hands-on experience of this project. You can register for the conference
here. If you try this project and discover some improvements, please pass them on!
Tags: Electricity, Light
