Chris Meyer, Past President, OAPT
c.meyer@bell.net
We want our students to become confident, fluent users of physics. We want them to develop good, reliable habits that will carry them through our physics classes and beyond. But very often, students become stuck on the habit hump! What is this mysterious hump? It is an analogy I use for our experience of the learning process and how we react and respond to it. If students better understand the learning process, my hope is they will make better decisions be more likely to stick to their learning. So, what is the habit hump and how do we get over it?
The help of habits
Our brains have a powerful strategy for dealing with routine, often boring things we do: habits! We can perform tasks without our full focus and concentration. After some repetitions of a new task, our brain will begin to automate the task so it happens without our attention. Even highly complex skills can end up as an automated habit. Think of tying your shoes or writing your name. How much time and effort did you spend first acquiring these skills? Trying to loop up one lace and wrap the other around it, fumbling with the pencil as you learn each quivering stroke of the letters in your name. It was tough stuff! But now you do it automatically as a habit – probably even while doing other things! And there is a good chance you would now find it challenging to explain all the steps and movements involved. This is a sign that the skill has become a habit that is fluent, executed quickly with little effort or attention. (Congratulations!) This is an important goal for our students’ physics learning. To tackle challenging problems or do some deep thinking, students’ mental efforts shouldn’t be bogged by the required routine skills; those skills need to be fluent, automatic habits.
Brain zombies
Habits are like zombies, and what do zombies like? Brains, of course! Whether they are the Romero style lumbering zombie or the hyperkinetic contemporary zombie, these undead creatures do their thing without thought, just like our mental habits. This is an analogy I first found in Barbara Oakley’s
Learning How to Learn, which I find very apt. She makes the point that it is especially helpful to turn the things we don't like doing into automated habits, so our zombie habits just get the job done without us devoting much mental attention to it. This can be helpful to explain to our students: tasks they're not fond of will become quick and relatively painless once they are automated through a well-practiced habit. The challenge is getting to that stage! And this is where I came up with the idea of the habit hump; to help students understand how we get to this end state.
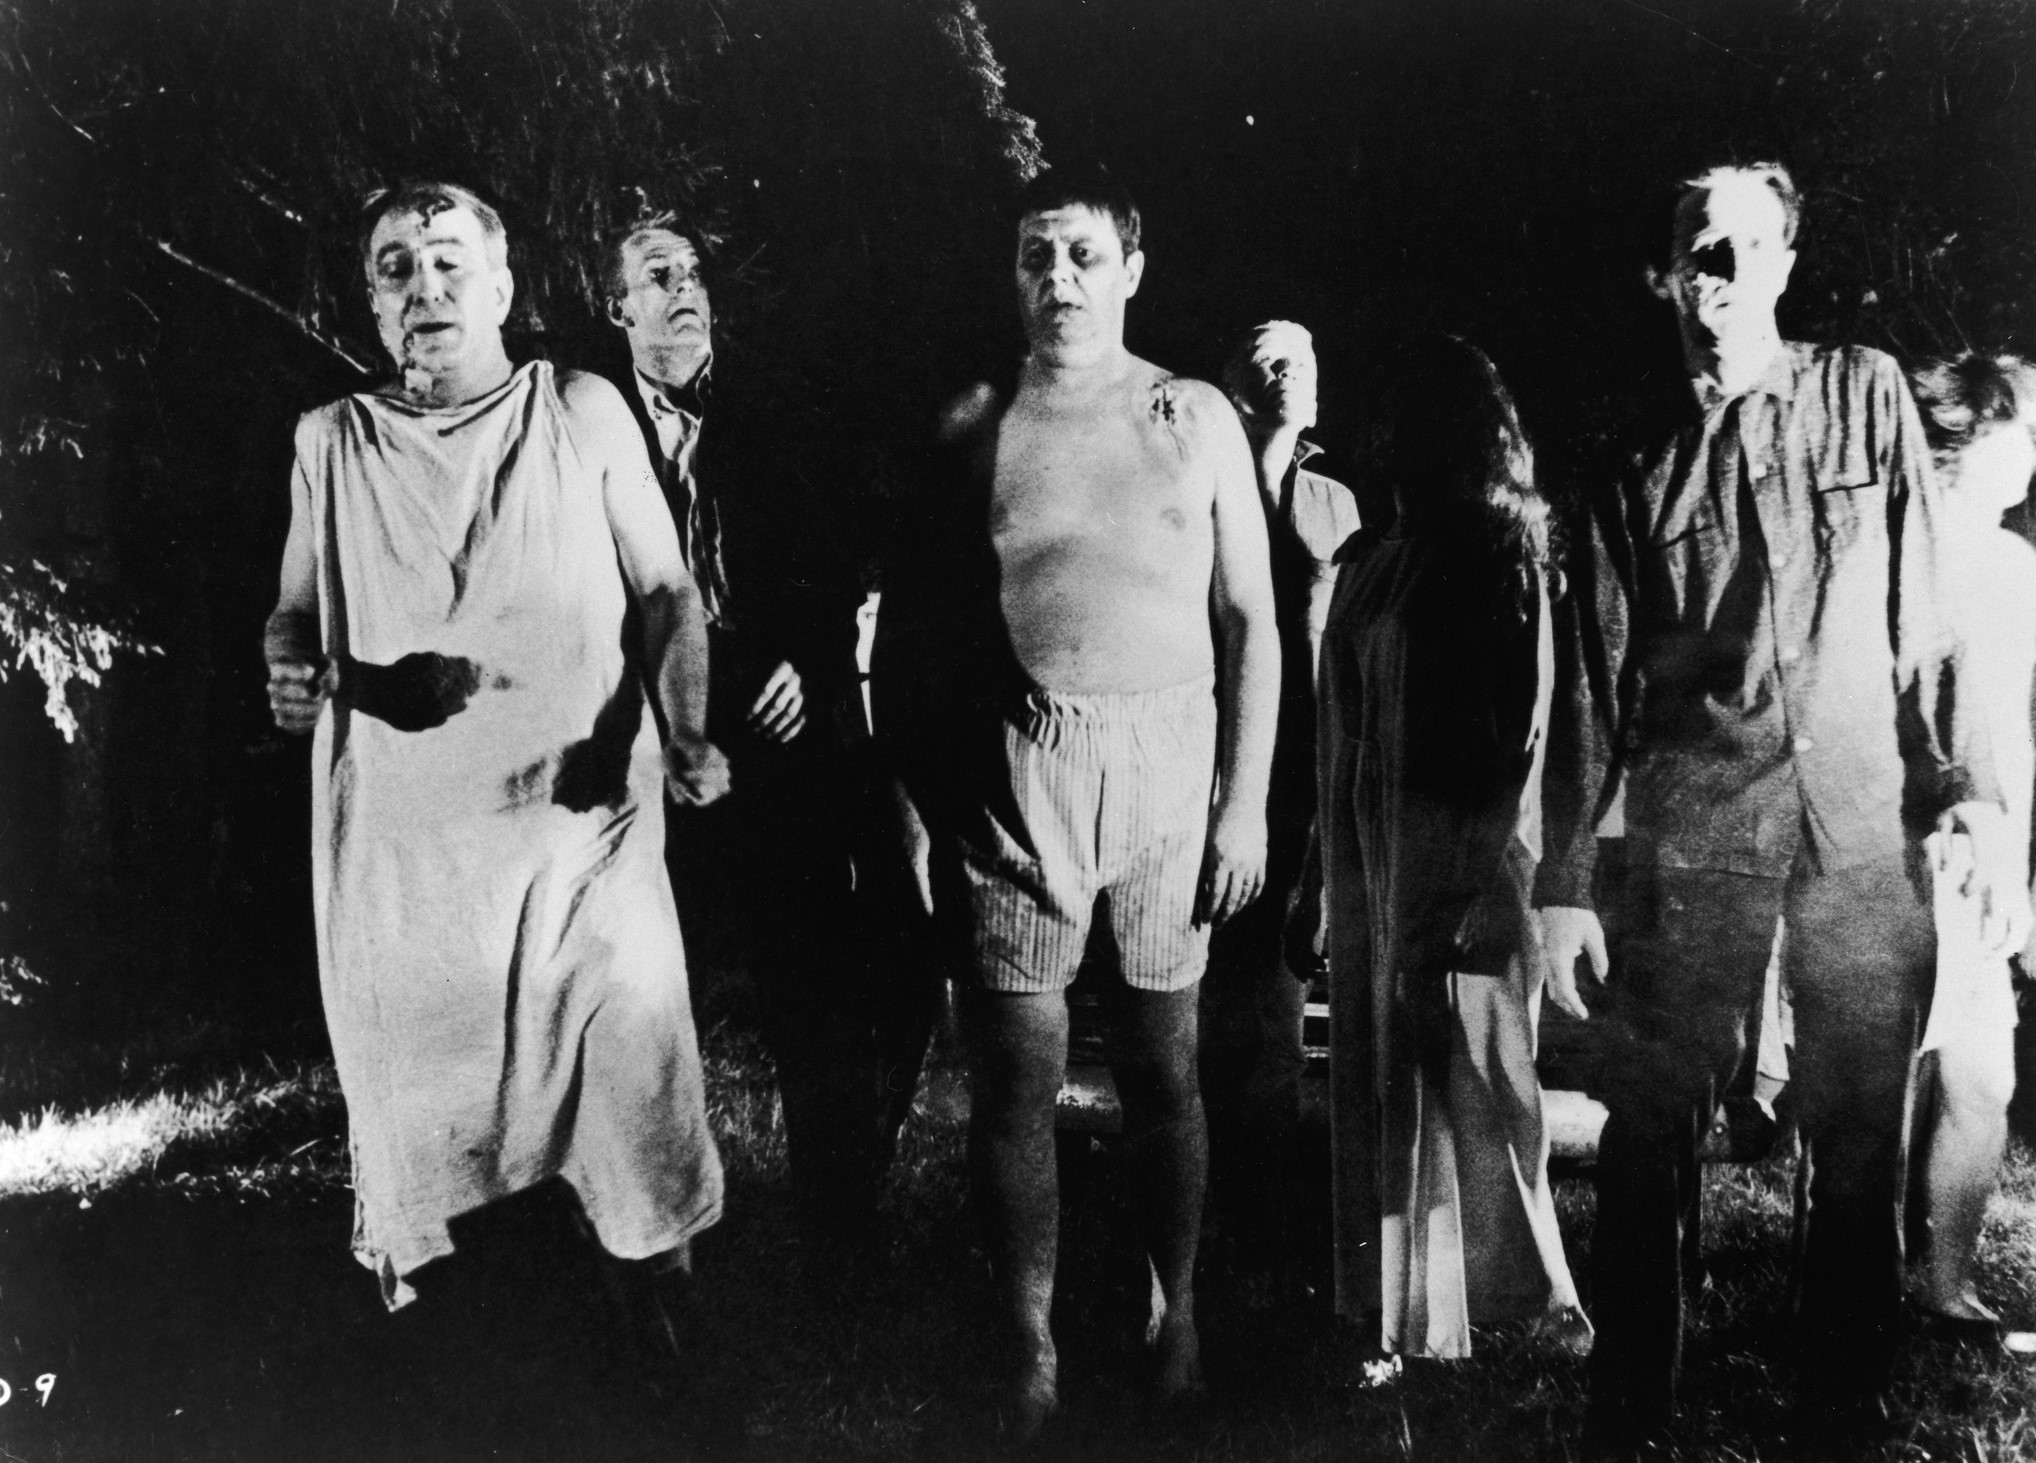 (Direction and cinematography both by George A. Romero - Screenshot from timeinc.net. Public Domain image. https://commons.wikimedia.org/w/index.php?curid=948189)
Starting new skills
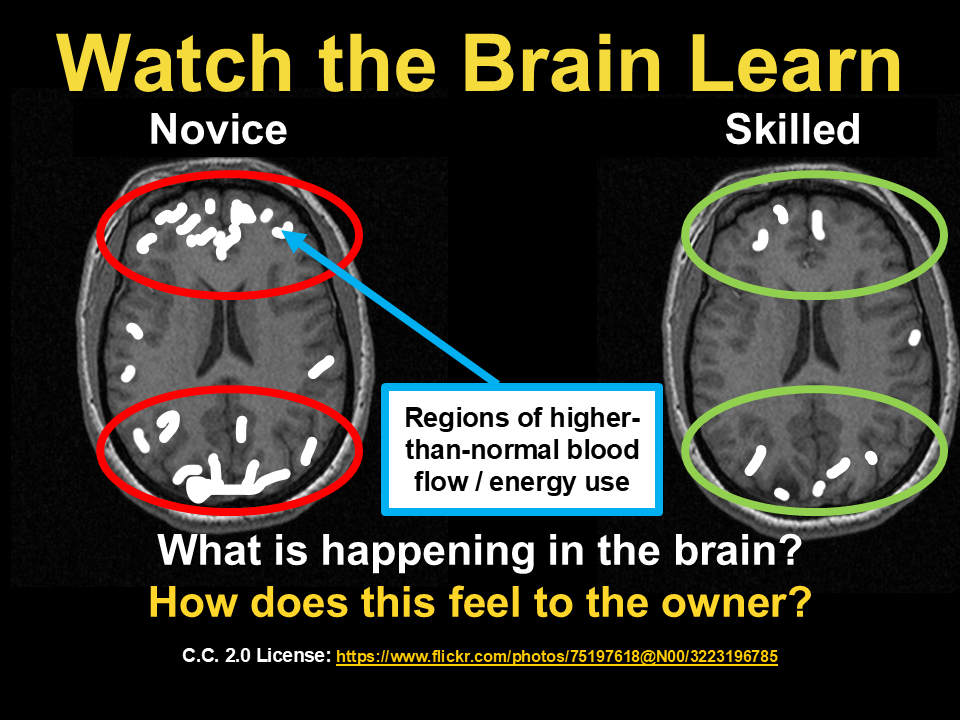
Let's take a careful look at the brain as it learns a new skill. Below is a slide that I show students and teachers with
fMRI images of a brain during the learning process. The areas appearing white in the brain scan are regions of higher-than-normal blood flow, which correspond to increased energy use and brain cell activity. When I show this slide, I ask two questions: What is happening in the novice brain and the skilled brain? What does it feel like to be the owner of each brain? Take a moment right now to ponder these questions as you examine the slide.
 (fMRI one by Kelley, adapted. Used under a Creative Commons license. https://www.flickr.com/photos/75197618@N00/3223196785)
Look at that novice brain go! It seems to be using the classic strategy: throw everything against the wall and see what sticks. I like to imagine the brain cells excitedly talking to one another and exclaiming they have no idea which switch to flip, so they're flipping them all in the hope that something useful happens. This is very energy intensive and I imagine the neurons hyperventilating in their frantic conversations. Learning something new is energetically taxing and feels tiring. Our students often associate this experience in class with feelings of confusion, doubt, or perhaps even despair! Learning is often hard. This is not a fault of the student; this is a fact of how our brains work. Students should understand this to better make sense of their learning experiences.
The skilled brain
Now let's consider the image of the skilled brain. How is it functioning differently compared with the novice brain? How does this brain feel? You (the teacher) should remember that this is likely how your brain feels when you are explaining to students your fancy physics ideas. In the fMRI we see much less energy use. Many more brain cells are quiet. It feels easy. This brain might not be thinking about the steps involved anymore, the skill might be automatic. In the experiment from which the brain scans were derived, the subject practiced a new visual-motor skill for 60 minutes. For the complex cognitive skills we teach in a physics classroom, the time needed to become a skilled brain could be shorter or longer, it just depends on how we breakdown the task.
The habit hump
Now we're ready to introduce the idea of the habit hump, an analogy I have created to help think through this skill learning process and the development of a new habit. Here is the slide I use to introduce this to my students.
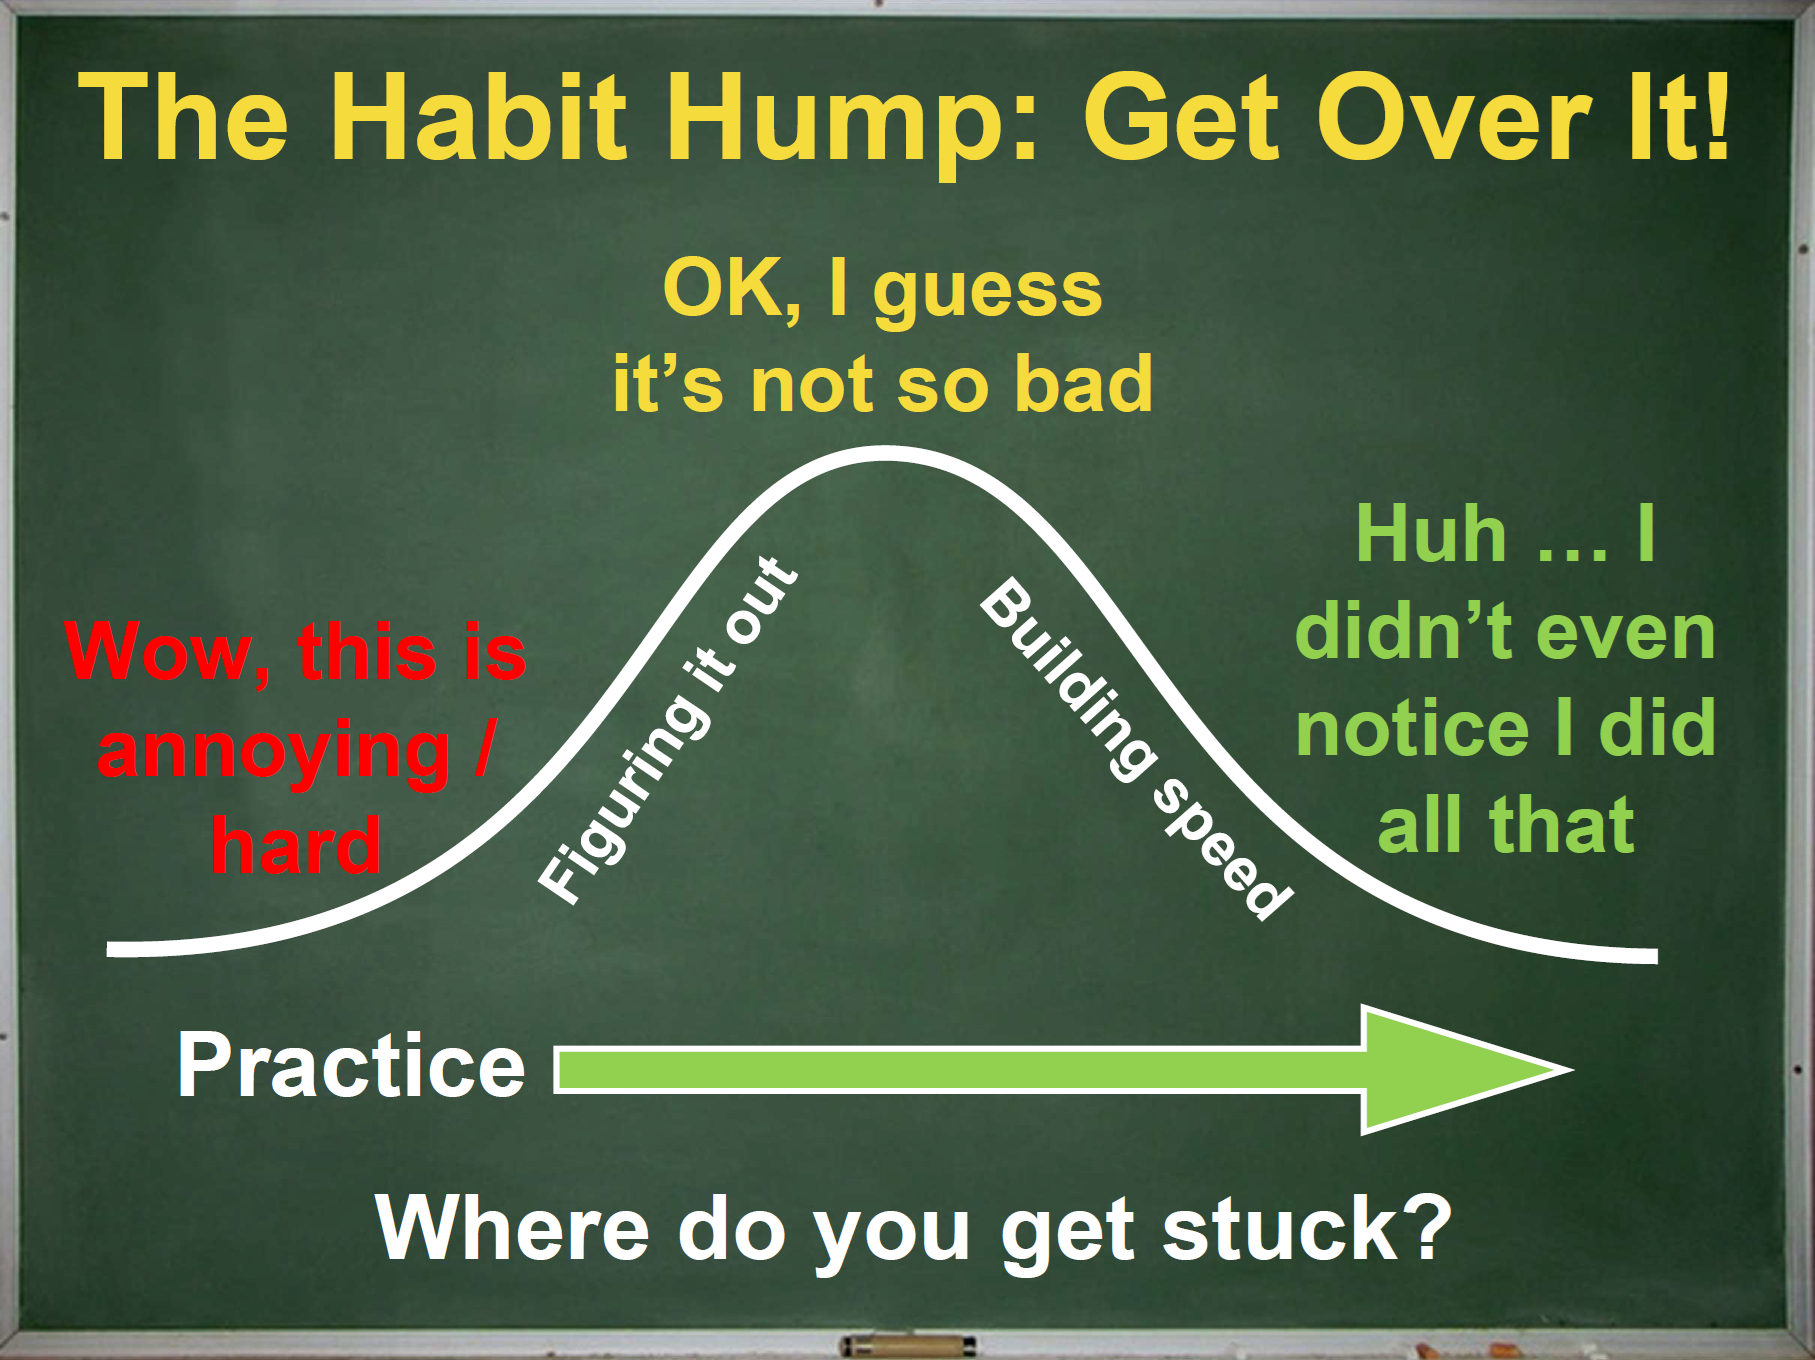
Let's turn this psychological exploration into a bit of a story. Imagine you are beginning to learn a new skill and stand at the bottom of the habit hump. You see this tall hill looming above you and your mind begins to flood with thoughts: “wow, this is a tall hill”, “what a pain, do I really have to do this”, “this is going to be so hard”. I'm sure that you, fearless teacher, have never had thoughts like these! The only way to make it up that hill is through practice, and at first all those brain cells are frantically firing. You are doing the hard work of figuring out how to perform this skill. The climb up is exhausting. Fortunately, you stick to it and soon notice each step forward becomes a bit easier as you reach the crest of the hill. From the vantage of the top, you look around and can see where you came from. You wipe your brow and think to yourself, “OK, this isn't too bad, I can do it.” You have figured out how to reliably perform this skill! You take a moment to celebrate on the hilltop. But you are not done! While the skill makes sense to you now and you can successfully perform it, you can’t do it quickly and easily. You are at the middle image in the fMRI brain scans. More practice is required! You must descend the slope of the habit hump. And as you go down, you get faster and faster. By the time you reach the bottom, you are performing the skill so quickly and easily that you no longer notice or think about it. It is now a fluent habit.
Get over it
There are two processes we need to complete to get over the habit hump: we need to figure out how to perform the skill and then we need to practice it until it is fluent. In my own classroom teaching when I first changed to an inquiry model, I prioritized the figuring-out process. I wanted my students to build a deep understanding of physics concepts. I was quite surprised when the test came around and many students failed. I quickly realized that I had overlooked an important part of learning: building skill fluency. My students became bogged down in their attempts at the deeper conceptual learning because the skills they needed were not fluent and still very cognitively demanding. The first part of the learning process can be very daunting when we stand before the tall hill and are summoning the willpower to surmount it. But there is another moment that is equally challenging, which is when we reach the top of the hill. From there it can be tempting to dust off your hands, congratulate yourself on figuring things out, and then abandon the skill development process before it becomes a fluent habit. I remember when I was taking my second-year electricity and magnetism course and was writing the midterm exam. I was furiously deriving some basic trig relationships when I paused mid-flight and reflected that this is probably not what I should be doing during an exam. Those skills should have been fluent and automatic. I recognized my own lazy habit of stopping at the top of the hill, feeling just swell that I figured things out, before abandoning the rest of the skill development process.
Where do we get stuck?
This is a question I ask my students: where do you tend to get stuck? We are all different and often get stuck on the habit hump. Is it at the beginning when we don't know how to start, or the task seems annoying or hard and we choose not to engage with it? Is it discouraging when you see other people going up and over the hump much faster than you? Or is it at the top after you figure it out and proudly proclaim, “Good enough. Moving on to something else”? I think a lot of classroom experience is designed to get students to the top of the hump. We devise fun and engaging activities to introduce an idea, explore its in-and-outs, and then provide some basic practice. But then we feel the curriculum breathing down our necks, compelling us to move on to a new topic before our students have a chance to develop their fluency. Soon test time comes around and we experience shock and surprise when our students are hesitant and slow with their new skills. How can they take so long to write this test? It’s almost inconceivable! Except, it is quite conceivable.
Hump hurdling pedagogy
So how do we design lessons and plan our courses to help students routinely hurdle the hump? Here are a few ideas:
- Focus. Be more focused with skill development. If you introduce a skill, make sure it is used many times throughout the unit or course. If it is not frequently used in a meaningful way, consider carefully whether the skill should be learned in the first place! Focusing on fewer skills overall will help provide the time to develop them more deeply and reliably. This is a good thing! Superficial skills that are lost as quickly as they are acquired don't help our students in the medium and long term (unit test, final exam, future course of study, life).
- Smaller pieces. Break up the skills into smaller, clearly defined pieces that students can recognize and easily practice. Design a clear and logical continuum to build up the skill. Help students understand how the skill works and why it is useful.
- Identify the skills. Especially early on, be very explicit when the skill is being used. Provide helpful structure or scaffolding to prompt the skill’s use.
- Feedback. Provide regular and detailed feedback for skill development. The weekly quiz or monthly test is not enough. Students need high quality, daily feedback.
- High standards. Don't accept substandard products showing poor skill use. It is very wasteful when students practice and reinforce poor quality or incorrect skills. Send it back to be fixed! Do this more than once if needed! Don’t just accept it and give it a 50% on their first attempt.
- Metacognition. Teach students about the learning process. Help them recognize where on the hump they tend to get stuck and practice strategies to unstick themselves.
A physics skill: draw a ray diagram
I have been working on the grade 10 science course for my school and find myself thinking a lot about skill development in this course. The optics unit develops an important skill: drawing ray diagrams. Here's a quick tour of how we do this. Note the steps in this process that explain how the skill works or why it is useful. If you're curious about all the details and the surrounding lessons, feel free to explore
the resources I have produced for grade 10 science.
Optics Lesson 1:
- We observe how light travels in straight lines. We begin by drawing straight lines in our first ray diagram.
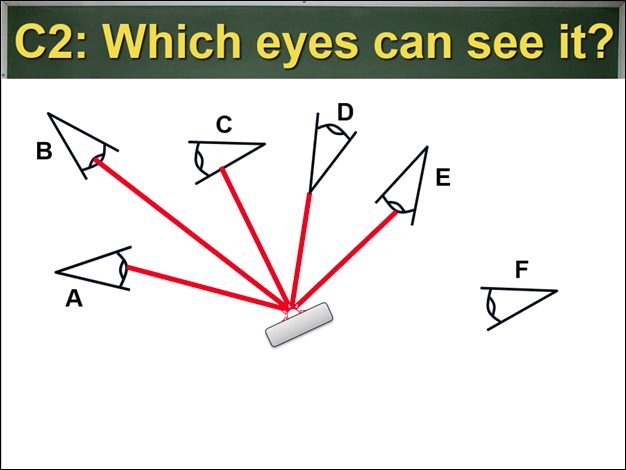
- We test these light paths and infer that light energy travels along them in one direction. We add arrows to our lines in the ray diagrams.
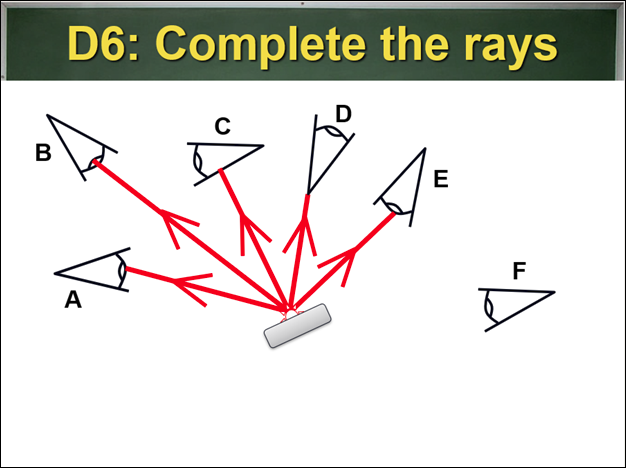
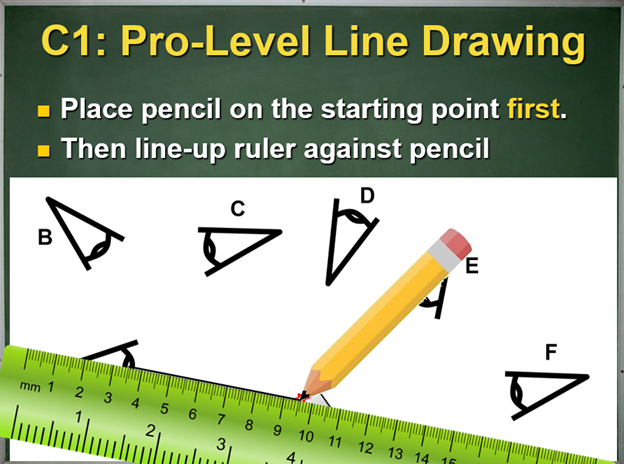
- Students watch an exciting video that I created demonstrating how to draw straight lines using a pencil and ruler. Have you been explicitly taught how to do this?
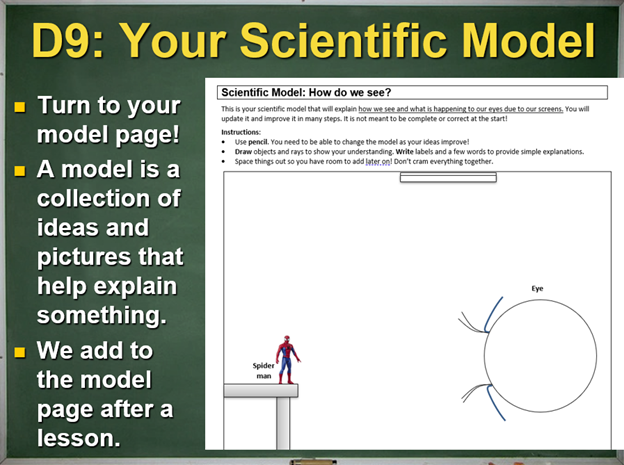
- We begin creating a model that explains how we see.
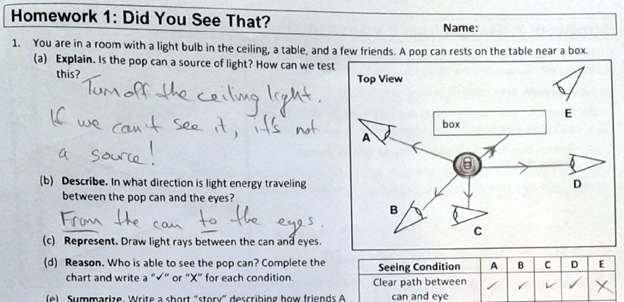
Homework Lesson 1:
- In the first homework set, students practice ray diagrams and compare their work with the solutions that I post online. Students use a different colour (we call this our blue-pen technique) to make corrections or improvements to their work.
Optics Lesson 2:
- Students hand in their corrected homework. I provide further feedback by indicating where additional corrections or improvements are required. It is returned to students to be corrected until it is acceptable. This routine continues with the rest of the unit’s homework.
Optics Lessons 3+4:
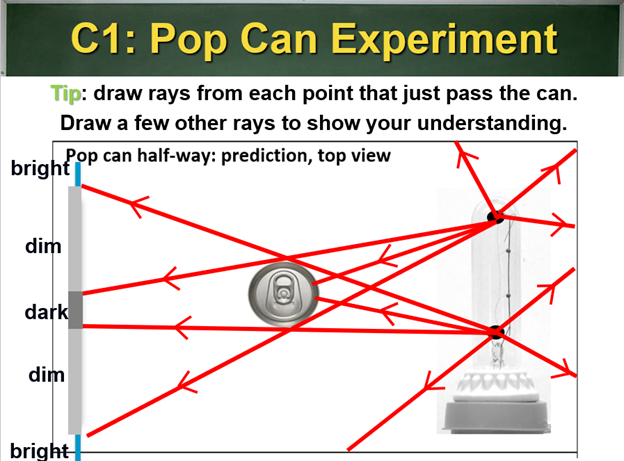
- We learn how to interpret ray diagrams and explain how rays of light create bright spots and shadows with different sources and obstacles.
Optics Lesson 5:
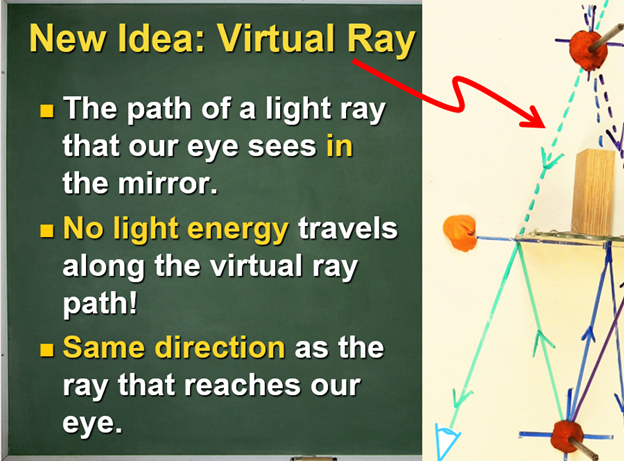
- While studying mirror reflection, we observe that objects cannot block the “rays of light” that our eyes perceive to be coming from behind a mirror. We call these rays of light that don't exist, virtual rays. (No energy travels along these rays. Note our energy theme connected with rays.)
Optics Lessons 6-11:
- Students draw ray diagrams in each lesson for refraction and then lenses.
Optics Lesson 12:
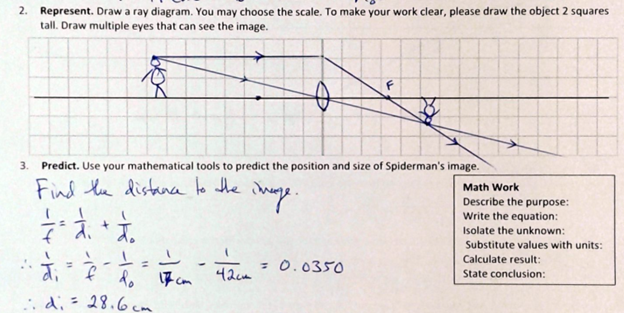
- We continue using our ray diagram skills as we explore the thin lens equation. Every thin lens problem starts with drawing a ray diagram. The diagram should be consistent with the calculated results and the SALT characteristics of the image! (SALT = size, attitude, location, type)
Not in any lesson:
- Waves and electromagnetic radiation. We get rid of unhelpful content! We do not introduce or discuss the wave model of light. This is conceptually inconsistent with the ray model of light. Just ask Newton.
Climate Change Unit:
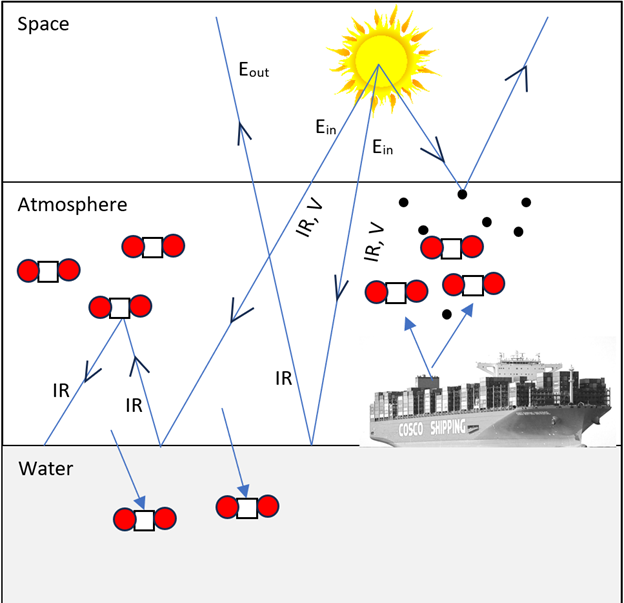
- And climate change is all about understanding the movement of light energy and how light interacts with gases in our atmosphere. We still don’t discuss the wave model of light, just light with different energies (colours). Luckily, we have developed tools to help us picture this! Wow, imagine science being useful in multiple contexts!
Tags: Optics, Pedagogy
