Eric Haller, Occasional Secondary School Teacher, Peel District School Board
eric.haller@peelsb.com
This summer I had the opportunity to teach the grade 12 college-level physics course for the first time.
Due to the nature of summer school in my board, I was not given access to any of the school’s science equipment or textbooks; thus, I had to come up with plenty of simple, wallet-friendly, hands-on activities for the students. While I came up with a few good experiments and demonstrations, my favourite activity was an experiment to see how much my students ‘suck’; or in more professional and appropriate terms, how strong of a vacuum they could create with only their mouths. To measure this, all you need is a long straw and some water. Keep reading to find out how!
First, here’s a quick refresher on how a regular drinking-straw works. Many students (and even adults for that matter) have a preconception of how it functions, thinking that when you suck on a straw, you ‘pull’ the liquid (let’s assume water) up the straw. This is wrong! When you start sucking the air out of a straw, you create a region of lower-pressure air inside the straw. While this air does have a lower pressure when compared to the rest of the air in the environment, it is still somewhat pressurized, and should therefore push the water in the straw down; not ‘pull’ it up. But then why does the water go up a straw? The water inside the straw goes up because the rest of the water in the cup is being compressed by the atmospheric pressure! Since the pressure from the atmosphere pushing down on the surface of the water in the cup is stronger than the pressure of the air pushing down on the water inside the straw, the water will go up the straw. It is very important to realize that the water doesn’t get ‘pulled’ up by the drinker, but gets ‘pushed’ up by the surrounding atmospheric pressure.
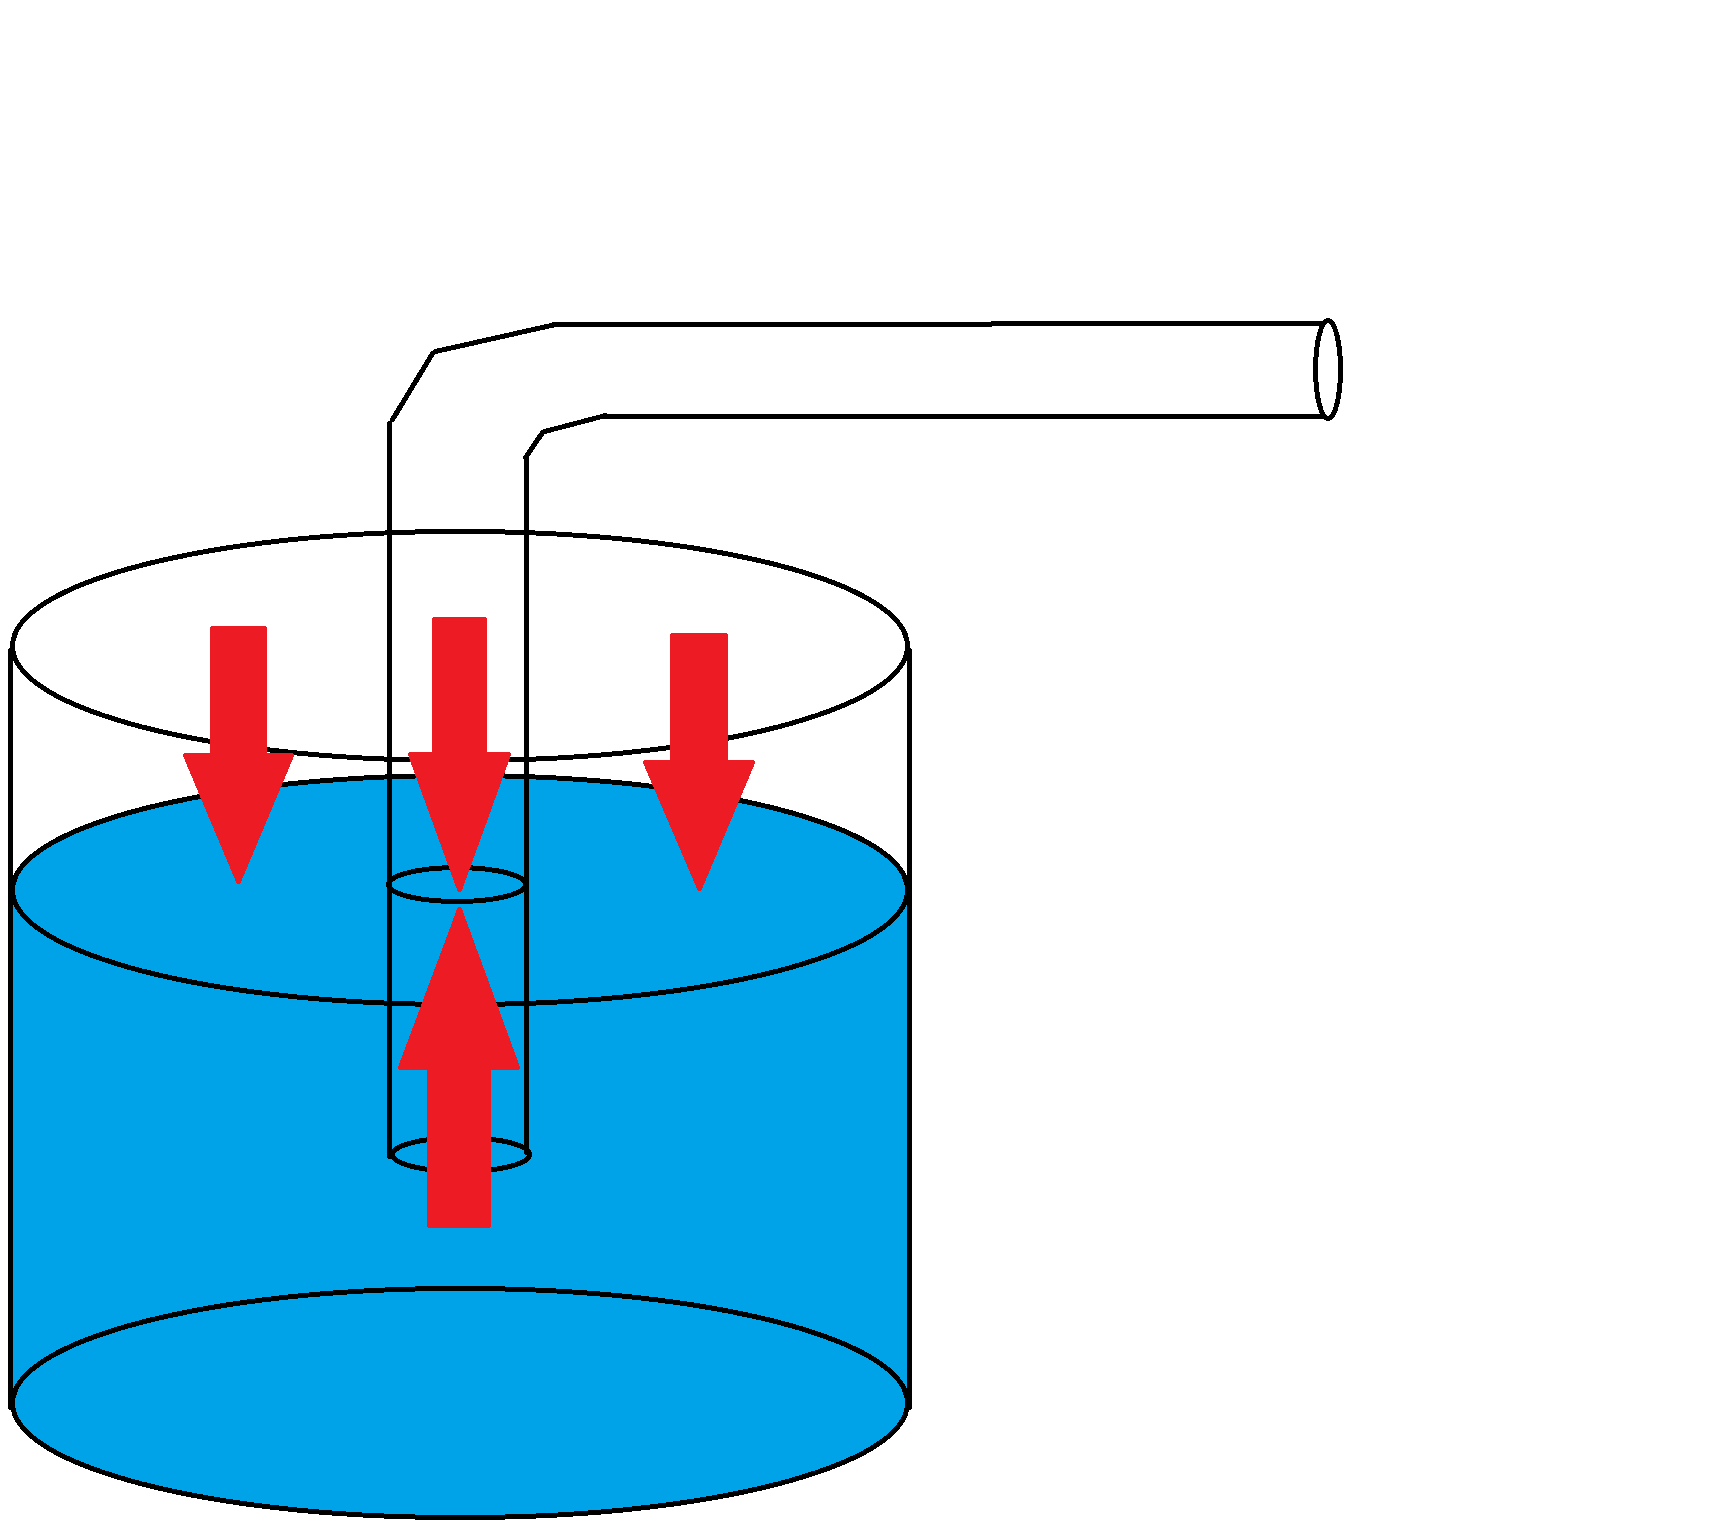 Figure 1: A diagram showing a straw partially submerged in water, with pressure depicted by the red arrows. Note that both the air and the water are equally pressurized.
 Figure 2: A diagram showing someone sucking on a straw, with pressure depicted by the red arrows. Note the smaller arrow indicating a smaller pressure.
Okay, so why is this all so important? Well, even if you were able to create a perfect vacuum with your mouth, since the atmospheric pressure can only push so hard, the water will only ever go so high up the straw. At some point the force from the pressure in the atmosphere pushing the column of water up the straw would become balanced by the weight of the water column inside the straw itself, and the water would stop rising when it reaches that equilibrium. For water at standard atmospheric pressure, if you were to manage to create a perfect vacuum, it would go (spoiler alert) about 10.3 m up the straw. This is exactly how a barometer works, except it is typically filled with liquid mercury. Mercury only goes up about 760 mm of straw because of its high density; thus, we often say atmospheric pressure is about 760 mmHg. Note that since the atmospheric pressure in the air is independent of what liquid you happen to put in your barometer, we could say 760 mmHg = 10.3 mH
2O (note though that not many people in the scientific community use mH
2O as a unit of measurement).
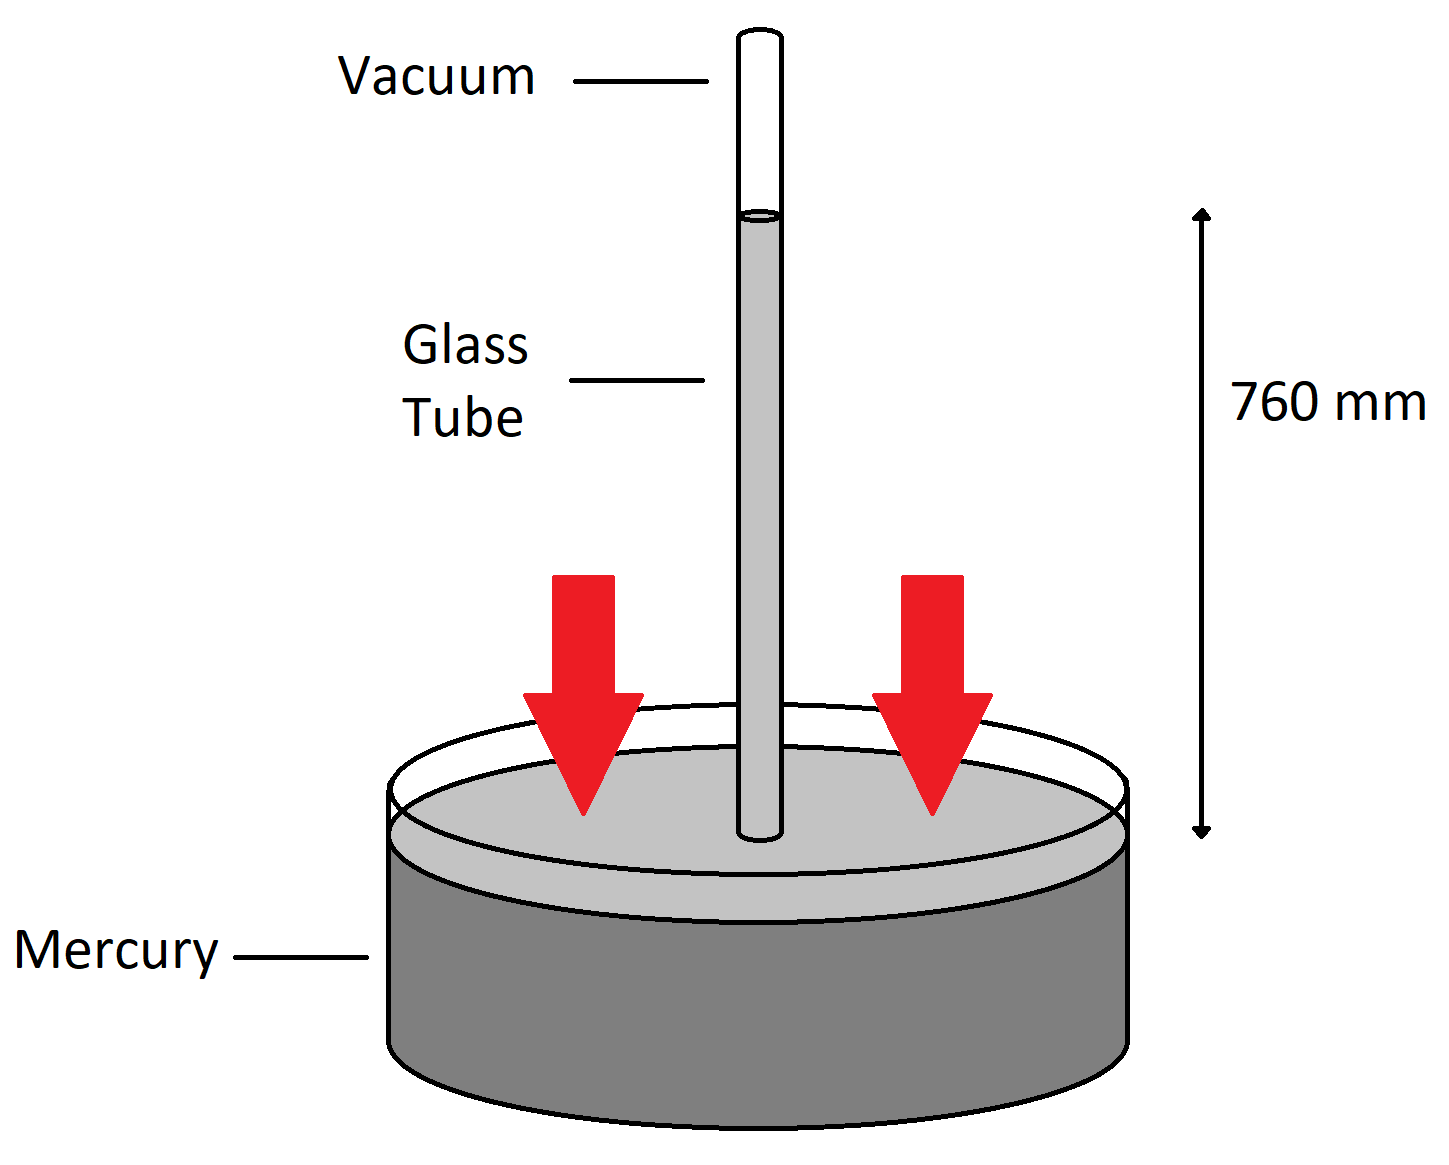 Figure 3: A mercury barometer with a perfect vacuum showing that mercury rises to a height of 760 mm. The red arrows indicate the atmospheric pressure. Note that the vacuum does not exert any pressure.
Since nobody can create a perfect vacuum using their mouth, we know that if we were to give any of our students a straw, they wouldn’t be able to suck water up to a height of 10.3 m; but they should be able to suck it up a significant portion of that height. By performing the experiment and measuring how high the water goes, we’ll be able to calculate the reduced pressure that a student produced with their mouth inside the straw and ultimately answer the question of how much that student ‘sucks’. Below I’ll detail everything you’ll need to carry out this experiment with your students.
Step 1
You’ll need something long and see-through to act as the straw. While the straw need-not be any longer than 10.3 m, there’s no drawback to getting a longer one. I would recommend getting one longer than that as the extra length will leave you with more options on where in your school you can do the experiment. Also, the longer straw means you won’t need to worry about any student getting the water in their mouth. I recommend a length of about 12 m. The straw itself must be fairly firm, as a flimsy straw material will cave-in on itself if the pressure is reduced too much inside of it, especially over such a long distance. For the straw, I recommend you go to a hardware store and get the tubing that would supply your fridge’s ice-maker with drinking water. The diameter of the straw doesn’t matter; a student would take longer to suck the water up a wider straw to its maximum height, but that final height would ultimately still be the same height as that of a narrower straw. These tubes are see-through, rigid, and have the bonus of being nontoxic. Here’s a picture of some tubing I was able to find in the plumbing aisle of a Home Depot.
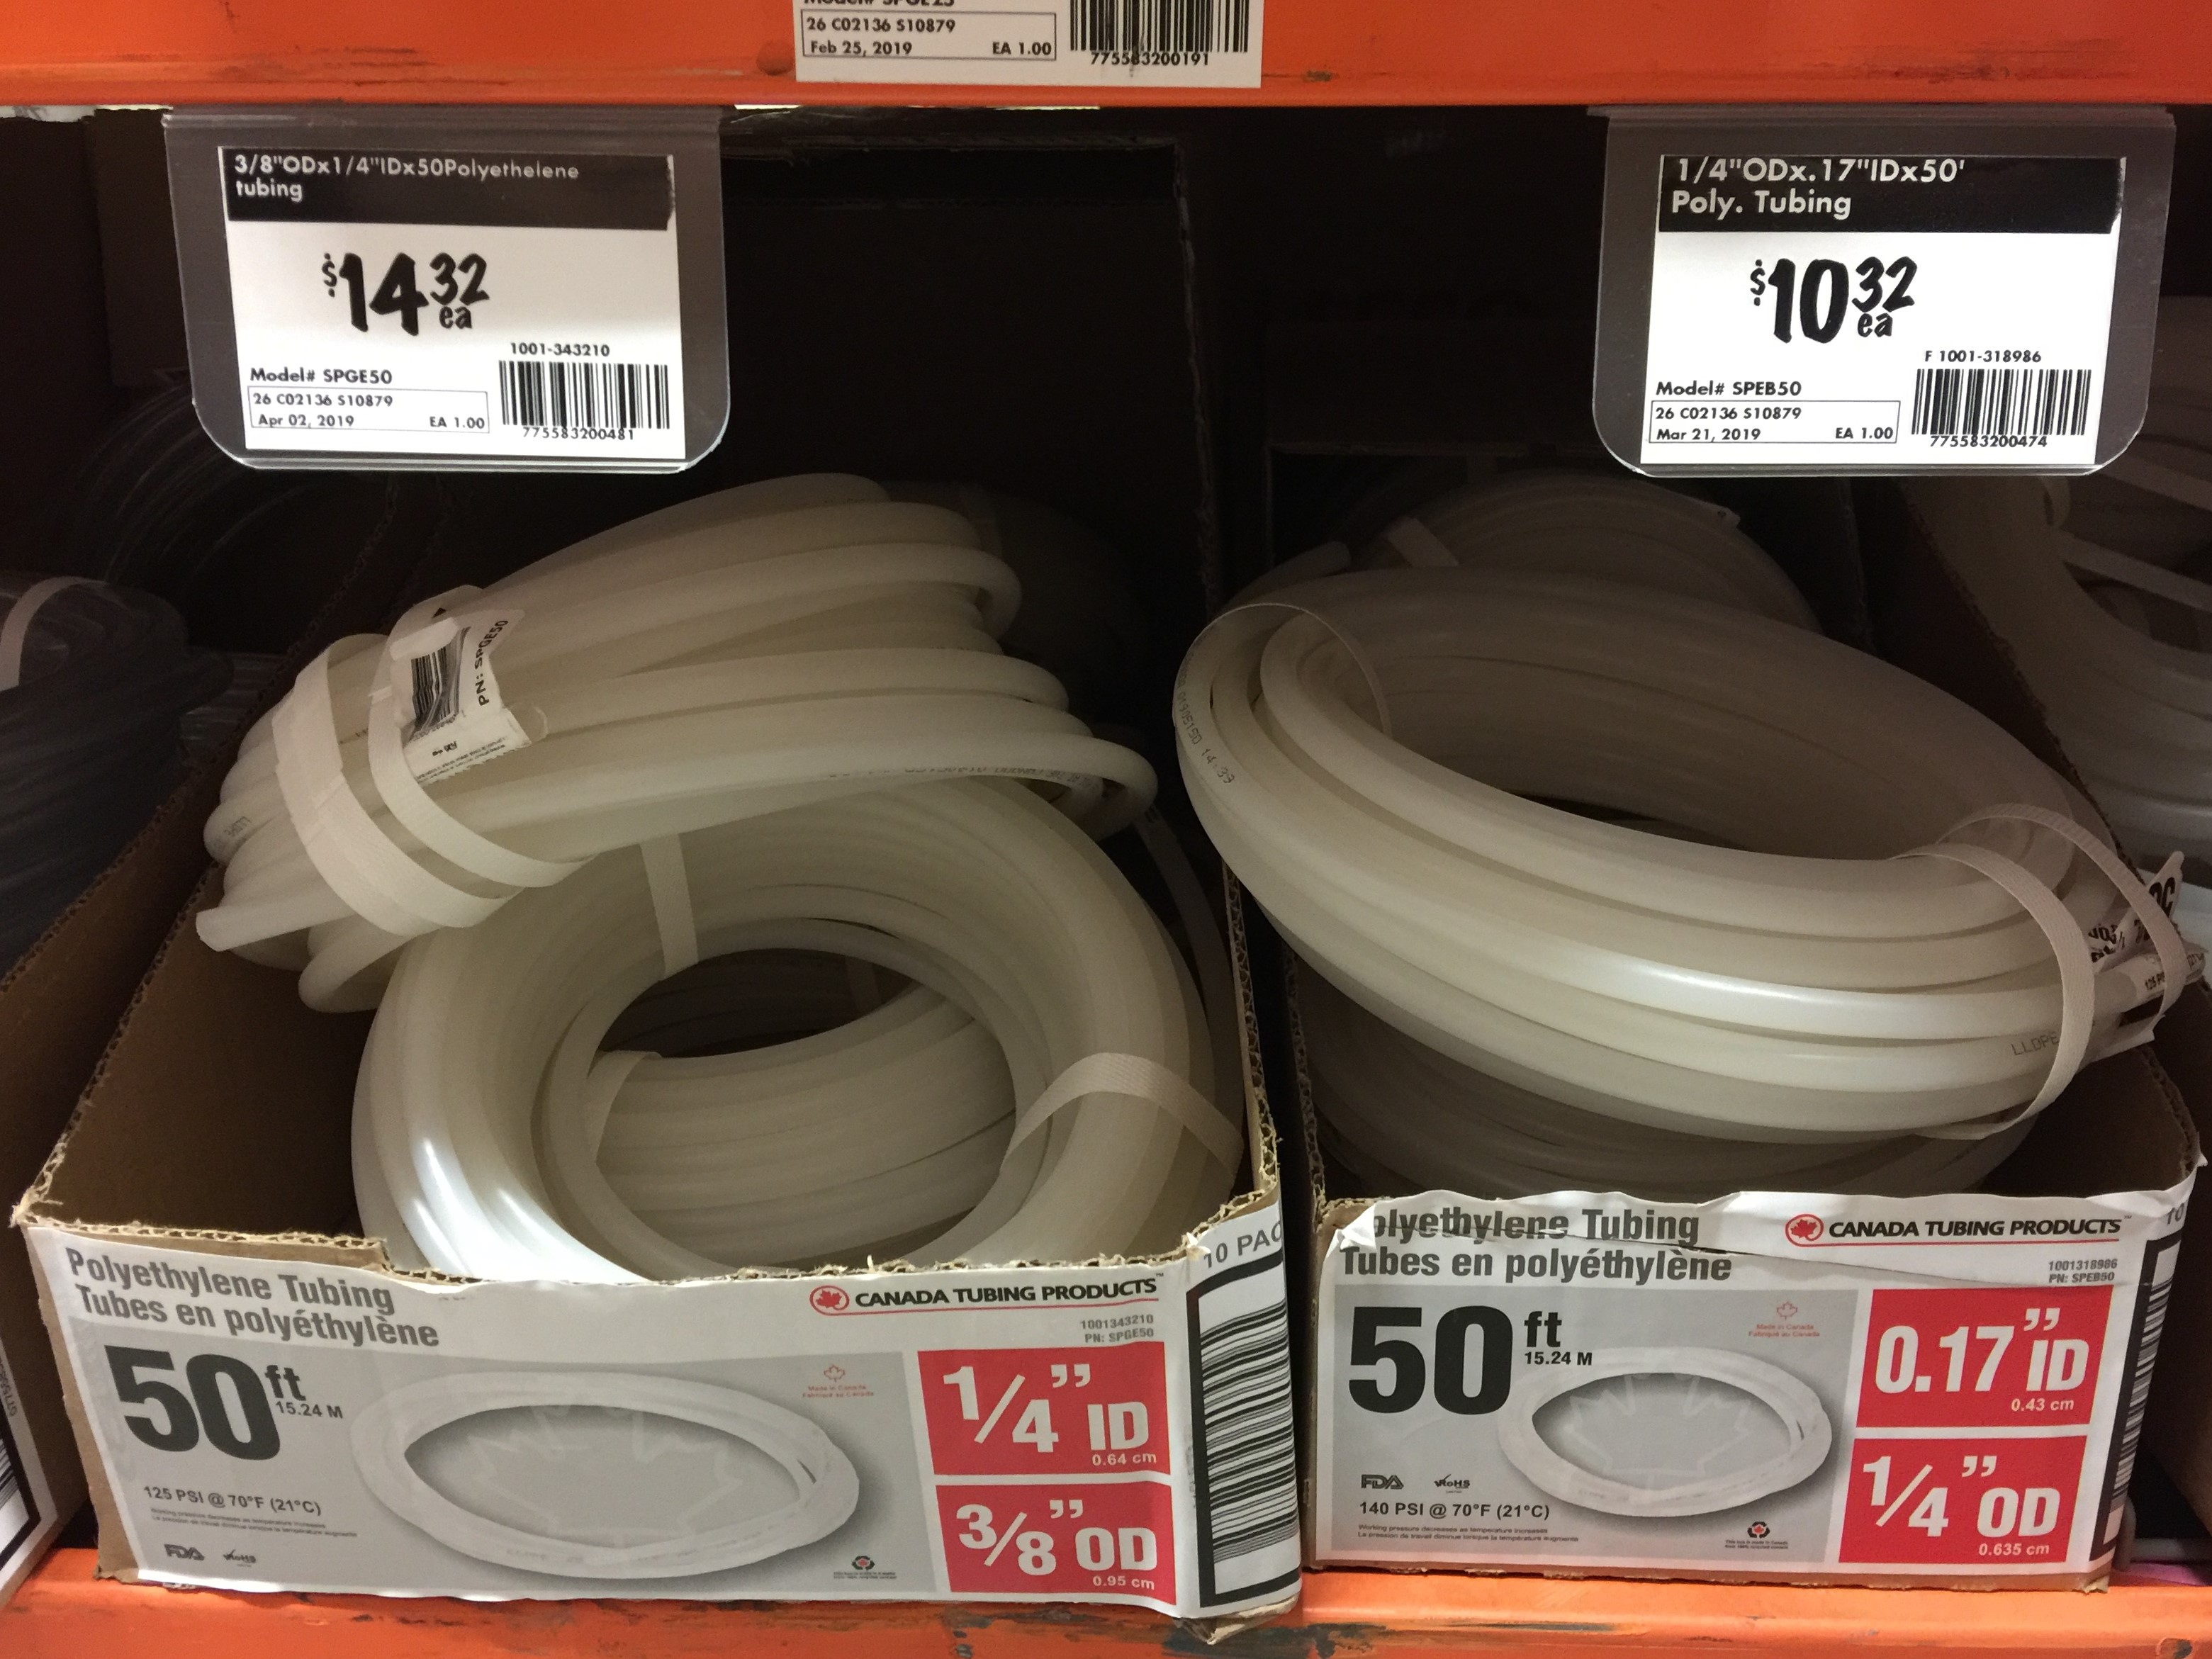 Figure 4: The tubing I bought for this activity from the plumbing aisle of a Home Depot.
Step 2
You’ll need some water. You won’t need too much, a 2 L pop bottle of it should do fine. To make it easier to see the water inside the straw, consider adding some food colouring to it. Alternatively, you could use a darker liquid, like pop, but I found out the hard way that carbonated beverages fizz when you stick a long plastic tube in them, and the carbonation also creates large, unwanted bubbles inside the straw. Something like cranberry juice would work well, however if it contains a lot of sugar it will be denser than water, slightly altering the calculations. If you use juice instead of coloured water, choose one that has no added sugar.
Step 3
You’ll need a spot in your school to perform the experiment. Some students will manage to suck the water up by about 7 m, so you’ll have to find a location where someone’s mouth would be higher than that above the floor. If your school has three storeys, great, otherwise the second floor will be almost high enough; supplement the height with a ladder or something if need be. My school was three storeys tall, and the main atrium had an excellent open-concept staircase for when I did this activity. Here are pictures of what it looked like when I did the experiment with my class. Note that their faces have been altered to hide their identities.
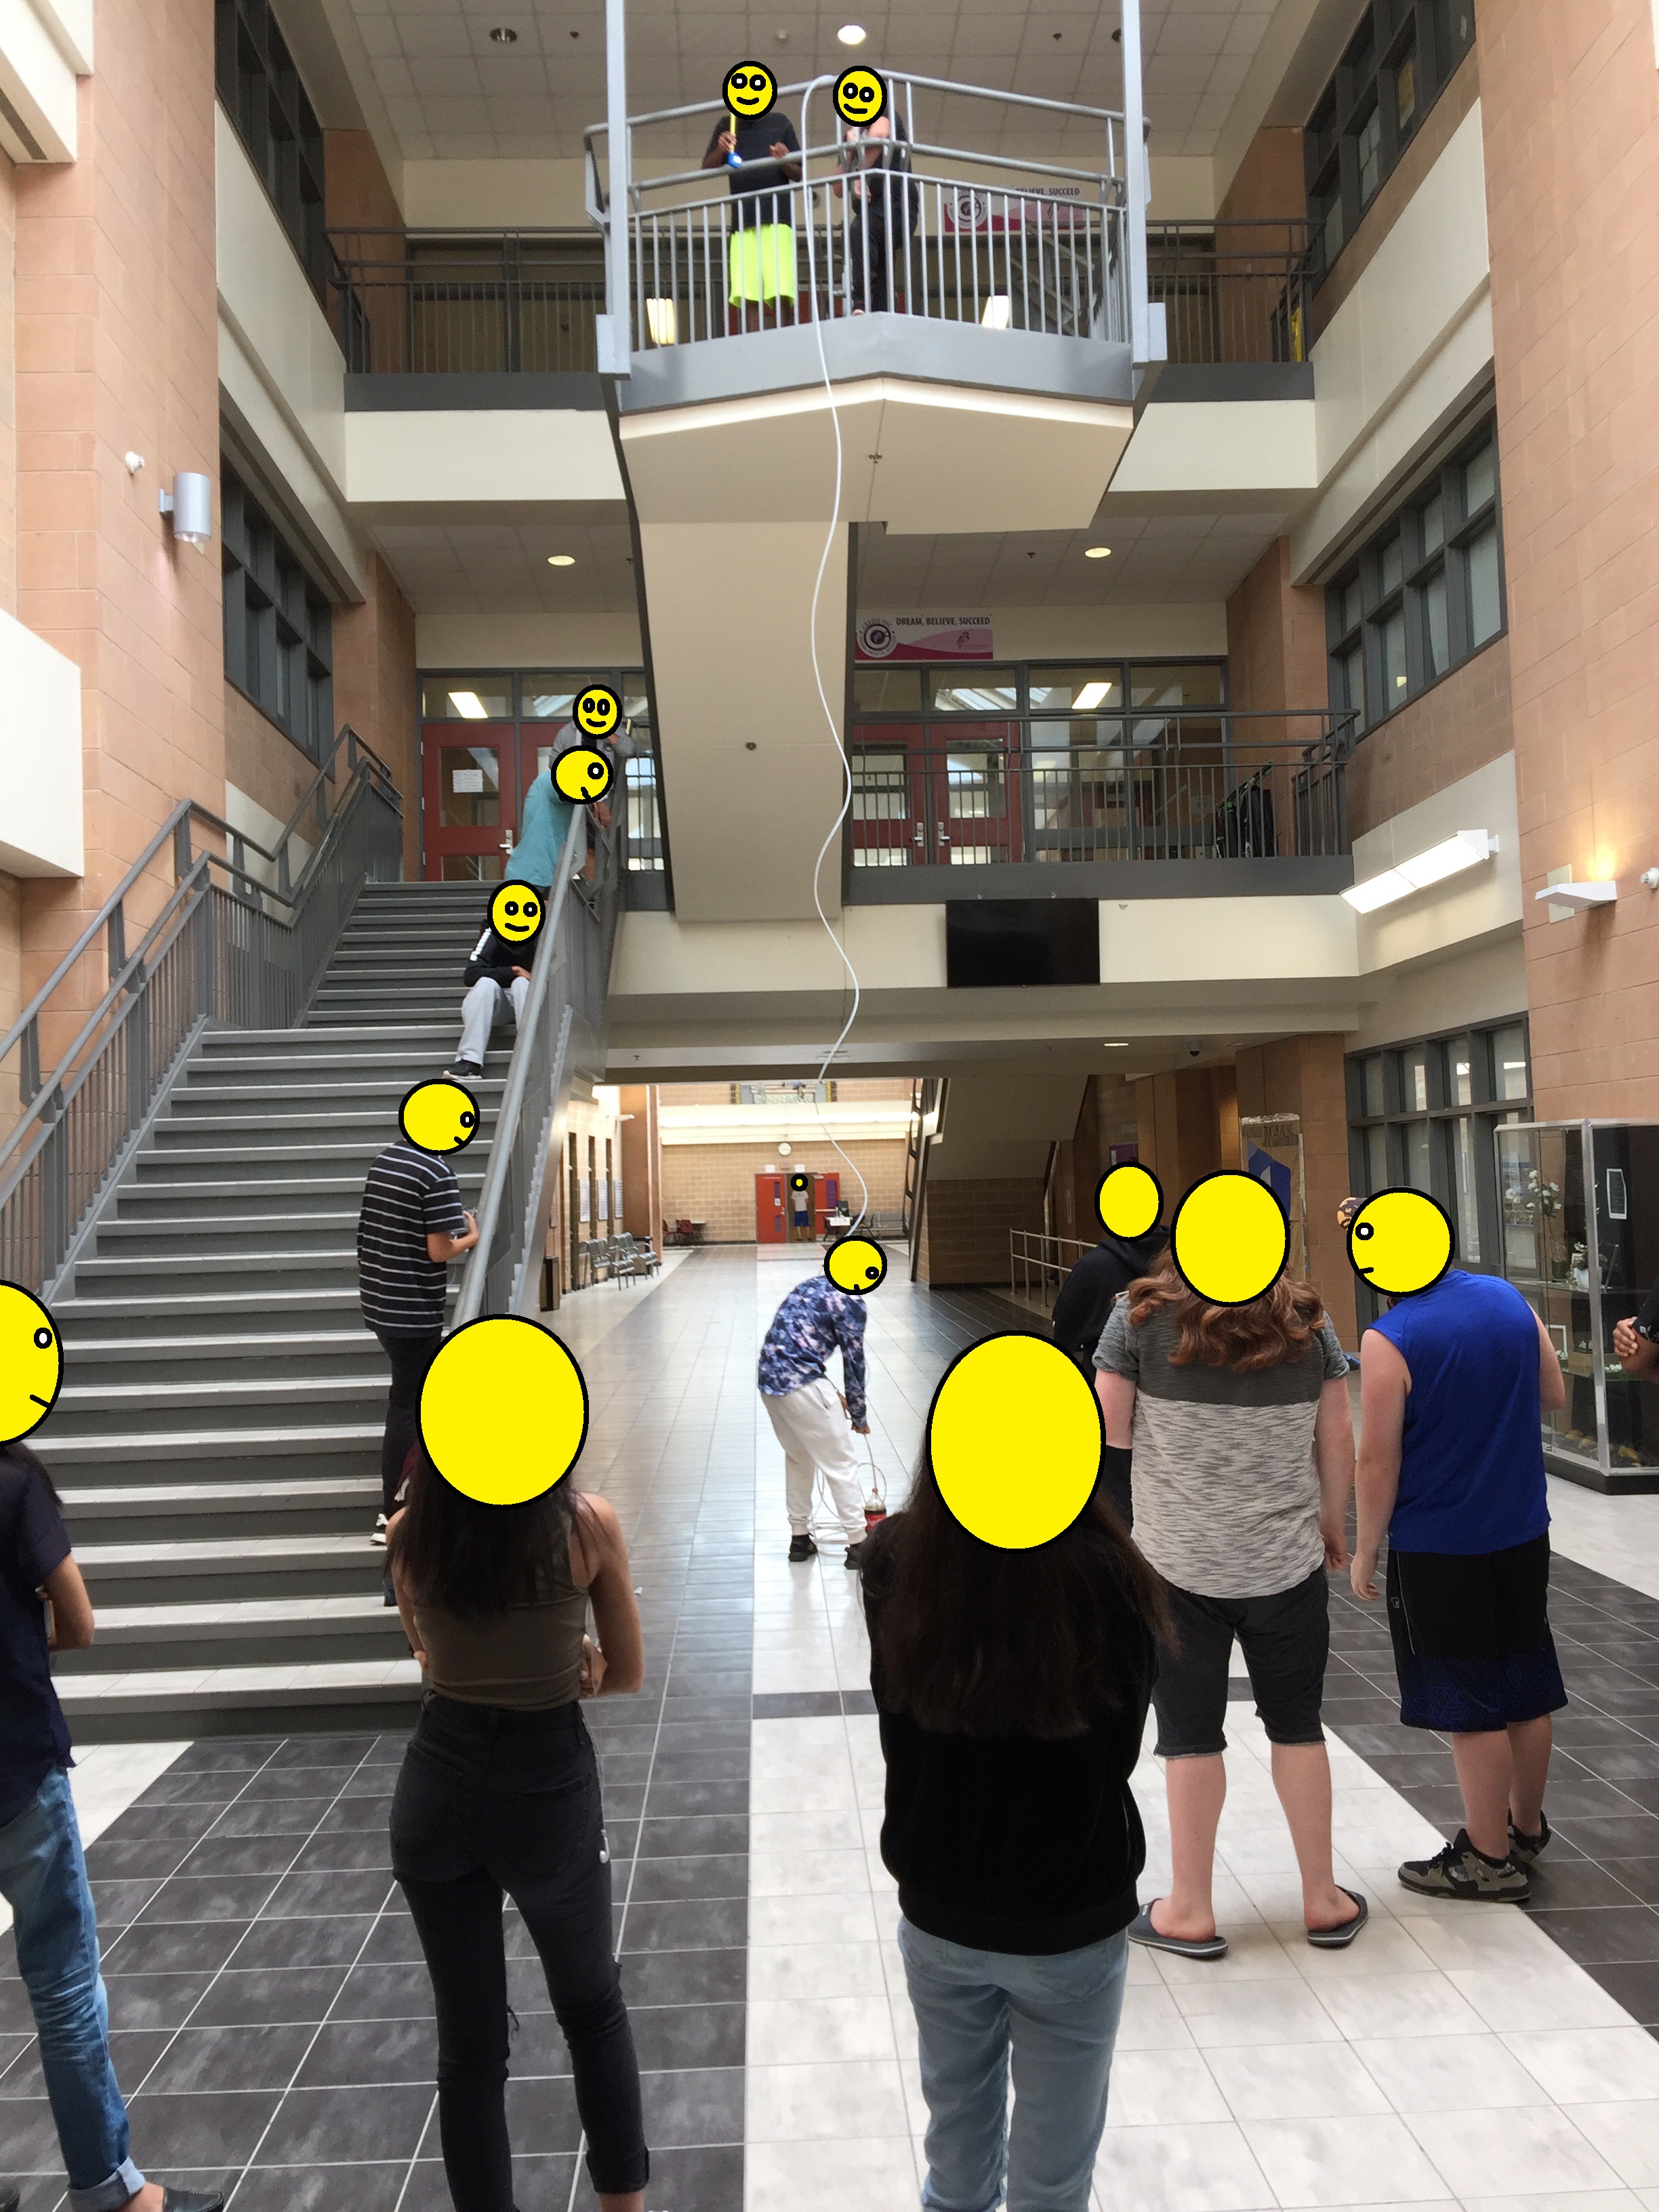
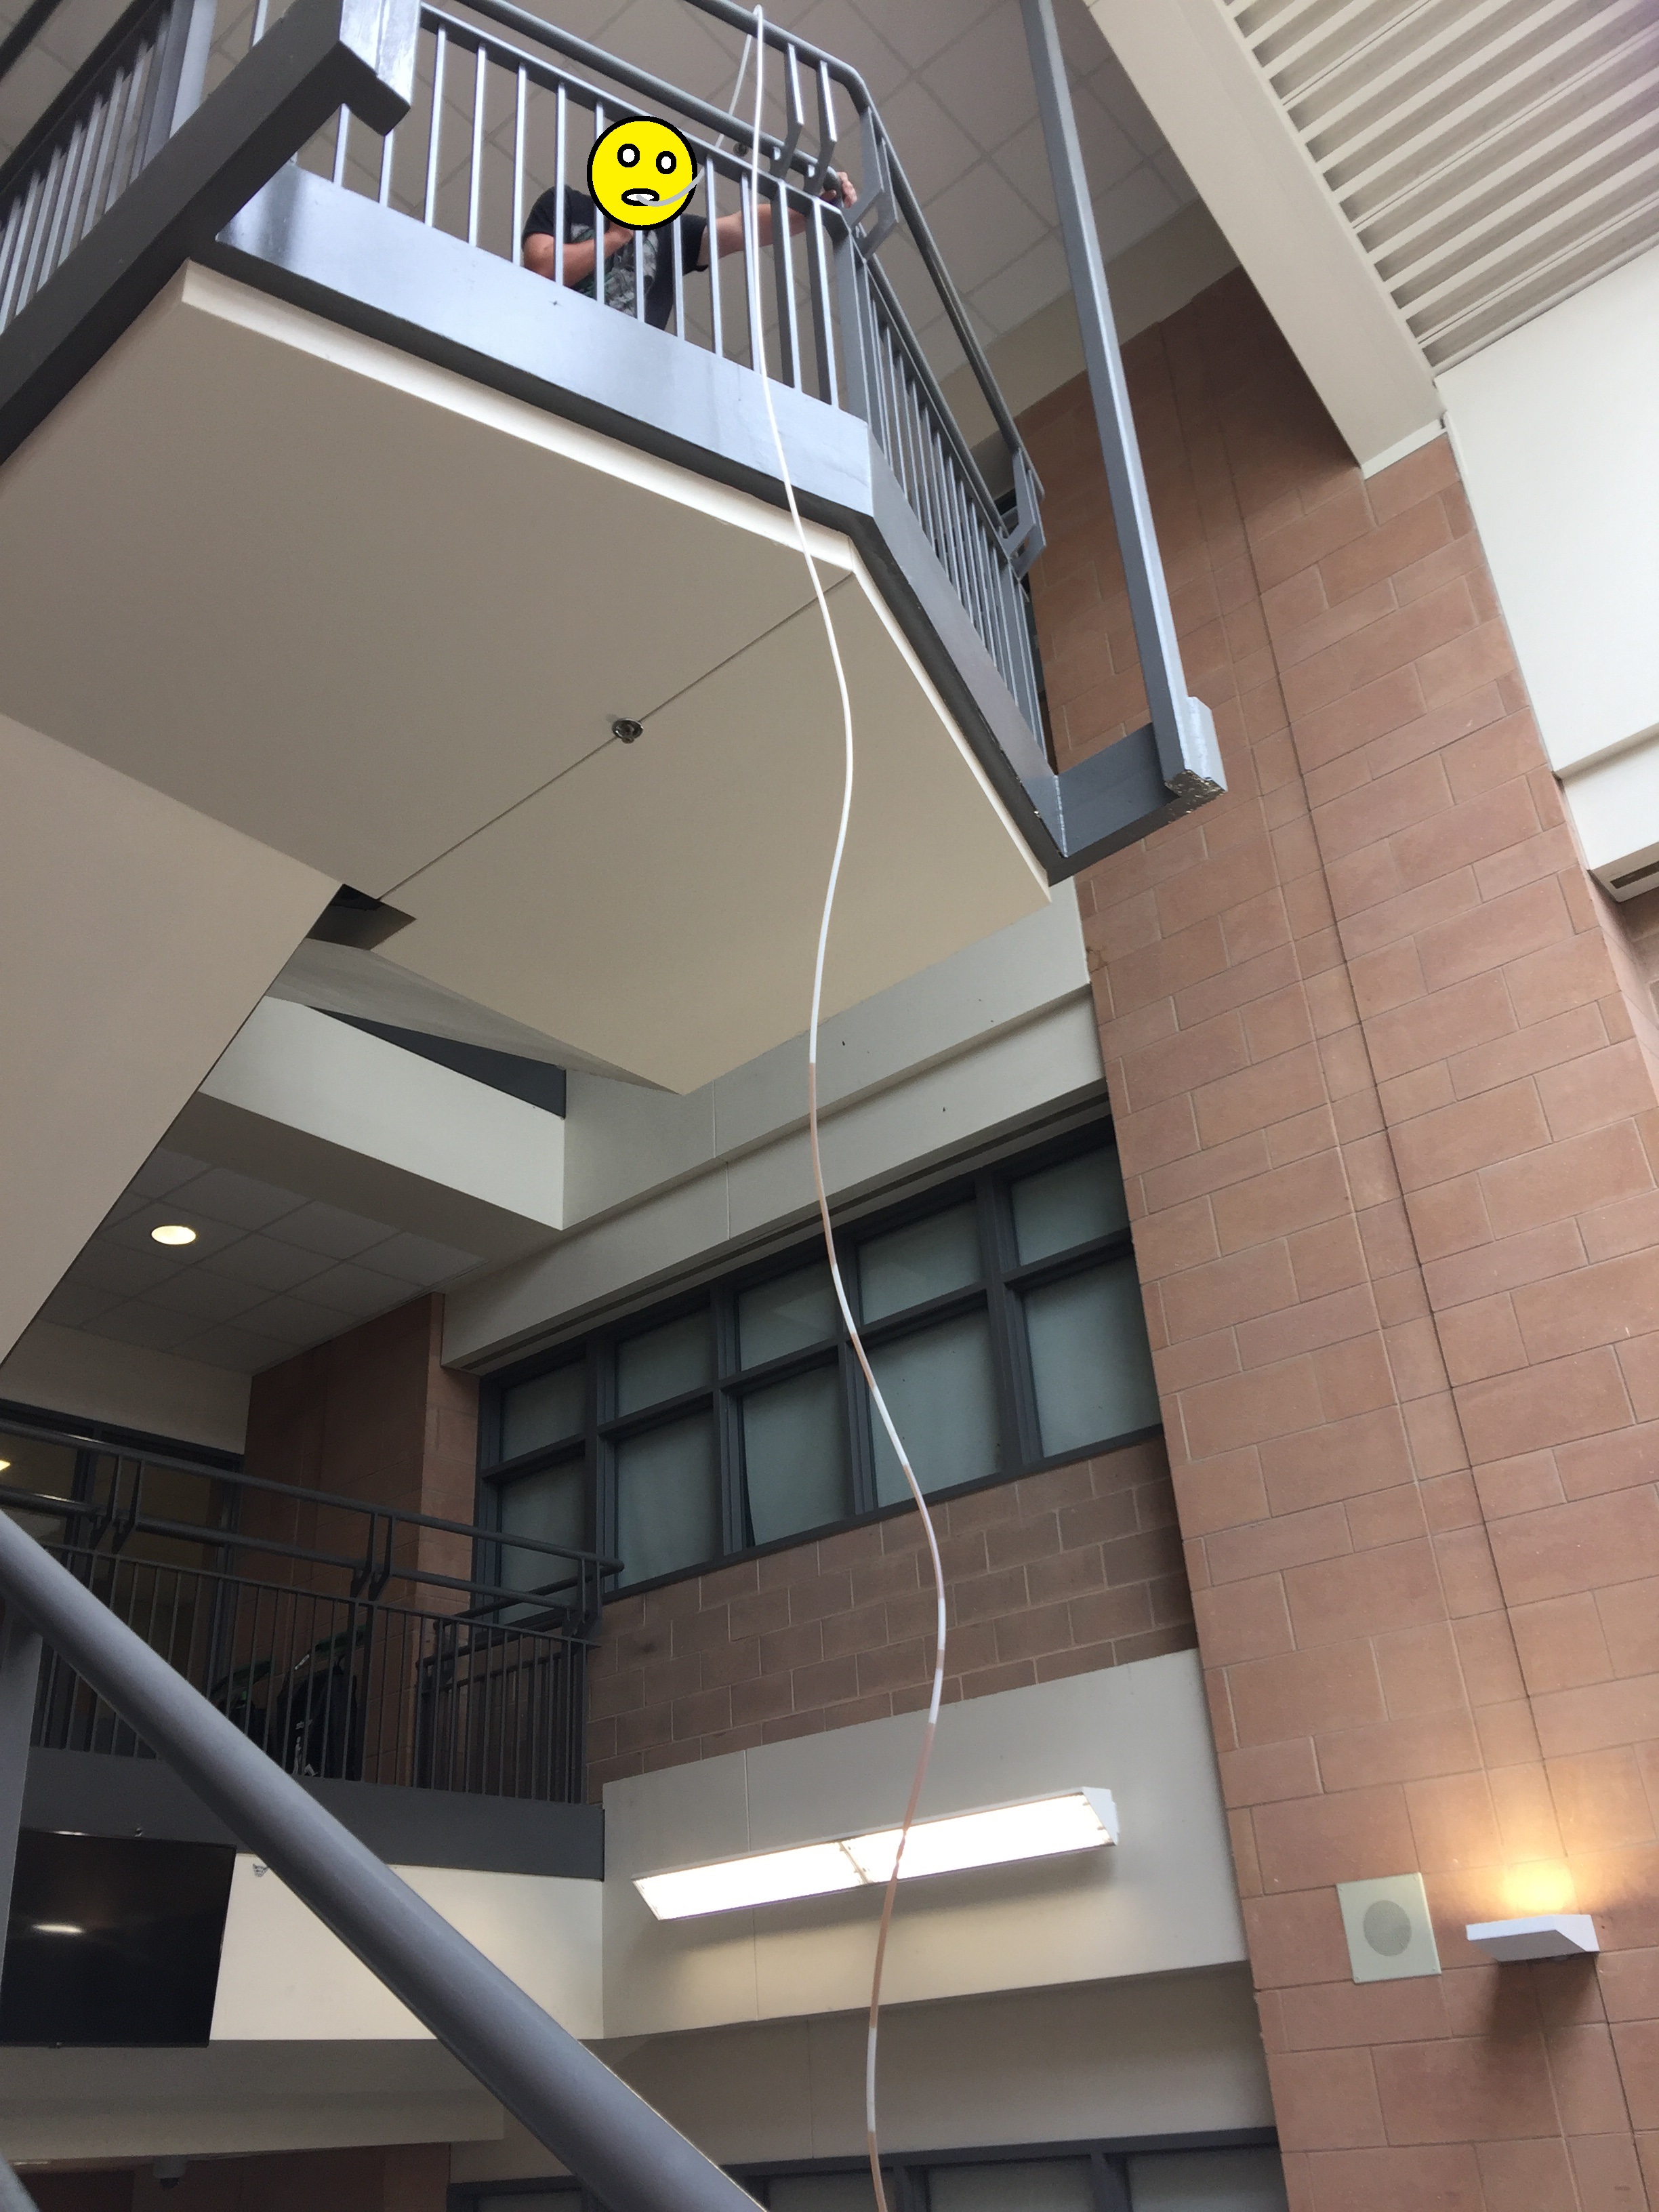 Figures 5 and 6: My students performing the activity.
Step 4
When you are ready to do the experiment, you’ll need four volunteers. The first volunteer will be the student who ‘sucks’ and who will take all of the tubing up to the third floor. That student will drop one end of said tubing down to the second volunteer on the first floor, who will hold that end inside the 2 L bottle of water. The third volunteer will need a long measuring tape. This volunteer’s job will be to run up the stairs and follow the water level as it gets sucked up the straw. Once the first volunteer has reached their maximum level of ‘sucking’, the third volunteer will hold one end of the tape at the maximum height that the water made it up to, and let the rest of the tape spool straight down to the floor. The fourth volunteer will grab the spool of measuring tape and bring it down to match the height of the surface of the water inside the 2 L bottle (not the top of the bottle or the floor), and then record the distance. Note that we are only measuring the vertical displacement of the water, not the length of the path the water took to get there. It’s fine if the tube is on a 45° angle, in a knot, going around a corner; all that we want to do is be sure to record only the vertical displacement between the water level in the bottle, and the water level in the straw.
Step 5
Now that you’ve recorded how high up the straw the student was able to get the water, you can calculate the pressure they were able to create using their mouth. Rather than walking you through the full calculation in this article, I’ve left a scaffolded version of the calculation as an exercise for your students to complete in a handout. Click these links for the
handout and its
solutions.
When I did this experiment with my students, they found it to be a lot of fun. Don’t shy away from mentioning how much your students ‘suck’ while they’re performing the activity; it would be a missed opportunity if you didn’t (similar to how if you went on a tour of a dam, you wouldn’t want to miss making a couple of dam-jokes, like “How long is this dam tour?”). In addition to the college-level physics course, SPH4C, this activity could also be done in the grade eleven university-level chemistry course, SCH3U, as it is useful in Unit F (gases and atmospheric chemistry). If you like the content of this activity but don’t want to sacrifice a whole class to do it, consider instead showing your class the video by Veritasium that originally inspired me to do this activity:
Tags: College, Fluids, Pressure
